
You know that crackling sound right before a frozen pipe lets go? By the time you hear it, hundreds of gallons are already flooding into places you can’t see. A burst pipe doesn’t just wet your floor. It soaks into walls, crawls under baseboards, saturates insulation, and starts a 48-hour countdown to mold growth. The difference between a quick cleanup and months of reconstruction comes down to what you do in the first hour. This guide walks you through the exact steps to stop the spread, protect what matters, and decide when to call in pros.
First Steps After a Pipe Bursts: Emergency Actions to Control the Damage
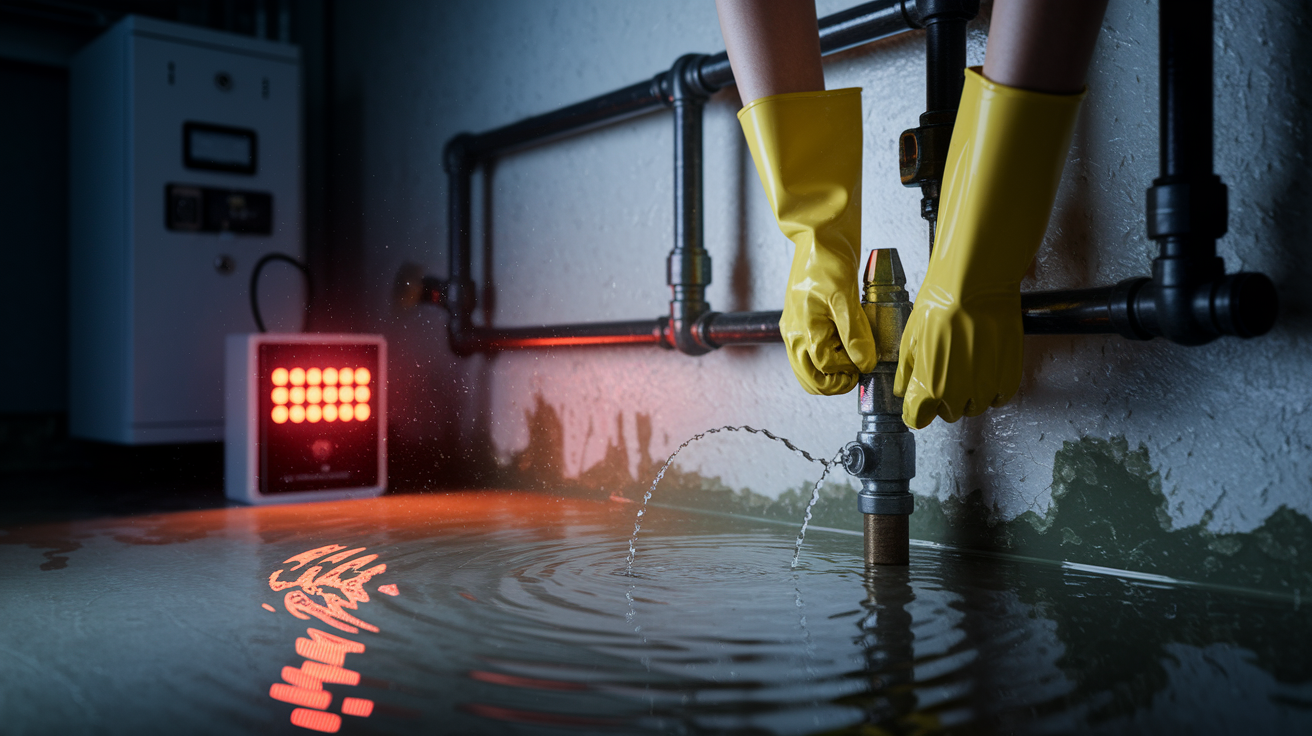
The first 30 to 60 minutes after you discover a burst frozen pipe determines whether you’re dealing with a manageable cleanup or tens of thousands in structural damage. Water spreads fast. About one gallon per minute from a typical half-inch supply line, soaking into walls, under floors, into everything it touches.
Safety comes before cleanup. Always. Standing water near outlets, appliances, or your electrical panel creates electrocution risk that can kill.
-
Assess for electrical hazards. Look for water near outlets, light switches, appliances, or anywhere electrical wiring runs. If you see water touching electrical sources, don’t enter the area.
-
Turn off electricity at breaker. If water has reached any electrical components or you’re unsure, shut off power to affected rooms at your circuit breaker panel. When in doubt, shut off the main breaker.
-
Shut off main water valve immediately. Locate your main shutoff valve (usually near the water meter or where the supply line enters your home) and turn it clockwise until it stops. This halts water flow from the burst.
-
Open all faucets. Turn on every sink, tub, and outdoor spigot to drain remaining water pressure from your plumbing system. This reduces additional stress on the burst section.
-
Contact electrician if unsure about electrical safety. If water has reached your electrical panel, outlets, or major appliances and you didn’t shut off power, call your utility company or a licensed electrician before entering the area.
-
Begin removing standing water. Use towels, mops, or a wet/dry vacuum to remove water from floors and surfaces. Work from the outer edges toward the source to prevent spreading.
-
Move furniture and belongings away from wet areas. Relocate anything you can carry to dry space. Lift furniture legs onto blocks or foil to prevent further water absorption.
-
Take photos and videos of all damage from multiple angles. Document every wet surface, water line on walls, damaged belongings, and the burst pipe location. Capture wide shots showing extent and close-ups showing detail.
-
Document water source location and extent of spread. Note which pipe burst, what rooms are affected, and how far water has traveled. Write down the time you discovered the problem.
-
Contact emergency plumber for pipe repair. Call a licensed plumber immediately to repair the burst section. Don’t wait. Even with water shut off, you can’t restore service until the pipe is fixed.
If water has spread beyond a single room, soaked into carpet padding, or been sitting for more than a couple hours, contact a restoration company right away. Within that first hour if possible. Towels and a shop vac handle surface water, but they can’t reach moisture that’s already migrated into wall cavities, under flooring, or into insulation. That hidden moisture is what creates the mold problem and structural damage that shows up weeks later. Professional crews bring extraction equipment and moisture meters to find and remove water you can’t see, which is the difference between a cleanup and a months-long reconstruction project.
Understanding Water Categories and Contamination Risks After a Burst Pipe

Not all water damage is the same. The contamination level in the water determines what safety precautions you need, which materials can be saved, and how aggressive the sanitization has to be.
Most frozen pipe bursts involve Category 1 water. Clean water straight from your supply lines. This is the same water that comes out of your drinking faucets. It doesn’t contain sewage, chemicals, or biological contaminants when it first escapes the pipe. Category 1 water can often be extracted with standard drying procedures, and many materials can be salvaged if you act within 24 to 48 hours. The clock starts the moment the pipe bursts, not when you discover it.
Category 2 water, sometimes called “gray water,” comes into play if the burst pipe affects drainage systems or if Category 1 water sits long enough to start supporting bacterial growth. This water may contain microorganisms and contaminants that create health risks. It can come from washing machine overflows, dishwasher leaks, or clean water that’s mixed with dirt, cleaning products, or sat stagnant for more than 48 hours. Category 2 requires more thorough sanitization, and porous materials like carpet padding often can’t be properly cleaned and need replacement.
Category 3 water is sewage or highly contaminated water requiring full hazmat protocols. This happens when a burst pipe backs up into a sewer line, when floodwater enters from outside, or when Category 2 water sits untreated and grows significant bacteria. Category 3 water contains harmful pathogens, and everything it touches (drywall, insulation, flooring) typically requires removal and disposal. Professionals handling Category 3 wear protective equipment and follow strict containment procedures.
Even Category 1 water from a burst supply line needs sanitization. Mold spores exist everywhere, and once surfaces stay wet for 24 to 48 hours, those spores start growing into active colonies. Proper cleanup means not just removing visible water but treating surfaces with EPA-registered antimicrobial solutions to prevent bacterial growth and mold amplification.
Professional Water Extraction vs. DIY: What Actually Works for Burst Pipe Cleanup
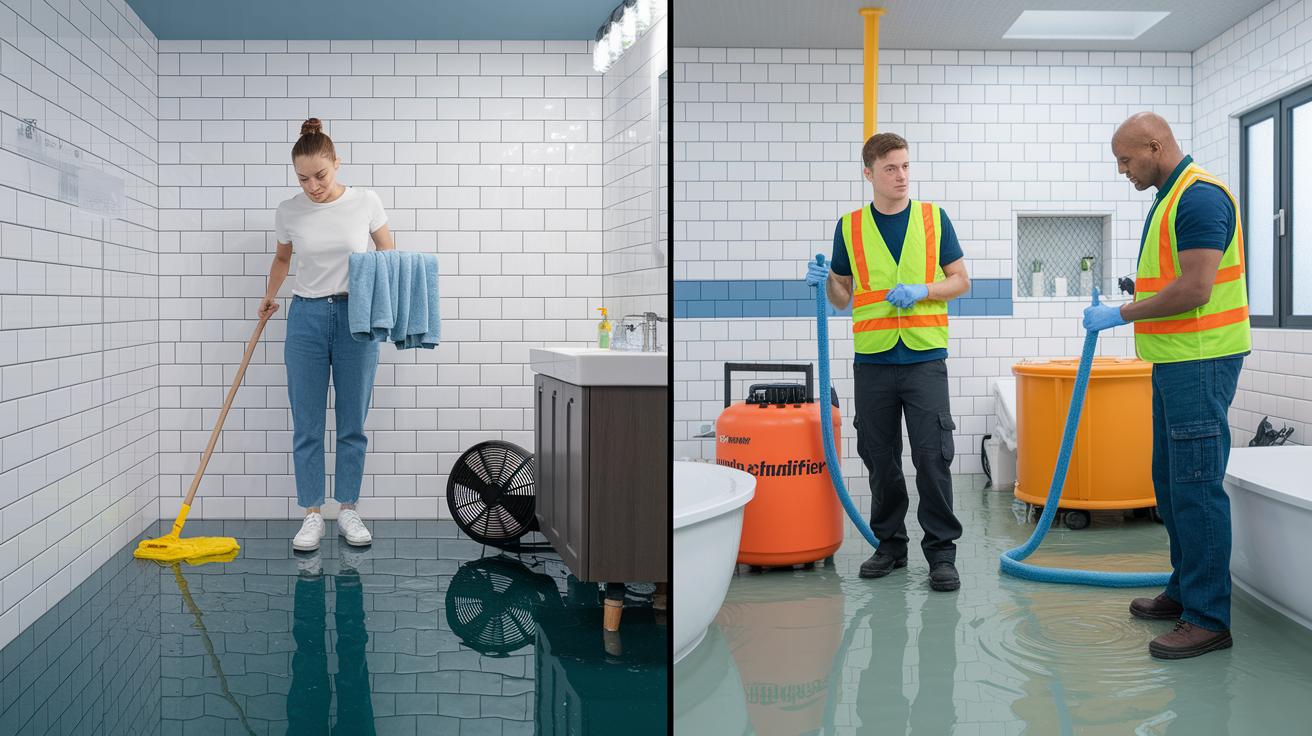
The decision between handling cleanup yourself or calling professionals comes down to one critical factor: hidden moisture. If you can see all the affected surfaces and verify they’re dry, DIY might work. If water has gone anywhere you can’t directly access and measure, you need professional equipment and expertise.
Volume, spread, and affected materials tell you which path makes sense. A small leak contained to a single bathroom with tile floors is different from a burst that’s flooded two rooms with carpet. Water doesn’t stay on surfaces. It migrates into every porous material and cavity it can reach within minutes.
Professional restoration is necessary when:
- Water has spread beyond a single room
- Water has been present more than 24 hours
- Water has reached wall cavities or subflooring
- Affected area includes carpet with padding
- No access to verify dryness behind surfaces
- Mold odor already present
- Insurance claim requires professional documentation
- Structural materials show warping or staining
Household tools (towels, box fans, and shop vacuums) can handle surface water on hard floors in small areas. They cannot reach moisture that’s wicked up inside drywall, soaked into the paper backing, traveled behind baseboards, or saturated subfloor and floor joists. They can’t measure moisture content three inches deep in a wall stud. And they can’t verify that humidity levels throughout the affected space have dropped below the threshold where mold grows. You might get floors and walls that look dry while moisture sits trapped in cavities, creating the perfect environment for mold colonies that appear weeks later. That’s when you’re looking at full mold remediation on top of the original water damage, and insurance companies don’t always cover mold that results from incomplete initial drying.
IICRC (Institute of Inspection, Cleaning and Restoration Certification) is the industry standard for water damage restoration. IICRC-certified technicians have completed training in water damage science, proper drying techniques, moisture measurement, microbial remediation, and documentation standards. The certification matters because insurance companies recognize it, which smooths claims processing. More importantly, it means the crew knows the difference between “looks dry” and “measures dry.” They’re using moisture meters on structural materials and tracking readings until everything hits safe levels. For insurance purposes, most carriers require professional documentation when water damage exceeds minor surface exposure, both to validate the claim and to confirm that mitigation met industry standards.
Structural Drying and Mold Prevention: Critical 48-Hour Window

Mold spores start germinating within 24 to 48 hours once surfaces stay wet. That’s not when you see visible mold. That’s when the microscopic growth process begins. By the time you smell mold or see discoloration, colonies are well-established and spreading. The 48-hour window is when you prevent the problem instead of remediating it later. Rushing the drying process causes its own problems. Sealing wet materials behind new drywall or flooring just moves the mold growth out of sight. Proper structural drying takes time, and cutting corners leads to callbacks, failed inspections, and health issues.
| Drying Stage | Duration | Key Actions | Equipment Used |
|---|---|---|---|
| Initial Extraction | 0-24 hours | Remove standing water, set up containment, start dehumidification | Truck-mount extractors, portable extractors, initial air movers |
| Active Drying | Day 1-3 | Maximum airflow and dehumidification, first moisture readings, remove saturated materials | Industrial dehumidifiers, air movers, moisture meters |
| Continued Drying | Day 4-7 | Adjust equipment based on readings, check hidden areas, maintain humidity control | Same equipment with repositioning, thermal imaging cameras |
| Verification Testing | Day 7-10 | Final moisture readings on all materials, confirm humidity stabilization | Moisture meters on all structural components, hygrometers |
| Final Clearance | Day 10+ | Document dry-standard achievement, equipment removal, clearance for reconstruction | Final documentation tools, photo evidence |
Industrial dehumidifiers come in two main types. Refrigerant models that work like air conditioners to condense moisture, and desiccant models that use chemical absorption for extremely wet conditions or cold environments. Refrigerant dehumidifiers handle most residential water damage efficiently. Air movers are high-velocity fans rated by CFM (cubic feet per minute). Typical units run 1,000 to 3,000 CFM and get positioned to create airflow across wet surfaces and into cavities where moisture sits. The goal is circulation that moves moisture from materials into the air, where dehumidifiers capture it. Moisture meters come in pin-type versions that penetrate surfaces to measure internal moisture content, and pinless versions that scan without damaging materials. Thermal imaging cameras detect temperature differences that indicate wet areas hidden behind walls or under floors. Wet materials show cooler than surrounding dry areas. Equipment placement follows a strategy: air movers angled toward wet walls and floors, not just blowing around the room randomly. Dehumidifiers sized for the affected square footage, typically one large unit per 500 to 1,000 square feet depending on saturation level. Creating slight negative air pressure in the affected area prevents moisture migration to unaffected rooms.
Within the first 48 hours, take these actions to prevent mold:
-
Remove all standing water within first 24 hours. The longer water sits, the deeper it penetrates and the more materials it saturates.
-
Start industrial dehumidification immediately after extraction. Humidity control is as important as removing visible water.
-
Position air movers to maximize circulation in affected areas. Target airflow into wall cavities through baseboard removal, under cabinets, and across wet floors.
-
Remove saturated porous materials. Carpet padding, insulation, wet drywall sections below the waterline. These rarely dry properly and create mold risk even if surface moisture disappears.
-
Clean and disinfect all non-porous surfaces. Tile, sealed concrete, metal, plastic, and painted surfaces get wiped with antimicrobial solution.
-
Monitor humidity levels continuously. Target below 50% relative humidity, ideally 30 to 40% during active drying.
-
Inspect hidden areas daily. Pull baseboards, check behind cabinets, verify airflow reaches wall cavities and subflooring.
-
Run HEPA air filtration to capture airborne spores. Any water damage stirs up mold spores that were dormant in dust, and HEPA filters capture them before they resettle and grow.
Moisture readings tell you when materials are actually dry, not just when they look dry. Acceptable levels vary by material: wood studs and framing should read below 15% moisture content, concrete below 4%, and drywall below 1%. Readings above these thresholds mean materials are still releasing moisture and mold can grow. Testing happens every 12 to 24 hours, with readings documented in a moisture log that tracks each measured location. When readings plateau (stop dropping for 24 hours) and remain above dry standards, that material likely needs removal because it’s not going to dry further without intervention.
Antimicrobial treatment becomes necessary when you’re dealing with Category 2 or 3 water, when visible mold is already present, or when materials stayed wet beyond 48 hours. Application methods include spray, fog, or wipe-on depending on the product and surface type. EPA-registered antimicrobial products are required. Household bleach doesn’t cut it for professional restoration because it doesn’t penetrate porous materials and can damage surfaces. HEPA filtration runs continuously during the entire drying process to prevent mold spores from spreading. Any disturbance of wet materials (moving furniture, pulling carpet, demolishing drywall) releases spores into the air. HEPA filters capture particles down to 0.3 microns, which includes mold spores, preventing them from landing on clean surfaces and creating new growth sites.
Material Removal and Demolition: What Needs to Be Replaced After Water Damage
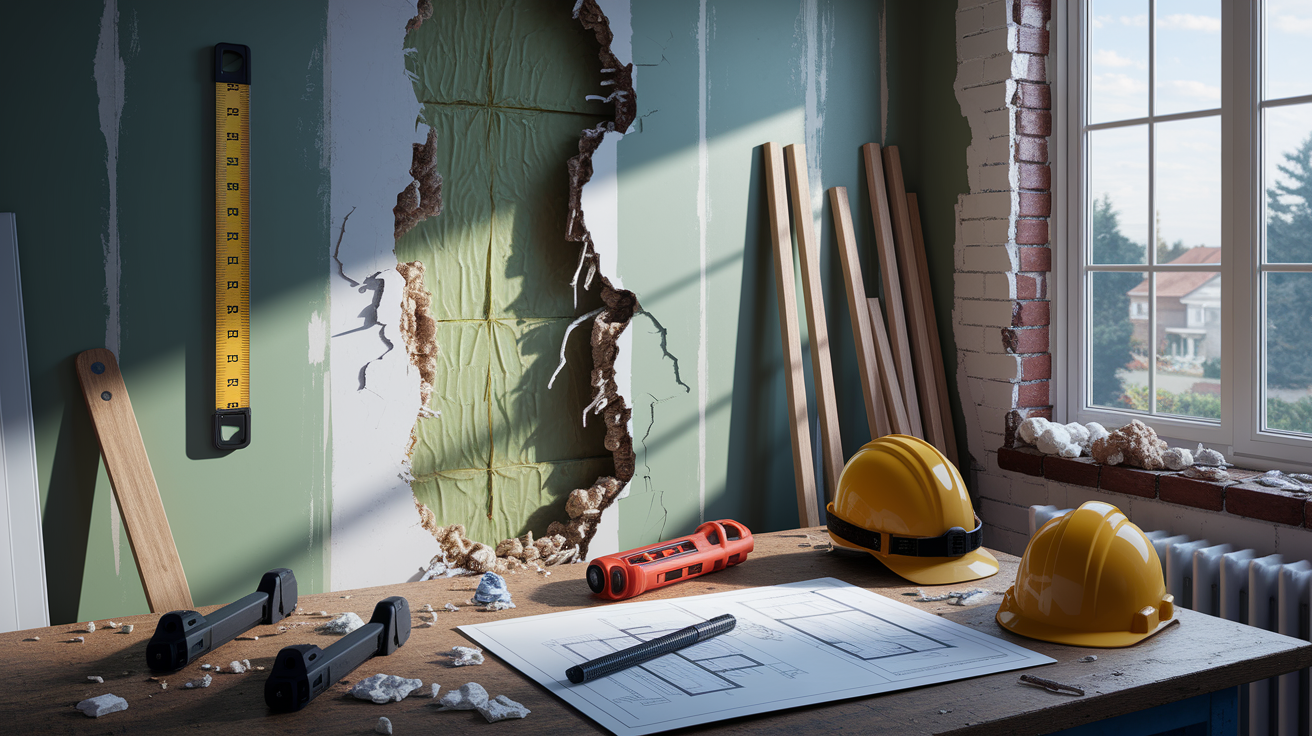
Materials fall into two categories: porous (absorb water) and non-porous (water stays on the surface). Porous materials saturate, hold moisture in places you can’t reach, and provide food sources for mold. Non-porous materials can be cleaned, dried, and disinfected because water doesn’t penetrate the material itself.
Contamination level drives the second major decision. Category 1 clean water gives you options to try drying materials. Category 2 gray water requires disposal of many porous items. Category 3 black water means nearly everything porous gets removed. No exceptions.
| Material Type | Usually Salvageable | Usually Requires Replacement |
|---|---|---|
| Drywall | If wet less than 24 hours, Category 1 water, no wicking above 2 feet | Saturated beyond 24 hours, Category 2/3 water, crumbling or soft texture |
| Insulation | Closed-cell foam if dried quickly | Fiberglass, cellulose, any insulation that absorbed water |
| Carpet/Padding | Carpet only, if extracted within 24 hours, Category 1 water | Padding always, carpet if Category 2/3 or wet beyond 48 hours |
| Hardwood Floors | Solid hardwood if dried slowly with controlled dehumidification | Engineered hardwood (delaminates), floors with cupping/crowning |
| Baseboards | Solid wood or PVC if not warped | MDF baseboards (swell and crumble when wet) |
| Subflooring | Plywood if dried completely, no swelling or delamination | Particle board, OSB with swelling, any subfloor with mold growth |
| Tile | Ceramic and porcelain tile (non-porous) | Grout may need resealing, substrate below if saturated |
| Concrete | Sealed concrete, can be dried with dehumidification | Rarely replaced, but surface treatments may fail |
Demolition extent follows a standard guideline: remove drywall and materials to at least two feet above the visible water line. Water wicks upward through porous materials beyond where you see staining. Sometimes six inches, sometimes more depending on how long it sat. The two-foot rule ensures you’ve removed everything that absorbed water, not just the obviously damaged section. When removing drywall, cut along stud lines to make reconstruction cleaner. Pull back enough to inspect wall cavities for insulation saturation, mold growth on studs, or water that pooled on bottom plates. If you find wet insulation or signs of mold, removal extends until you hit dry, clean materials. Better to remove an extra sheet of drywall during initial demo than to close walls and discover mold three weeks later.
Assessing Structural and System Damage Beyond Visible Water

Water that reaches ceiling joists, wall studs, and subflooring creates problems you won’t see until materials start failing. Ceiling joists that stay wet can develop rot or mold growth on the top side, the side you can’t see from below. Load-bearing walls that absorbed water may have studs with moisture content high enough to weaken structural integrity. Subflooring that looks fine from above might be delaminating or supporting mold growth on the underside, where it contacts the crawl space or basement. Foundation impacts happen when water pools against walls long enough to find cracks or seep through joints, creating interior moisture problems that persist even after the burst pipe is fixed. Professional structural assessment uses moisture meters on framing members, inspection cameras in wall cavities, and sometimes requires small exploratory openings to verify what’s happening inside assemblies.
Building systems run through the same spaces water travels. HVAC ductwork in crawl spaces, attics, or between floors can fill with water if the burst happens near supply or return vents. Wet ductwork doesn’t dry easily, and the dark, damp environment inside ducts is perfect for mold growth that then spreads spores throughout your home every time the system runs. Electrical wiring and outlets exposed to water create ongoing shock hazards until they’re inspected, tested, and cleared by an electrician. Even after things look dry. Outlets that got wet internally can fail weeks later. Plumbing connections near the burst location need inspection because the same freezing conditions that burst one pipe can damage joints, valves, or fittings nearby. You might fix the obvious break and still have slow leaks from stressed connections.
Appliances and fixtures in affected areas take hidden damage. Water heaters with wet insulation, control boards exposed to moisture, or standing water around the base may work initially then fail. Furnaces with wet motors, blower assemblies, or electrical components are fire hazards even if they run. Washing machines, refrigerators with water lines or ice makers, and dishwashers all have electrical components at floor level. Exactly where water sits. If any major appliance sat in standing water, it needs professional inspection before you run it again.
Professional assessment catches what homeowners miss because restoration technicians know where water hides and what long-term damage looks like before it becomes obvious. They’re pulling up flooring edges, inspecting with thermal cameras, measuring moisture in framing you can’t see, and testing systems for damage that hasn’t failed yet. That inspection often reveals damage that adds to your initial estimate, but finding it during restoration is better than discovering it six months later when you’re dealing with mold remediation or structural repairs without an active insurance claim.
Documenting Damage and Filing Insurance Claims for Water Restoration

The quality of your documentation directly determines whether your claim gets approved quickly, approved partially, or denied. Adjusters make decisions based on what you prove, and they’re trained to minimize payouts when documentation is incomplete. Thorough documentation from the first minutes protects your claim.
Document these items immediately and throughout the process:
- Date and time you discovered the burst pipe, not just when you called it in
- Photos and video of all water damage before any cleanup starts. Wet floors, water on walls, ceiling stains, saturated materials, the burst pipe itself
- Photos during cleanup showing extent behind walls. Once drywall comes down, photograph wet studs, soaked insulation, subfloor damage, everything hidden
- Damaged belongings with estimated values. Furniture, electronics, clothing, anything ruined by water
- All repair estimates and invoices. Plumber bills, restoration company quotes, contractor bids for reconstruction
- Communication log with restoration company. Who you spoke with, when, what they said about timeline and scope
- Temporary repair receipts. Emergency plumbing repairs, equipment rental, tarps, anything you bought to stop damage
- Moisture readings at various stages. Initial readings showing saturation, daily tracking during drying, final readings confirming dry standards achieved
- Before photos of affected areas if available. Any photos showing the space before the burst help establish loss value
Adjuster inspections usually happen within a few days of filing your claim. The adjuster walks the property, takes their own photos, asks about the timeline, and inspects the scope of damage. They’re looking for pre-existing damage that’s not covered, evidence of maintenance neglect that might void coverage, and confirmation that the damage matches your description. They’ll check moisture readings if drying is underway, review your documentation, and assess whether repair estimates are reasonable. Be present during the inspection, answer questions directly, and have your documentation ready to show.
Typical homeowner policies cover sudden and accidental water damage from frozen pipe bursts. This is usually a covered peril. You’ll pay your deductible, and the policy covers mitigation (emergency water extraction and drying) and restoration (repairs to return your home to pre-loss condition). What’s typically not covered: gradual damage from a slow leak you didn’t address, damage from lack of maintenance like failing to heat your home adequately, and sometimes additional living expenses unless you have that coverage added. Read your specific policy declarations because coverage varies.
Mitigation is your legal duty under most policies. You must take reasonable steps to prevent additional damage once you discover the problem. Shutting off water, extracting standing water, and starting the drying process are all mitigation. If you discover a burst pipe and do nothing, letting water run for hours or days, the insurance company can deny coverage for damage that occurred after you knew about the problem and failed to act. That’s why calling a restoration company immediately and documenting your actions matters. It proves you met your mitigation duty and protected the claim.
Cost Breakdown: What to Expect for Frozen Pipe Burst Restoration

Costs vary dramatically based on how much water escaped, how many rooms are affected, what materials absorbed water, and how accessible the damage is. A small burst caught quickly might cost a few thousand dollars. A burst that ran overnight and flooded multiple rooms can reach $20,000 to $50,000 or more.
| Service Component | Typical Cost Range |
|---|---|
| Emergency plumber callout | $300 – $800 |
| Water extraction | $500 – $3,000 |
| Structural drying (3-7 days) | $1,500 – $5,000 |
| Mold prevention treatment | $500 – $2,000 |
| Drywall/flooring demo | $1,000 – $4,000 |
| Material replacement | $3,000 – $15,000+ |
| Full restoration | $5,000 – $50,000+ |
Key cost variables include square footage affected. Water damage pricing often runs $3 to $8 per square foot for extraction and drying, more for reconstruction. Material types matter because replacing tile costs more than vinyl, and hardwood floors cost more than carpet. Accessibility affects labor costs. Water in a finished basement with easy access costs less to address than water that requires crawling through tight crawl spaces. Contamination level drives up costs when Category 2 or 3 water requires additional protective equipment, disposal procedures, and sanitization protocols.
Insurance coverage significantly impacts your out-of-pocket costs. After you pay your deductible (often $500 to $2,500), the policy covers covered losses up to your limits. If your deductible is $1,000 and total restoration costs $8,000, you pay $1,000 and insurance covers $7,000. Check your policy limits for water damage and ensure they’re adequate for worst-case scenarios. Some policies cap water damage coverage lower than fire damage. Many restoration companies work directly with insurance, billing the carrier after you pay the deductible. Some offer payment plans for your portion, spreading the deductible and any non-covered items over several months. Always get written estimates before work begins so you know what you’re authorizing and what your financial responsibility is.
Repair and Reconstruction Timeline After Water Extraction
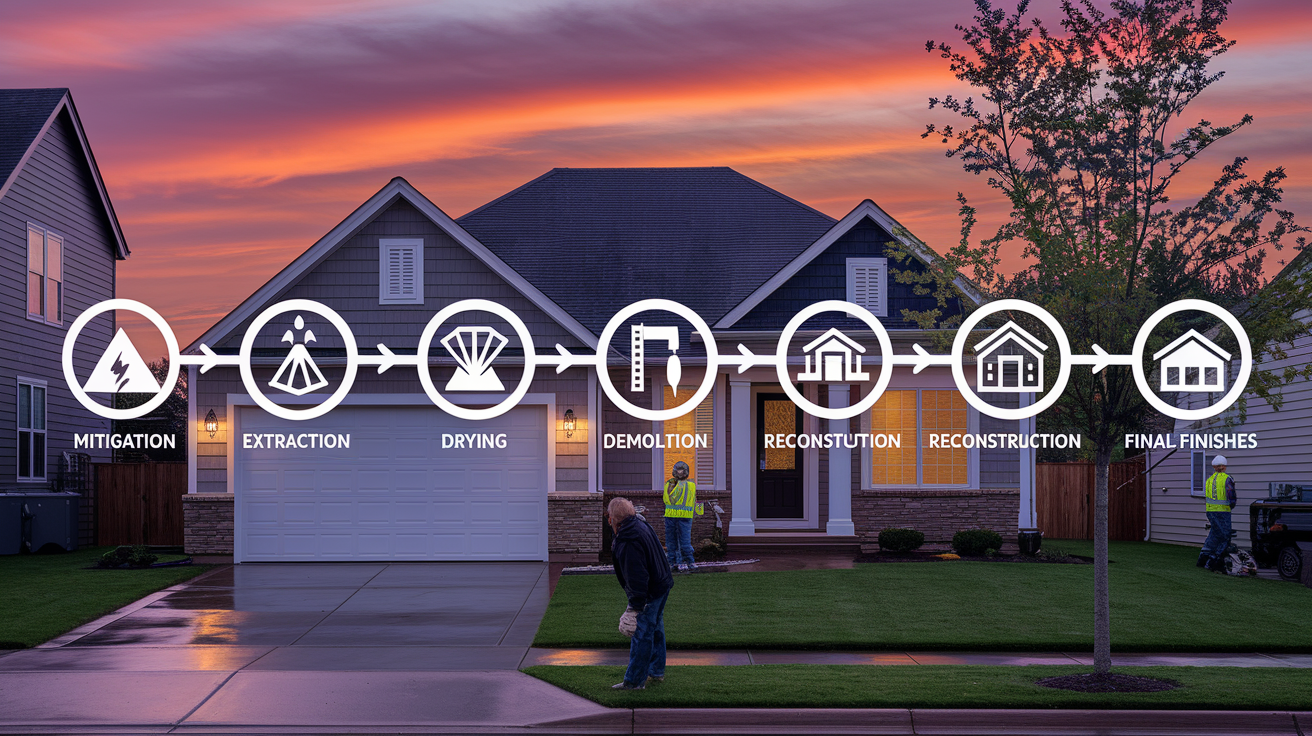
Proper sequence and waiting for materials to reach dry standards prevents callbacks, failed inspections, and recurring problems. Rushing reconstruction over wet materials just traps moisture and creates mold problems you’ll be dealing with later.
The restoration sequence with realistic timeframes:
-
Emergency mitigation (day 0 to 1). Plumber repairs the burst pipe, restoration crew extracts standing water, sets up drying equipment, establishes containment to prevent spreading moisture to unaffected areas.
-
Water extraction and initial drying (day 1 to 3). Maximum dehumidification and airflow, first round of moisture readings to establish baselines, removal of obviously saturated materials like carpet padding.
-
Structural drying verification (day 4 to 10). Daily moisture readings on wall studs, subfloors, and any materials being salvaged. Adjustments to equipment placement based on readings. Thermal imaging to check hidden areas.
-
Demolition and material removal (day 5 to 12). Once moisture readings confirm extent of saturation, remove all materials that won’t dry properly. This overlaps with drying because some areas dry faster than others.
-
Reconstruction and material installation (week 2 to 4). Replace drywall, insulation, flooring, baseboards. Install in phases as areas achieve dry clearance. Primer and first coat of paint.
-
Final finishes and inspection (week 4 to 5). Final paint coats, trim installation, fixture reinstallation. Final moisture verification and clearance inspection.
Variables that extend the timeline include extent of damage. Severe flooding requiring extensive demolition and reconstruction can run 6 to 8 weeks. Material availability delays reconstruction when specialty flooring, tile, or fixtures are back-ordered. Permit delays happen in jurisdictions requiring permits for substantial drywall replacement or electrical work. Insurance approval delays occur when adjusters take time to review estimates or request additional documentation. Cold weather slows drying because dehumidifiers work less efficiently and opening windows for ventilation isn’t an option.
Expect your home to be fully functional again somewhere between 3 to 6 weeks for moderate damage, longer for severe incidents. The drying phase can’t be rushed. Materials are dry when they measure dry, not when you want them to be. Reconstruction can only start once drying is complete and verified. Plan for the process to take longer than the initial estimate, and you’ll avoid frustration when reality doesn’t match the best-case timeline.
Choosing the Right Restoration Company: Credentials and Response Standards

Not every company advertising “water damage restoration” has the equipment, training, or insurance backing to handle a major burst pipe properly. Emergency situations require immediate vetting because you’re making a decision under stress about a company that’s about to work in your home for weeks.
Professional credentials separate qualified restoration contractors from companies that own a wet-dry vacuum and call themselves experts. IICRC certification isn’t optional. It’s the baseline that proves technicians understand water damage science, structural drying principles, moisture measurement, and industry standards. Without IICRC certification, there’s no assurance the crew knows the difference between surface drying and actual structural drying verification.
Verify these qualifications before signing a contract:
- IICRC certification for water damage restoration. Ask to see certification cards for the technicians who will be on-site
- Licensed and insured in your state. Verify general liability and workers compensation coverage so you’re not liable if someone gets hurt
- 24/7 emergency availability. Burst pipes don’t happen during business hours, and every hour of delay increases damage
- Local presence for rapid response. Companies that dispatch from 100 miles away can’t respond in the critical first hour
- Industrial equipment inventory. Ask what equipment they own versus rent, because owned equipment means immediate deployment
- Experience with insurance claims. Companies familiar with insurance processes provide documentation that smooths claim approval
- References and reviews. Check recent reviews and ask for references from jobs similar to yours
- Written estimates before work begins. Verbal quotes and handshake agreements create disputes, written estimates protect both parties
Realistic response time expectations for local emergency services are 60 to 90 minutes from your call to technician arrival. Companies advertising “immediate response” might mean 2 to 4 hours, which is still reasonable depending on your location. Response time within the first 2 to 3 hours is what matters most. Getting extraction equipment running within that window prevents the worst moisture migration.
Red flags that indicate unqualified companies include refusal to provide credentials when asked, pressure to sign contracts immediately before you can review terms, lack of proper equipment visible when they arrive, and verbal-only estimates with no written documentation. If a company shows up with a pickup truck, shop vacs, and box fans instead of truck-mount extractors and industrial dehumidifiers, they’re not equipped to handle structural drying. If they can’t produce IICRC certification or insurance certificates, they’re operating outside industry standards and your policy might not cover work that doesn’t meet those standards.
Professional restoration companies like FireFloodFix.com provide complete water extraction and structural drying services with certified technicians, industrial equipment, and insurance claim support, which removes the guesswork from finding qualified help during an emergency.
Special Considerations: Contents, Storage, and Salvaging Belongings
Immediate triage determines what you can save. Electronics that got wet need to be unplugged and left off until professionally cleaned. Turning them on while moisture is inside causes short circuits and permanent damage. Furniture sitting in standing water needs to be moved within hours to prevent wood swelling, upholstery mildew, and finish damage. Documents, photos, and papers start deteriorating immediately when wet. Freeze them if you can’t address them right away, as freezing halts deterioration until you can get them to a document recovery specialist. Clothing and fabrics can usually be laundered or professionally cleaned if you act within a day or two.
Salvage decisions vary by item category. Solid wood furniture can often be dried and refinished if it didn’t sit in water for days. Particle board and MDF furniture swells and delaminates. It’s rarely salvageable. Electronics require professional cleaning and testing; don’t assume something works just because it powers on. Important documents may need freeze-drying services from specialists. Sentimental items get priority treatment even if their dollar value is low. Restoration companies deal with this regularly and understand why you want to save your grandmother’s quilt even though insurance won’t pay much for it.
Professional pack-out and storage services become necessary when you’re dealing with extensive reconstruction that makes rooms uninhabitable for weeks, when contents need to be moved to allow floor and wall drying, or when insurance requires off-site storage to prevent further damage. Pack-out includes inventorying every item removed, photographing condition, transporting to climate-controlled storage, and returning items once reconstruction is complete. Most policies cover reasonable pack-out and storage costs as part of the loss. The restoration company coordinates the logistics. You’re not hauling boxes yourself or renting a storage unit. Everything gets tracked in a detailed inventory so nothing goes missing during the weeks or months items are in storage.
Odor removal from salvaged items requires more than airing them out. Water damage creates musty smells from mildew, and those odors penetrate fabrics, wood, and porous materials. Professional cleaning includes ozone treatment or hydroxyl generators that break down odor molecules at the chemical level, not just mask them with fragrance. Quick action prevents odors from setting permanently. Items that sit wet for days absorb smells that become nearly impossible to remove. If you’re salvaging clothing, furniture, or other contents, get them into the cleaning and deodorization process within the first few days.
Preventing Future Frozen Pipe Bursts: Winterization and Monitoring
Prevention costs a fraction of dealing with another burst pipe. Spending a few hundred dollars on insulation and monitoring equipment eliminates the risk of a five-figure restoration bill next winter.
Implement these prevention methods according to timing:
Before winter:
- Insulate all exposed pipes in unheated spaces. Foam pipe insulation costs $1 to $2 per linear foot and prevents freeze damage on pipes in attics, crawl spaces, garages, and exterior walls
- Seal foundation cracks and gaps near pipes. Spray foam or caulk stops cold air from reaching pipes running along foundation walls
- Install heat tape on vulnerable pipe sections. Self-regulating heat cables wrap around pipes prone to freezing and maintain safe temperatures automatically
- Winterize attic and crawl space areas. Add insulation above crawl spaces and ensure attic insulation doesn’t leave gaps near plumbing penetrations
- Service heating system for reliability. A furnace failure during a deep freeze leads to whole-house pipe freezing
During cold snaps:
- Maintain minimum 55°F when away. Even when traveling, leave heat set to prevent interior pipes from reaching freezing temperatures
- Open cabinet doors under sinks. Allows warm air circulation around pipes in exterior walls
- Allow faucets to drip during extreme cold. A pencil-thin stream of flowing water prevents pressure buildup that causes bursts
- Keep garage
Final Words
When a frozen pipe bursts, the first hour determines everything. Shut off the water, check for electrical hazards, and start removing standing water right away.
If water’s traveled beyond one room or seeped into walls, call a restoration team. Towels and shop vacs can’t reach cavity moisture, and mold starts growing within 48 hours.
Proper frozen pipe burst cleanup means industrial drying, moisture verification, and sometimes demo work. But it also means you get your home back, dry and safe, without the guesswork.
One call handles the whole process. You’ll know what to expect, and your home gets restored the right way.
FAQ
Q: What should I do if a pipe freezes and bursts in my home?
A: If a pipe freezes and bursts, immediately shut off your main water valve, turn off electricity near wet areas, open all faucets to drain pressure, and start removing standing water with towels or a wet/dry vacuum while documenting all damage with photos.
Q: What can I pour down the drain to unfreeze pipes?
A: You should not pour anything down the drain to unfreeze pipes because the blockage is inside the pipe walls, not the drain opening. Instead, apply gentle heat to the frozen section using a hair dryer or heat lamp, working from the faucet back toward the frozen area.
Q: What is the fastest way to unfreeze pipes safely?
A: The fastest safe way to unfreeze pipes is to apply steady heat using a hair dryer or heating pad directly on the frozen section, starting at the faucet end and working backward, while keeping the faucet open to allow melting water to escape.
Q: Should I leave faucets open if pipes are frozen?
A: Yes, you should leave faucets open if pipes are frozen because the open faucet relieves pressure buildup as ice melts, prevents pipe rupture, and lets you know when water flow resumes, indicating the freeze has cleared.
Q: How quickly does mold grow after a pipe bursts?
A: Mold can begin growing within 24 to 48 hours after a pipe bursts if moisture is not properly extracted, making immediate water removal and thorough structural drying critical to prevent contamination and health risks.
Q: When do I need professional help versus handling cleanup myself?
A: You need professional help when water has spread beyond one room, reached wall cavities or subflooring, been present over 24 hours, affected carpet with padding, or if you cannot verify complete dryness behind surfaces using moisture detection equipment.
Q: How long does it take to fully dry a home after a burst pipe?
A: Structural drying after a burst pipe typically takes 4 to 10 days depending on water volume and affected materials, with moisture meters verifying complete dryness before reconstruction begins to prevent mold growth and structural problems.
Q: What materials need to be replaced after water damage from a burst pipe?
A: Saturated porous materials like carpet padding, insulation, and wet drywall typically need replacement after water damage, while non-porous surfaces like tile and sealed concrete can usually be cleaned, dried, and salvaged if properly treated.
Q: How much does frozen pipe burst restoration cost?
A: Frozen pipe burst restoration costs vary dramatically from $2,000 to $20,000 depending on water volume, affected square footage, material damage, and contamination level, with emergency extraction, structural drying, demolition, and reconstruction as separate cost components.
Q: What credentials should I look for in a water restoration company?
A: Look for IICRC certification for water damage restoration, state licensing and insurance, 24/7 emergency availability, local presence for rapid response, industrial equipment inventory, insurance claims experience, and verifiable references before hiring a restoration company.
Q: Will my homeowners insurance cover a frozen pipe burst?
A: Most homeowners insurance policies cover sudden frozen pipe bursts if you maintained heat and took reasonable prevention steps, but may exclude gradual damage or lack of maintenance, making immediate mitigation critical to protect your claim.
Q: How can I prevent pipes from freezing and bursting again?
A: You can prevent future frozen pipe bursts by insulating exposed pipes in unheated spaces, maintaining minimum 55°F when away, allowing faucets to drip during extreme cold, sealing foundation gaps, and installing heat tape on vulnerable pipe sections.
Q: Which pipes in my home are most likely to freeze?
A: Pipes most likely to freeze are those in unheated spaces including exterior walls, attics, crawl spaces, garages, and outdoor faucets, as well as kitchen sinks on exterior walls and washing machine connections in uninsulated areas.
Q: What is the difference between water mitigation and restoration?
A: Water mitigation is the immediate emergency response to stop damage and remove water within the first 24-72 hours, while restoration is the full reconstruction process that rebuilds and repairs your home after complete structural drying verification.
Q: How do I know if water damage has reached my wall cavities?
A: Water damage has likely reached wall cavities if you see baseboards warping, walls feeling spongy or cool to touch, paint bubbling, or moisture meter readings showing elevated levels, requiring professional thermal imaging to confirm hidden moisture location.
