
Your cabinets might look cleaner after you wipe them down, but here’s the problem: if you cleaned them wrong in those first 48 hours after your kitchen fire, you just pushed smoke residue deeper into the wood. Most people grab a wet sponge and start scrubbing, which spreads greasy soot into grain lines and seams where it becomes permanent. The right sequence—dry removal first, then specific cleaners matched to your cabinet material—determines whether your cabinets get restored or need replacing. We’ll walk through the safe approach that actually lifts fire damage instead of locking it in.
Post-Fire Cabinet Cleaning: Immediate Action Steps and Safety Protocols

The first 24 to 48 hours after a kitchen fire decide whether your cabinets can be saved or need replacement. Water from firefighting efforts creates conditions for mold growth in just one day. Smoke residue keeps penetrating wood surfaces with each passing hour. Quick action with the right approach prevents permanent staining, structural damage, and that overwhelming smoke smell that sticks around when cleanup gets delayed.
Before touching anything in your fire damaged kitchen, gather this protective equipment:
• Respiratory protection or N95 mask to prevent inhaling microscopic smoke particles that irritate lungs and cause headaches
• Rubber gloves protecting hands from soot, chemical residue, and cleaning solutions
• Safety goggles because soot particles fall during cleaning and cause eye irritation
• Long sleeves preventing skin contact with fire residue and cleaning products
• Proper lighting using portable work lights since fire damage often affects kitchen electrical systems
• Ventilation setup with open windows and fans positioned to pull contaminated air outside
Follow these immediate action steps in order:
- Establish ventilation by opening all windows and positioning fans to create airflow pulling smoke contaminated air outside, then put on all protective equipment before entering the affected area
- Assess structural integrity by checking for warped cabinet doors that won’t close properly, melted laminate surfaces showing heat damage, or water saturated wood that feels spongy. Stop immediately and call professionals if you see severe damage like sagging shelves or cabinet boxes pulling away from walls
- Use a HEPA vacuum with a soft brush attachment to remove loose debris and soot from all cabinet surfaces, working top to bottom so falling particles don’t re contaminate cleaned areas (standard vacuums blow microscopic smoke particles back into the air instead of trapping them)
- Apply dry chemical sponge technique by pressing the sponge gently against soot covered surfaces using a blotting motion, rotating the sponge to expose clean sections frequently, never rubbing in circles or applying water at this stage
- Avoid water only cleaning because moisture spreads greasy soot deeper into wood grain and laminate seams, turning surface stains into permanent discoloration that requires refinishing to remove
You’re dealing with two distinct types of fire residue requiring different approaches. Grease based soot from cooking oil fires creates sticky, yellowish brown stains that cling to cabinet surfaces and feel tacky when touched. “Our gas range fire left every cabinet door covered in this greasy film that smeared when we tried wiping it.” Protein based smoke from burnt food often looks clean but penetrates porous wood surfaces and creates a persistent smell that returns even after initial cleaning attempts. Following the proper sequence prevents spreading contamination from heavily damaged areas to sections that only need surface cleaning, and stops you from pushing residue deeper into materials where it becomes impossible to remove without professional restoration.
Complete Cabinet Fire Damage Cleaning Process: Tools, Techniques, and Step-by-Step Instructions

Using the wrong tools or cleaning products can permanently damage cabinet finishes or spread fire residue across surfaces that were barely affected. A standard kitchen sponge pushes soot into wood grain. All purpose cleaners designed for countertops don’t break down the greasy, acidic compounds in smoke residue. Paper towels scratch softwood cabinets and leave lint particles that trap odors.
Always test cleaning solutions on a hidden cabinet area first. Inside a cabinet door near the hinge, or on the back panel where damage won’t show. Apply your chosen cleaner, wait five minutes, then wipe clean and check for finish damage, discoloration, or surface dulling before treating visible cabinet areas.
| Product/Tool | Purpose | Application Method |
|---|---|---|
| HEPA vacuum with soft brush | Removes loose soot without spreading microscopic particles | First step always, vacuum all surfaces before wet cleaning |
| Dry chemical sponge | Lifts surface soot without water that spreads stains | Blot with light pressure, rotate to clean side, replace when saturated |
| TSP cleaner (trisodium phosphate) | Cuts through heavy grease and smoke residue | Mix 1/4 cup per gallon water, apply with wrung out cloth |
| Vinegar solution (1:1 with water) | Mild cleaning and deodorizing for light smoke damage | Spray on surface, let sit 2 to 3 minutes, wipe with microfiber cloth |
| Baking soda paste (3 parts soda, 1 part water) | Tackles stubborn stains without harsh chemicals | Apply to affected spots, let sit 15 minutes, wipe clean with damp cloth |
| Degreasing solution | Removes kitchen specific grease buildup mixed with soot | Apply undiluted to heavily soiled areas, scrub gently, rinse thoroughly |
| Microfiber cloths (12+ needed) | Removes residue without scratching surfaces | Use separate cloths for washing and rinsing, switch when visibly dirty |
| pH neutral soap | Final cleaning on sensitive finishes and sealed wood | Dilute per instructions, apply with barely damp cloth, rinse immediately |
Here’s the complete restoration sequence with specific techniques:
- Remove all hardware including hinges and handles using a screwdriver, placing small pieces in labeled bags. Soak metal hardware in a container of degreasing solution while you clean cabinet boxes. Soaking time loosens burnt on residue that scrubbing alone won’t remove
- Vacuum all surfaces with your HEPA filter vacuum using the soft brush attachment on cabinet doors (both sides), interior surfaces, drawer interiors, and shelves including edges where soot accumulates in corners, making two complete passes to capture particles loosened by the first pass
- Work dry chemical sponge across all surfaces using a gentle blotting motion without applying pressure. The sponge lifts soot through contact, not scrubbing. Rotate the sponge to expose a clean section after every few blots, and replace the entire sponge when all sides show dark soot saturation (never wet the sponge because moisture releases captured particles back onto the cabinet)
- Prepare your first cleaning pass solution by mixing TSP cleaner for cabinets with heavy smoke coating or grease buildup, or vinegar solution for light damage with minimal visible soot. TSP cuts through acidic smoke residue but requires thorough rinsing, while vinegar provides gentler cleaning with natural deodorizing
- Apply the first cleaning pass starting at upper cabinets and working downward, wiping in one direction rather than circular motions that spread residue, wringing out your cloth until barely damp because excess water causes damage, and switching to a clean cloth section every few wipes
- Mix baking soda paste for a second cleaning pass on stubborn residue that didn’t lift during the first cleaning. Apply the paste to discolored areas, let it sit for 15 minutes to break down embedded soot, then wipe clean with a fresh damp cloth. This step typically addresses 20 to 30% of cabinet surfaces with the worst damage, not the entire kitchen
- Clean interior surfaces by removing all shelf paper and debris, washing drawer interiors including the tracks where soot settles, and cleaning shelves on all sides including undersides where smoke residue is often visible as yellow brown staining
- Rinse cabinets thoroughly using clean water and fresh microfiber cloths, making at least two complete rinse passes and changing rinse water after every 3 to 4 cabinet doors because dirty rinse water redeposits dissolved soot onto cleaned surfaces
- Dry completely by positioning fans to blow across cabinet surfaces, running a dehumidifier to pull moisture from the air, and leaving cabinet doors and drawers open for 24 to 48 hours. Touching surfaces to check for dampness isn’t reliable because moisture hides in cabinet box joints and door panel seams where mold forms fastest
- Inspect for remaining odor by closing cabinet doors for several hours then opening and smelling the interior, and check for discoloration by viewing cabinets from different angles under good lighting before reinstalling hardware. Persistent smell indicates residue remaining in porous wood requiring another cleaning pass
Common mistakes that cause additional damage: Never use steel wool or abrasive scrubbers that create scratches trapping soot particles permanently, avoid ammonia based glass cleaners that strip cabinet finish when used on wood surfaces, don’t oversaturate surfaces with cleaning solutions that penetrate seams and cause swelling, and resist rushing the drying process by reinstalling hardware on damp cabinets.
Products to avoid entirely include bleach that yellows wood cabinets and breaks down finish, abrasive powders like Comet that scratch laminate and remove protective coatings, and furniture polish that traps remaining soot particles under a waxy layer making future cleaning impossible. Commercial smoke removal products designed for fire restoration become worth their higher cost ($25 to $40 per bottle versus $5 for vinegar) when you’re dealing with severe damage across more than 15 cabinet doors. These specialized formulas contain surfactants that break molecular bonds between smoke particles and cabinet surfaces, working faster with less physical scrubbing than household products. For guidance on when fire and smoke damage restoration requires professional equipment and expertise beyond basic cleaning, look for structural damage indicators like warped cabinet boxes or persistent odors after three complete cleaning attempts.
Material Specific Fire Damage Cleaning: Wood, Laminate, and Painted Cabinets With Integrated Odor Elimination
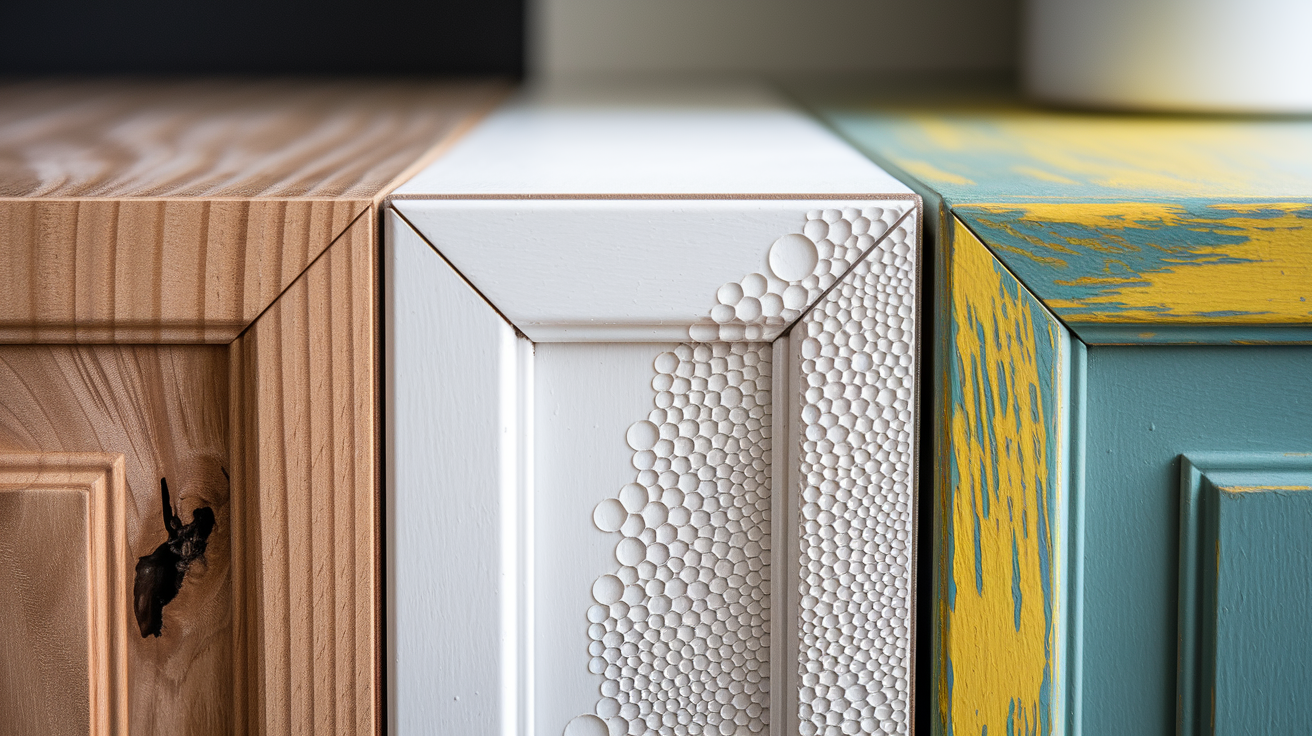
Your cabinet material determines which cleaning products work and which cause permanent damage. Wood cabinets react differently to moisture and chemicals than laminate surfaces. The grease based soot from cooking oil fires bonds more aggressively to porous wood than to sealed laminate, while protein based smoke from burnt food penetrates deep into wood grain but mostly sits on laminate surfaces. Using the wrong approach for your cabinet type can push stains deeper, remove protective finish, or create damage worse than the original fire.
Wood Cabinets: Cleaning and Deodorizing Techniques
Sealed wood cabinets with polyurethane, lacquer, or varnish topcoats resist smoke penetration better than unsealed or oil finished wood. Check if your cabinets are sealed by placing a water drop on an inconspicuous area. If water beads up rather than soaking in within 30 seconds, you have a sealed finish that tolerates moisture based cleaning. Unsealed wood requires minimal water contact during cleaning because moisture raises wood grain, creating a rough texture that traps more soot.
Clean sealed wood using TSP solution applied with a wrung out microfiber cloth, working in the direction of the wood grain rather than circular motions. Blackened surfaces showing char marks need extremely gentle treatment. Test whether the blackening is surface soot or actual wood char by rubbing lightly with a dry cloth. If black color transfers to the cloth, it’s removable soot. If the wood itself is blackened and the color doesn’t transfer, the heat caused permanent damage requiring refinishing or replacement. Heat warping that prevents cabinet doors from closing properly indicates structural damage beyond DIY repair.
Smoke stains penetrate 1 to 2mm deep into unsealed wood, making them visible even after surface cleaning. Sanding is required to remove penetrated stains, but aggressive sanding removes too much wood and affects door fit. Light sanding with 220 grit sandpaper removes approximately 0.5mm of wood, typically enough for moderate smoke staining.
Wood cabinets trap protein based smoke smells more aggressively than other materials because wood’s porous structure absorbs odor causing compounds. Apply baking soda paste to interior surfaces, letting it sit overnight to absorb odors. “We packed baking soda paste into every corner of our oak cabinets and the burnt food smell was finally gone after the third application.” For penetrated odors that return after cleaning, spray vinegar solution inside cabinets, close the doors for 30 minutes to trap vapors, then wipe dry and leave open for airflow. Place activated charcoal in shallow containers on cabinet shelves, replacing it every 48 hours until odors disappear.
Protein smoke requires 3 to 5 cleaning applications on unsealed wood because each pass only removes odor compounds from the top layer of wood, and deeper absorbed odors continue migrating to the surface. After each cleaning, wait 24 hours with cabinet doors open before assessing whether smell persists. Disinfect wood surfaces using a solution of 1 tablespoon bleach per gallon of water applied with a barely damp cloth. Disinfecting kills bacteria in food residue that contributes to persistent odors, but always rinse bleach solution completely within 2 minutes to prevent wood damage.
Laminate Cabinets: Surface Cleaning and Smell Removal
Laminate and melamine cabinets with their sealed, non porous surfaces don’t absorb smoke as deeply as wood, making them easier to clean but vulnerable to different damage. The plastic surface layer can melt, bubble, or delaminate from heat exposure. Check for melted surfaces by running your hand across cabinet doors. Melted areas feel rough or show visible bubbling that can’t be cleaned away and require cabinet replacement.
Clean laminate using pH neutral soap mixed with water rather than alkaline cleaners like TSP that can dull the finish over time. Apply cleaner with a well wrung microfiber cloth because excess moisture penetrating seams and edges causes the particle board core to swell, creating permanent damage. “Water got into the edge of our white laminate cabinet door and it swelled up like a sponge, totally ruined.” Wipe seams and edges last using an almost dry cloth to prevent water intrusion.
Fire extinguisher residue appears as white or yellowish powder covering laminate surfaces, creating a chalky film that standard cleaning doesn’t remove. This dry chemical residue requires an acid based cleaner (vinegar solution works well) to neutralize the alkaline powder before it can be wiped away. Apply vinegar solution, let it sit for 5 minutes while it reacts with the powder, then wipe clean with a damp cloth. Stubborn extinguisher residue needs a baking soda paste to provide gentle abrasion without scratching the laminate surface.
Laminate cabinets trap significantly less odor than wood, typically 80% less smoke smell penetration, because the sealed surface prevents absorption. Most laminate odors come from smoke residue sitting on the surface rather than absorbed into the material. Spray vinegar solution across all surfaces, let it sit for 2 to 3 minutes, then wipe completely dry. For remaining smells, apply commercial deodorizing spray designed for smoke odor after cleaning is complete, following product instructions for application and ventilation time.
Ventilation requirements for laminate run 48 to 72 hours with windows open and fans running continuously before odors dissipate completely. If smoke smell persists after thorough cleaning and three days of ventilation, it indicates hidden damage beneath the laminate surface. Smoke and water penetrated through seams into the particle board core, where odor causing compounds remain trapped. This situation requires professional assessment because surface cleaning won’t reach absorbed odors, and the particle board may have structural damage from moisture exposure.
Painted Cabinets: Finish Protection and Odor Control
Assess paint damage before cleaning by looking for bubbling that indicates heat separated the paint from wood substrate, yellow or brown discoloration showing smoke absorption into the paint layer, or smoke stains that appear as dark streaks even after initial cleaning attempts. Light pressure with your fingernail against bubbled paint causes it to crack or flake. Paint in this condition needs removal and refinishing because cleaning won’t restore integrity.
Clean painted cabinets without removing paint by using gentle alkaline cleaners like diluted TSP or pH neutral soap, avoiding abrasive tools and harsh scrubbing that wear through paint to bare wood. Apply cleaner with soft microfiber cloths using light pressure, and wipe in straight lines following cabinet door construction rather than circular motions. Painted surfaces show scratches more visibly than stained wood, so tool selection matters more.
Repainting becomes necessary when smoke penetrated through paint into wood, creating stains that show through even after cleaning. You’ll see brown or yellow shadows that match the fire’s smoke pattern. Paint yellowing from heat exposure can’t be reversed through cleaning. Smoke damaged paint that’s structurally sound but discolored requires thorough cleaning followed by light sanding with 220 grit sandpaper to create paint adhesion, then application of a shellac based primer that seals smoke odors before topcoat painting.
Paint layers trap smoke smell by absorbing odor compounds into the porous paint structure where surface cleaning can’t reach them. This makes painted cabinets some of the most challenging for complete odor removal without refinishing. Place open containers of baking soda inside cabinets, replacing the soda every three days until smell disappears. Baking soda absorbs airborne odor molecules over time through a process that requires air circulation, so keep cabinet doors slightly ajar during treatment.
Complete smoke odor removal from painted surfaces requires 2 to 4 cleaning passes over several days because each cleaning removes surface level odors, then deeper absorbed odors migrate outward from the paint layer where the next cleaning can reach them. Timeline expectations for painted cabinets run 1 to 3 weeks with proper ventilation, depending on smoke exposure severity. Close a cleaned cabinet for 8 hours, then open it and smell inside. If odor returns, the paint absorbed compounds requiring additional cleaning or sealing.
Persistent odors after multiple cleaning attempts indicate paint absorbed smoke so deeply that surface treatment won’t work. Professional thermal fogging penetrates painted surfaces with deodorizing compounds that neutralize smell at the molecular level before repainting. This process requires specialized equipment and chemicals, costing $300 to $800 for an average kitchen, but eliminates the need for complete cabinet replacement when paint damage is otherwise superficial.
Cabinet Restoration Versus Replacement: Making the Right Decision
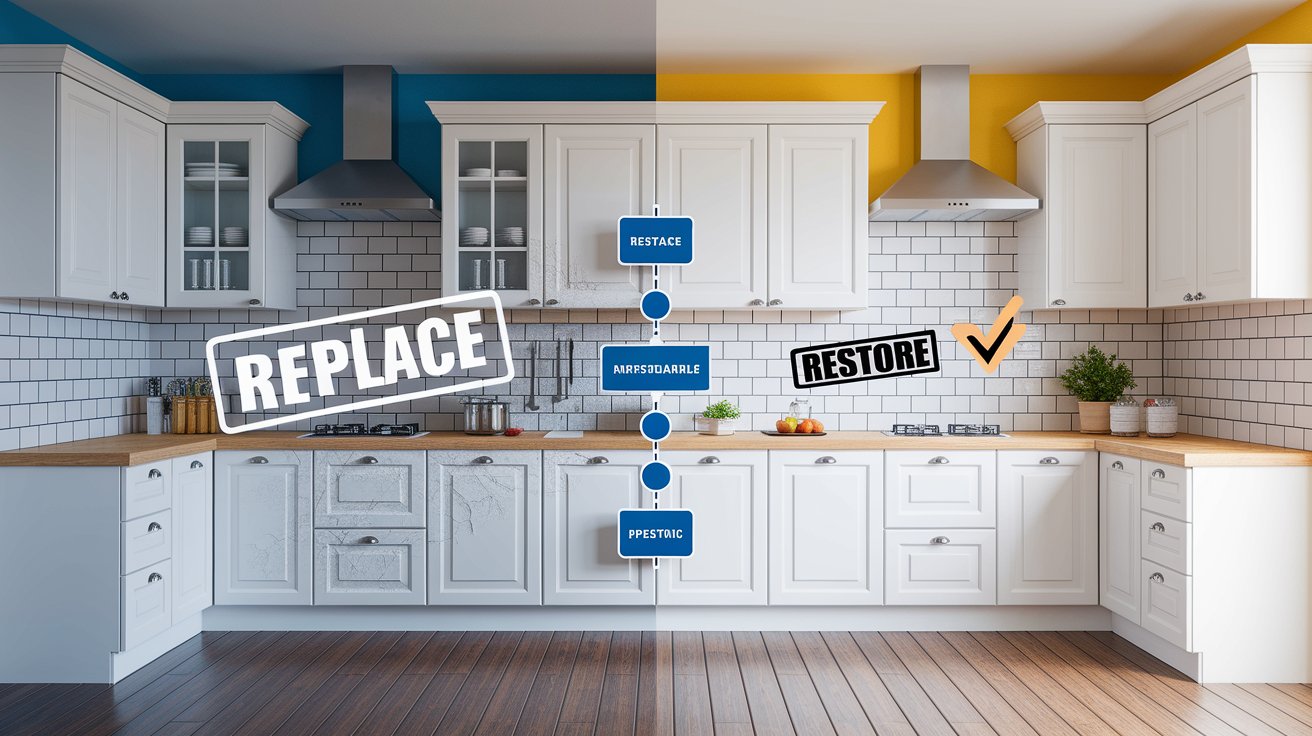
Assess your fire damage level by examining cabinet surfaces under good lighting from multiple angles. Surface discoloration that appears as yellowing, brown staining, or light gray soot without texture changes typically indicates damage limited to finish and top wood layers, salvageable through cleaning and refinishing. Structural compromise shows as warped cabinet boxes where doors no longer close properly, sagging shelves indicating weakened supports, or cabinet boxes pulling away from walls. Check cabinet door functionality by opening and closing each door. Doors that bind, swing improperly, or show gaps where they previously closed flush have heat damage affecting structural integrity.
Water damage extent from firefighting determines whether you’re dealing with surface moisture that dries without consequences or saturation that causes permanent problems. Press cabinet surfaces firmly with your palm. If wood feels spongy rather than solid, or if you can indent the surface, water penetrated deep into the material where it causes swelling and mold formation.
These indicators require professional help beyond DIY capability:
• Cabinet box warping where the main structure twisted or bowed from heat, causing doors to misalign or preventing them from closing. This affects structural stability and can’t be fixed through cleaning alone
• Water damaged cabinets with visible mold growth showing as black, green, or white fuzzy patches, especially concerning because mold forms within 24 hours of water exposure and spreads rapidly through porous materials. For information about mold mitigation tied to moisture events and the 24 hour timeline, professional assessment prevents health risks and contains spread.
• Persistent odors remaining after three complete cleaning attempts using TSP or specialized smoke cleaners, indicating deep penetration where DIY methods can’t reach absorbed compounds
• Extensive blackened surfaces covering more than 40% of total cabinet area, suggesting heat exposure severe enough to cause finish and structural damage across most of the kitchen
• Heat warping affecting door alignment and function where doors that previously hung straight now show gaps, binding, or contact with adjacent doors
• Melted surfaces on laminate or melamine cabinets showing bubbling, rough texture, or areas where the surface layer separated from substrate
• Fire extinguisher residue throughout the kitchen penetrating cabinet interiors, especially dry chemical powder that reacts with moisture and causes corrosion if not properly neutralized
• Severe stain penetration visible from multiple angles indicating smoke compounds absorbed deeply into wood grain rather than surface coating only
| Damage Level | Best Solution | Timeline | Professional Required |
|---|---|---|---|
| Light surface smoke with minimal discoloration | DIY cleaning with TSP and sealing with polyurethane topcoat | 1 to 2 days | No |
| Moderate smoke damage with finish penetration | Cabinet refinishing including sanding and restaining | 3 to 5 days | Recommended |
| Heavy smoke plus heat damage to doors | Refacing with new door and drawer fronts | Few weeks | Yes |
| Structural compromise with water damage | Complete removal and replacement | 3 to 6 weeks | Yes, IICRC certified required |
| Isolated severe damage with mostly sound cabinets | Selective replacement of damaged units plus restoration | 1 to 2 weeks | Assessment needed |
Cabinet refinishing becomes the best option when smoke damaged the finish layer but cabinet boxes and door structures remain solid. This process involves removing the existing stained or painted finish through sanding, treating smoke penetrated wood, then restoring color with new stain or paint and protective topcoat. Refinishing works for cabinets showing yellowing from smoke exposure, surface staining that didn’t penetrate deeply, or finish damage from heat that stopped before affecting wood structure. Stain color matching presents challenges because existing cabinets developed color shifts from years of light exposure and oxidation. “Our oak cabinets were golden when new but had darkened to amber over 15 years, so matching the refinished doors required custom stain mixing.” Professional refinishers create test samples on scrap wood, adjusting stain ratios until the new finish matches aged surrounding cabinets.
Refacing is appropriate when fire damaged cabinet doors and drawer fronts but cabinet boxes remain structurally sound without warping, water damage, or smoke penetration. This process replaces all visible door and drawer fronts with new components while keeping the existing cabinet box structure. Refacing costs 40 to 60% less than complete replacement while delivering a like new appearance. “We refaced our entire kitchen after a grease fire destroyed the doors, keeping the cabinet boxes that were protected by closed doors during the fire.” Refacing typically requires 2 to 3 weeks including measurement, custom door manufacturing, and installation.
Complete replacement becomes necessary when structural failure occurred through heat warping, water saturation causing wood deterioration, extensive melting of laminate surfaces, or severe smoke penetration throughout cabinet boxes that makes odor removal impossible without dismantling and rebuilding. Cabinet boxes pulling away from wall studs indicate fastener failure from moisture or heat damage. Water damaged cabinets with particle board construction require replacement rather than repair because particle board doesn’t recover structural integrity after saturation. “The firefighters’ hose water soaked our lower cabinets and within two days the particle board cabinet bottoms were sagging and falling apart.”
Cost comparison shows DIY cleaning ranges from $50 to $200 in supplies including TSP, sponges, sandpaper, and microfiber cloths for a standard kitchen with 20 to 25 cabinet doors. Professional restoration runs $1,500 to $4,000 depending on damage severity, number of cabinets, and whether refinishing or partial replacement is required. Cabinet refacing costs $4,000 to $9,000 for material, custom door manufacturing, and installation labor. Complete cabinet replacement starts at $8,000 for budget stock cabinets and reaches $20,000+ for custom or semi custom cabinets matching your kitchen’s dimensions and style.
Environmental benefits make restoration preferable when structurally feasible. Cabinet restoration reduces waste by keeping existing materials out of landfills. An average kitchen cabinet replacement generates 400 to 600 pounds of landfill waste from old cabinets. Manufacturing new cabinets requires harvesting wood, energy intensive processing, finish application with VOC emissions, and transportation contributing to carbon footprint. Restoration uses existing materials with minor additions, saving trees and resulting in 60 to 75% lower carbon emissions compared to replacement. Many restoration technicians now use water based products instead of solvent based finishes, providing environmental protection through reduced VOC release during application and curing.
After completing cleaning or refinishing, sealing cabinets with a polyurethane topcoat creates a protective barrier preventing future smoke absorption and making cleaning easier. Apply two coats of water based polyurethane in satin or semi gloss finish, allowing 4 to 6 hours drying time between coats. Topcoat protection extends cabinet life and maintains appearance by preventing moisture penetration, resisting staining from daily kitchen use, and creating a sealed surface where dirt and grease wipe away rather than embedding in wood grain.
IICRC certification (Institute of Inspection, Cleaning and Restoration Certification) ensures technicians completed training in fire damage restoration, smoke cleaning techniques, and proper equipment use. Check that restoration companies hold current state contractor licenses for residential and commercial work. Licensed contractors carry liability insurance protecting you from damage during restoration, and they understand building codes affecting structural cabinet repairs.
Timeline and Cost Expectations for Cabinet Fire Cleanup

Several factors determine how long cabinet restoration takes and what you’ll spend on the recovery process. Damage severity makes the biggest difference. Light surface smoke affecting only cabinet exteriors takes 1 to 2 days for complete DIY cleaning, while heavy smoke that penetrated wood grain requires 3 to 5 days plus additional refinishing time. Cabinet material affects timeline because sealed laminate surfaces clean faster than porous unsealed wood, and painted cabinets often need multiple cleaning passes to remove absorbed odors. The DIY versus professional approach creates timeline differences, with DIY projects taking longer due to learning curve and working around your schedule, while professional crews work full days with specialized equipment.
Realistic recovery process expectations depend on your damage level. Light surface damage where you’re doing DIY cleaning takes 1 to 2 full days for thorough cleaning and drying, then another 1 to 2 days if refinishing or sealing is needed. Moderate damage requiring professional help runs 3 to 5 days for cleaning and color restoration. Heavy damage with structural issues extends to a few weeks for refacing or selective replacement. Complete cabinet replacement projects take 3 to 6 weeks from measurement through custom manufacturing and installation.
Cost factors affecting your final expense include:
• Number of cabinets being cleaned or restored, with each additional door or drawer adding to labor and material costs. Industry pricing typically calculates per linear foot or per cabinet door rather than whole kitchen pricing
• Cabinet style complexity where raised panel doors with decorative molding require more cleaning time and refinishing material than flat panel doors, and multiple paint colors increase refinishing costs
• Kitchen size determining total square footage and number of work hours required, with larger kitchens typically showing better per cabinet pricing through economies of scale
• Wood species type affecting refinishing costs because some woods accept stain more evenly, and exotic hardwoods require specialized finishing products costing more than standard oak or maple
• Finishing process requirements including number of coats needed, custom color matching for aged cabinets, and whether paint or stain restoration is specified
• Structural condition assessment revealing hidden damage requiring repair before cosmetic restoration, with water damaged cabinet boxes sometimes needing reinforcement or replacement of individual components
DIY cleaning for a typical 10×12 kitchen with 20 cabinet doors costs $50 to $200 in supplies. You’ll spend approximately $30 on TSP cleaner, dry chemical sponges, and pH neutral soap, another $40 on HEPA vacuum bags and filters if your vacuum requires replacements, $25 for microfiber cloths and protective equipment, and $50 to $100 for optional refinishing supplies including sandpaper, stain, and polyurethane sealer. Professional restoration costs $1,500 to $4,000 for the same kitchen depending on damage severity, with light smoke damage toward the lower range and heavy smoke requiring refinishing at the upper range.
Insurance claim considerations start with documenting damage before beginning any cleanup. Take photos showing smoke damage from multiple angles, photograph date stamps on a newspaper in the scene for proof of timing, capture close ups of specific damage like melted surfaces or blackened areas, and photograph the overall kitchen layout. Contact your insurance company within 24 to 48 hours of fire occurrence to report the claim and understand your coverage for cabinet restoration versus replacement. Many policies cover professional restoration under dwelling coverage, while some require using specific contractors from insurance company networks. For guidance on insurance claims and emergency response timelines particularly for storm related damage repairs causing water issues, documentation becomes critical for claim approval.
Getting accurate cost estimates requires detailed damage assessment. Professional restoration companies provide free estimates including inspection of all cabinet surfaces, assessment of structural integrity, identification of hidden damage, and written scope of work detailing specific repairs needed. Request estimates from 3 to 4 companies to compare pricing, but focus on scope of work rather than bottom line price alone. Lower estimates sometimes exclude necessary steps discovered during work, leading to change orders and higher final costs.
DIY timeline expectations for a standard kitchen run 2 to 5 days for complete cleaning when you’re working evenings and weekends. Day 1 includes safety setup, vacuuming loose soot, and dry sponge cleaning taking 4 to 6 hours. Day 2 covers first cleaning pass with TSP or vinegar solution, requiring 4 to 5 hours including preparation and cleanup. Day 3 addresses stubborn residue with baking soda paste and completed rinsing, taking 3 to 4 hours. Days 4 to 5 allow for complete drying with fans running continuously for 24 to 48 hours before reinstalling hardware and assessing results. Additional refinishing time adds 3 to 7 days including sanding, staining, drying between coats, and final sealing. Professional services complete the same scope in 1 to 2 days for cleaning or 3 to 5 days for refinishing because multiple technicians work simultaneously with commercial grade equipment.
Hidden Cabinet Areas Requiring Special Attention

Smoke and soot particles travel throughout your kitchen following air currents created by the fire’s heat, settling in areas you wouldn’t expect based on fire location alone. A stovetop grease fire sends smoke upward initially, but as heat rises and hits the ceiling, air currents push smoke horizontally across the room where it falls into crevices, corners, and hidden spaces. Particles measuring less than 2.5 micrometers stay airborne for hours, eventually settling on every surface including spots you can’t easily see.
Hidden areas matter for complete odor elimination and fire damage removal because missed smoke residue in concealed spaces continues releasing smell for months or years after visible surfaces are cleaned. Smoke particles trapped in crevices slowly oxidize and break down, releasing odor compounds into cabinet interiors that make the smell return after initial cleaning seemed successful. “We cleaned every visible surface but the burnt smell kept coming back, and finally found thick soot buildup on top of the upper cabinets and behind the toe kicks.”
Critical hidden areas requiring thorough cleaning:
• Upper cabinets tops where smoke rises and deposits heavy soot layers often measuring 1/8 inch thick or more, creating a greasy residue that continues releasing odor
• Corner cabinets interiors, especially the hard to reach back sections where cabinet construction creates dead spaces that trap smoke particles
• Drawer interiors and tracks where smoke enters from below and deposits residue on drawer bottoms, sides, and the metal glide mechanisms
• Shelf cleaning undersides including the bottom surface of each shelf where smoke deposits leave sticky residue, often overlooked because you don’t see these surfaces during normal use
• Crown molding crevices where decorative trim creates gaps and shadow lines trapping smoke particles that standard cleaning misses
• Toe kick area underneath base cabinets where smoke settles near floor level, requiring removal of toe kick boards for access to clean cabinet base and floor behind
• Cabinet door edges on the top, bottom, and hinge side where smoke residue accumulates in narrow spaces between door and cabinet box
• Hinge recesses where cabinet door hinges mount into routed pockets, creating small cavities that fill with smoke residue
• Interior surfaces behind removable shelves including the cabinet back panel and sides normally hidden by shelf placement
Accessing difficult areas requires specific techniques and tool adaptations. For upper cabinet tops, use a sturdy step ladder or small platform ladder providing stable access while keeping both hands free for cleaning. Create better lighting by positioning a portable work light to shine across surfaces at a low angle, making soot deposits visible through shadow and reflection. Reach corner cabinet interiors using a flexible cleaning wand (attach a microfiber cloth to a wire coat hanger bent into a long reach tool), or remove cabinet shelves entirely for complete access to back corners.
Clean drawer tracks by removing the entire drawer from its glides, then wiping tracks with a TSP dampened cloth wrapped around a narrow putty knife to reach into track channels. Access toe kick areas by removing the toe kick board using a flat pry bar. Most toe kicks attach with small nails or clips and reinstall easily after cleaning the exposed cabinet base and floor. For crown molding crevices, use a dry chemical sponge cut into narrow strips that fit into gaps, or spray vinegar solution into crevices then wipe with a cloth corner.
Cabinet door edges require cleaning on all four sides, not just the visible front face. Use a slightly damp microfiber cloth wrapped around your finger to wipe along the narrow top, bottom, and side edges where smoke residue creates dark lines. Clean hinge recesses by spraying cleaner into the routed pocket, letting it sit for 2 to 3 minutes to loosen deposits, then wiping with a cotton swab or small brush. Behind removable shelves, clean the cabinet back panel and sides by spraying vinegar solution or TSP mixture, letting it sit briefly, then wiping with a cloth wrapped around a paint stir stick for extended reach.
Replacing shelf liner after cleaning prevents
Final Words
Cleaning cabinets after kitchen fire takes patience and the right approach. Start with safety gear and proper ventilation, then work through loose soot removal before you touch any cleaners.
Match your cleaning method to your cabinet material. Wood, laminate, and painted surfaces all need different handling.
If you’re dealing with warping, melted areas, or smoke smell that won’t leave after multiple cleanings, that’s when to call in pros. Some damage goes deeper than surface residue.
Your cabinets can come back from this. Follow the steps, take your time with drying, and you’ll get there.
FAQ
How to clean a house after a kitchen fire?
Cleaning a house after a kitchen fire starts with wearing protective equipment (N95 mask, rubber gloves, safety goggles), establishing ventilation, and using a HEPA vacuum to remove loose soot before applying any wet cleaning methods that can spread stains.
Does Dawn dish soap remove soot?
Dawn dish soap can help remove light soot and grease when combined with warm water, but heavy smoke residue requires stronger solutions like TSP cleaner or commercial degreasing products designed specifically for fire damage restoration.
How long will air quality be bad after fire?
Air quality typically remains poor for 24 to 72 hours after a kitchen fire without proper ventilation, and complete odor elimination from smoke residue can take 1 to 3 weeks depending on damage severity and cleaning thoroughness.
How to recover from a home kitchen fire?
Recovery from a home kitchen fire involves immediate safety assessment, proper ventilation setup, systematic cleaning starting with HEPA vacuuming and dry sponge methods, followed by material-specific cleaning solutions, complete drying for 24 to 48 hours, and odor elimination techniques.
What protective equipment do I need before cleaning fire-damaged cabinets?
Protective equipment needed before cleaning fire-damaged cabinets includes respiratory protection (N95 mask), rubber gloves, safety goggles, long sleeves, proper lighting, and fans for ventilation to prevent inhaling harmful smoke particles during the cleaning process.
When should I call professionals instead of cleaning cabinets myself?
Call professionals when you see structural warping affecting cabinet stability, water damage with potential mold formation (starts within 24 hours), persistent odors after three cleaning attempts, blackened surfaces covering more than 40 percent of cabinets, or melted laminate surfaces.
What’s the difference between grease-based soot and protein-based smoke?
Grease-based soot from kitchen fires creates sticky, visible residue that clings to surfaces, while protein-based smoke from burnt food often remains invisible but penetrates porous materials like unsealed wood, creating persistent odors that require repeated cleaning.
Can I use water immediately to clean soot off cabinets?
You should never use water immediately to clean soot because it spreads stains deeper into surfaces and pushes residue into porous materials, making removal harder and potentially causing permanent damage to cabinet finishes.
How do I clean different cabinet materials after fire damage?
Clean wood cabinets with appropriate solutions for sealed versus unsealed surfaces, laminate cabinets with pH neutral cleaners to protect the finish, and painted cabinets with gentle alkaline cleaners that won’t remove paint or cause bubbling.
What is a dry chemical sponge and why use it?
A dry chemical sponge is a specialized cleaning tool used for initial soot removal without water, applied in a blotting motion to lift smoke residue from surfaces before any wet cleaning begins, preventing stains from spreading or penetrating deeper.
How long does cabinet restoration take compared to replacement?
Cabinet restoration takes 1 to 2 days for basic cleaning and touch-ups, 3 to 5 days for refinishing with color changes, or a few weeks for refacing, which is significantly faster than complete cabinet replacement requiring 3 to 6 weeks.
Should I remove cabinet hardware before cleaning?
Remove all hardware including hinges and handles before cleaning to allow thorough soot removal from all surfaces, clean doors separately, and soak metal hardware in degreasing solution for proper restoration of all cabinet components.
Why does smoke smell return after cleaning cabinets?
Smoke smell returns when hidden areas like upper cabinet tops, drawer tracks, crown molding, toe kick areas, and cabinet interiors weren’t thoroughly cleaned, or when protein-based smoke penetrated deep into porous wood requiring additional cleaning passes.
How many times do I need to clean fire-damaged cabinets?
Fire-damaged cabinets typically require 2 to 4 cleaning passes for painted surfaces and 3 to 5 applications for unsealed wood where protein smoke has penetrated deeply, with complete odor removal taking 1 to 3 weeks with proper ventilation.
What cabinet damage requires replacement instead of restoration?
Cabinet damage requiring replacement includes structural failure from heat warping that affects cabinet box stability, extensive water damage with mold formation, severe melting of laminate surfaces, or blackened areas covering the majority of cabinet surfaces.
How much does professional cabinet fire restoration cost?
Professional cabinet fire restoration typically costs $1,500 to $4,000 for cleaning and refinishing, $4,000 to $9,000 for refacing with new doors, or $8,000 to $20,000 plus for complete replacement, compared to $50 to $200 for DIY cleaning supplies.
What cleaning products should I avoid on fire-damaged cabinets?
Avoid bleach that damages wood cabinets, abrasive cleaners that scratch laminate surfaces, harsh chemicals that strip cabinet finishes, and excessive water that penetrates unsealed surfaces causing warping, swelling, or mold formation within 24 hours.
How do I prevent smoke odor from returning to cleaned cabinets?
Prevent smoke odor from returning by applying baking soda paste to porous surfaces, placing activated charcoal in cabinet interiors, ensuring complete drying for 24 to 48 hours, and sealing restored cabinets with topcoat protection after cleaning.
When does water damage from firefighting require professional help?
Water damage from firefighting requires professional help when you notice warping, mold formation starting within 24 hours, soft or spongy cabinet materials, discoloration indicating moisture penetration, or structural compromise affecting cabinet box stability.
What’s the proper sequence for cleaning fire-damaged kitchen cabinets?
The proper sequence starts with establishing ventilation and protective equipment, HEPA vacuuming loose debris, dry sponge technique for initial soot removal, first cleaning pass with appropriate solution, second pass for stubborn areas, thorough rinsing, and complete drying.
