
After a kitchen fire, you’re staring at cabinets covered in soot and wondering if they’re ruined. Here’s the truth: most smoke damaged cabinets can be restored if the structure underneath is still solid. You don’t always need to replace them. The decision comes down to three things: how deep the damage goes, what your cabinets are made of, and whether you’re dealing with surface residue or actual heat damage. We’ll walk through how to tell the difference and what your realistic options are.
How to Clean and Restore Smoke Damaged Kitchen Cabinets

Before you start scrubbing, take a quick walk through. Make sure your cabinets are still structurally solid. No loose joints, no major warping. Check that there aren’t any active electrical hazards near outlets or light fixtures. Surface smoke damage, which is what most kitchens deal with after a cooking fire or nearby smoke exposure, is usually cleanable. Deeper structural damage? Charring, heat warping, or water soaked cabinet boxes from firefighting efforts? That needs a professional to assess.
Here’s the complete cleaning process, step by step:
-
Ensure the area is safe and well ventilated before beginning. Open windows, turn on fans, and make sure any electrical issues have been addressed by a licensed electrician.
-
Remove all items from cabinets and inspect the interior for damage. Check shelves, interior walls, and the back panels. Smoke travels everywhere.
-
Start with dry cleaning. Use a HEPA vacuum to remove loose soot particles from all surfaces. HEPA filters trap the microscopic smoke particles that regular vacuums just blow around the room. Go over cabinet faces, edges, handles, and the inside.
-
Prepare your cleaning solution by mixing equal parts warm water and white vinegar in a spray bottle, then add a few drops of dish soap. The vinegar cuts through smoke residue, the soap tackles grease and oils.
-
Test the solution on a small hidden area. Inside a cabinet door or under the sink. Wait 10 minutes. If the finish looks fine, you’re good to go. If it dulls or discolors, dilute the solution further or skip the vinegar.
-
Spray the solution generously on one section at a time, then let it sit for several minutes. Don’t rush this. The solution needs time to break down the sticky smoke residue.
-
Wipe with a microfiber cloth using gentle circular motions, working from top to bottom. Start at the upper cabinets and work your way down so drips don’t re-soil areas you’ve already cleaned.
-
For persistent smoke stains, sprinkle baking soda directly on the spot, add a few drops of water to form a paste, and gently scrub with a cloth or sponge. Baking soda is mildly abrasive without damaging most finishes.
-
Rinse all surfaces thoroughly with clean water to remove solution residue, then dry completely with a clean cloth. Leftover cleaning solution can damage finishes over time, and standing moisture can warp wood or MDF.
Heavily soiled cabinets often need more than one round. Let everything dry completely. Give it 24 to 48 hours between sessions. Patience here prevents finish damage and warping. If you’ve cleaned thoroughly, let it dry, cleaned again, and permanent discoloration still remains, cleaning alone won’t fix it. That’s when refinishing becomes necessary.
Assessing Damage Severity and Cabinet Material Vulnerability

Not all smoke damage looks the same. Kitchen fires leave greasy, sticky residue that smears when you touch it. Fires in other rooms produce dry, powdery soot that brushes off more easily. Each type needs a different cleaning approach. Greasy residue requires degreasers, dry soot responds better to dry methods first, then gentle washing. Your cabinet material also plays a huge role in how bad the damage is and whether restoration will work.
Key indicators to assess when examining smoke damaged cabinets:
-
Surface discoloration and staining depth. Is it just on the surface, or has it soaked into the wood grain? Run your finger across it after dry cleaning with a HEPA vacuum. If color remains, it’s penetrated.
-
Cabinet door and drawer front warping from heat exposure. Close a door and check the gaps. Uneven spacing or doors that won’t stay closed signal heat warping.
-
Structural integrity of joints and cabinet boxes. Open and close drawers, check corner joints for separation, look for loose sections. Smoke damage is surface level. Structural issues mean heat got serious.
-
Material type vulnerability. Solid wood handles smoke better than MDF or particleboard. Laminate might clean up fine but can’t be refinished if staining goes deep.
-
Extent of charring or bubbling on surfaces. Any actual charring or finish bubbling means heat damage, not just smoke. That’s a different category.
-
Odor penetration into cabinet interior. Open doors and smell inside. If the smell is strong even after cleaning the outside, smoke particles are embedded in the material.
Different materials respond completely differently. Solid wood is the most salvageable. You can sand it, bleach out stains if needed, and refinish it to look new. Veneer looks like solid wood but it’s a thin layer glued to a substrate, and heat can make it bubble or separate. MDF and particleboard are compressed wood fibers that absorb smoke and moisture like a sponge, making deep cleaning nearly impossible. Laminate surfaces might wipe clean, but if smoke has stained the material underneath or if the laminate itself has discolored, you can’t sand it or refinish it.
Professional inspection makes sense when damage covers more than a few cabinet doors, when you see structural issues like separating joints or significant warping, when you’re filing an insurance claim, or when you’re just not sure if restoration is worth attempting. Experts know how to check for hidden moisture damage inside cabinet boxes and can assess whether smoke particles have penetrated so deeply that cleaning and sealing won’t solve the odor problem.
Safety Precautions Before Cleaning Fire Damaged Cabinets
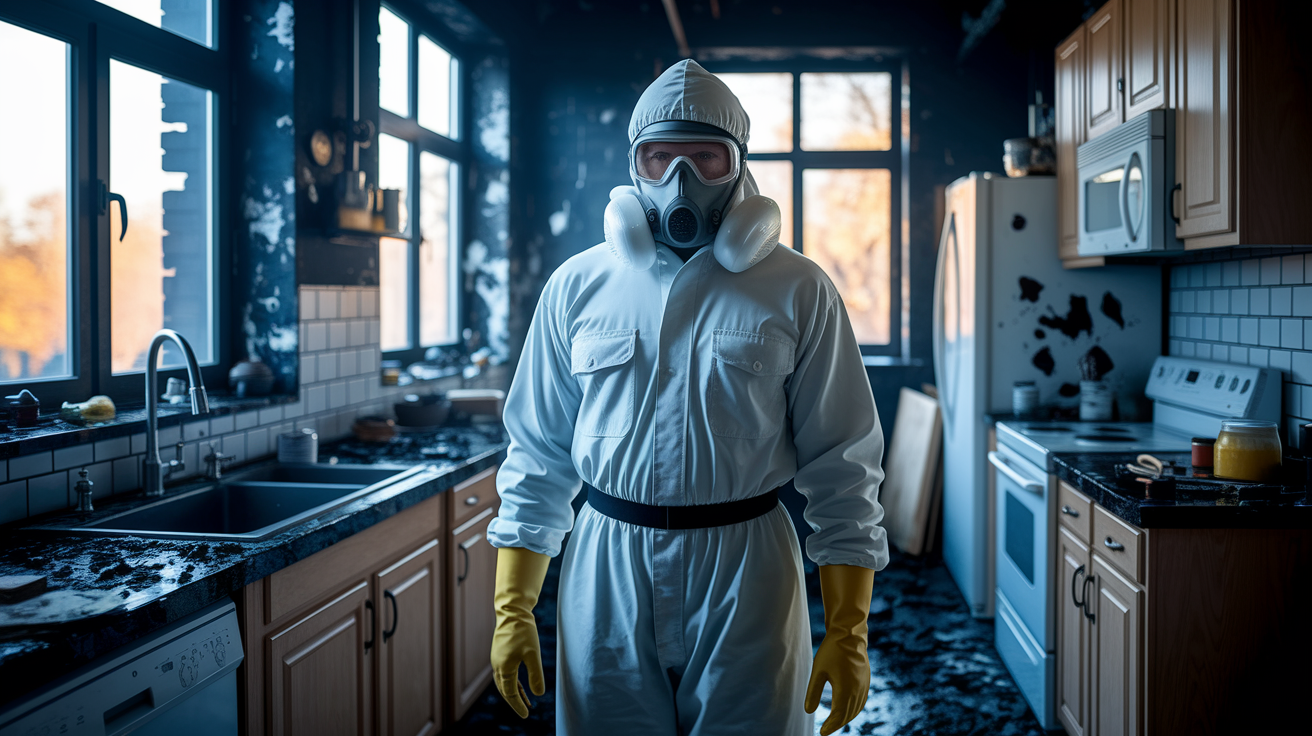
If there was an actual fire, not just heavy smoke, make sure the electrical system has been checked and cleared by an electrician before you start working. Standing water, damaged wiring, and cabinets don’t mix. Confirm that the structure is sound. Ceiling, walls, floor. If firefighters were involved, they’ve likely already checked this, but don’t assume.
You need real protective equipment. Get N95 masks or better. Smoke residue contains tiny particles that go straight into your lungs and can cause respiratory irritation even days after the fire. Safety goggles keep soot out of your eyes when you’re wiping overhead cabinets. Heavy duty gloves protect your skin from both the soot and the cleaning chemicals you’ll be using. Wear long sleeves. Soot is acidic and can irritate skin on contact.
Ventilation isn’t optional. Open every window in the kitchen and nearby rooms. Set up a fan blowing out to pull contaminated air outside. Another fan blowing in from a clean area helps create airflow. When you’re working with soot and chemical cleaners, you want that air moving, not sitting in the room with you. Even with a mask, proper ventilation reduces your exposure and speeds up drying time.
Here’s something that catches people off guard. Mold can start growing on wet cabinets in as little as 24 hours after a fire. If firefighters used water or if your sprinkler system went off, those cabinets are soaked. Before you even think about cleaning smoke residue, you need to dry everything out. Use fans, dehumidifiers, open cabinet doors to expose interiors. Check for moisture with your hand. If it feels damp or cool to the touch, it’s still too wet to clean. Cleaning wet cabinets just traps moisture under layers of grime and creates a perfect environment for mold.
Essential Supplies and Tools for Cabinet Smoke Removal

Get your supplies together before you start. Different damage levels need different approaches. Light smoke exposure from a small cooking incident responds well to simple household solutions. Vinegar, dish soap, baking soda. Heavier damage from a significant fire needs stronger commercial products. Either way, having everything ready prevents mid-project runs to the store.
| Supply Category | Specific Items | Purpose |
|---|---|---|
| Basic Cleaning Solutions | White vinegar, dish soap, baking soda, warm water | Gentle cleaning for light to moderate smoke residue, safe for most finishes |
| Heavy Duty Cleaners | TSP (trisodium phosphate), commercial degreasers, mineral spirits, ammonia solutions | Tackling stubborn greasy smoke residue and heavy soot buildup |
| Application Tools | Spray bottles, microfiber cloths, soft sponges, buckets, scrub brushes (soft bristle) | Applying and removing cleaning solutions without damaging cabinet finish |
| Protective Materials | Drop cloths, plastic sheeting, painter’s tape, rubber gloves, N95 masks, safety goggles | Protecting surrounding areas and yourself during cleaning |
| Sanding Supplies | 120-grit, 150-grit, 220-grit sandpaper, sanding blocks, tack cloths | Surface prep for refinishing when cleaning doesn’t remove all discoloration |
| Specialized Equipment | HEPA vacuum, wet/dry shop vacuum, fans, dehumidifier | Removing fine smoke particles and controlling moisture during drying |
| Deodorizing Agents | Activated charcoal, odor blocking primer, enzymatic cleaners, baking soda | Eliminating lingering smoke smell from cabinet interiors and surfaces |
| Testing Materials | Small cleaning cloths, cotton swabs, notebook for documenting results | Testing cleaning solutions on hidden areas before applying to visible surfaces |
Choosing between commercial products and home remedies depends on damage severity and your cabinet finish. Start with the gentlest option that might work. Home remedies like vinegar and baking soda are safer for finishes and cheaper. If that doesn’t cut through the residue after a thorough attempt, move up to commercial cleaners. Whatever you use, test it first on a hidden spot. Inside a cabinet door, under the sink, or on the back of a door that faces the wall. Apply it, let it sit for 10 minutes, wipe it off, and check for any dulling, discoloration, or finish damage. HEPA vacuums are worth mentioning again because they’re not optional for smoke damage. Regular vacuums blow microscopic smoke particles back into the air. HEPA filters trap them, which matters when you’re trying to actually remove soot instead of just moving it around.
Eliminating Smoke Odor from Kitchen Cabinetry

You can clean every visible surface until your cabinets look perfect, and the smell still lingers. Smoke odor isn’t just surface residue. It penetrates deep into porous materials. Wood absorbs it. MDF is even worse because it’s essentially compressed wood fibers with lots of tiny spaces for smoke particles to settle. That’s why surface cleaning alone doesn’t solve the smell problem.
Natural deodorizing methods work for light to moderate odor. Place bowls of activated charcoal inside your cabinets and close the doors. Charcoal absorbs odors over time. Leave it for several days, replace it, repeat. Baking soda works the same way. Sprinkle it on cabinet shelves, leave cabinet doors open for ventilation, let it sit for 24 hours, vacuum it out. Keep air moving through the kitchen with fans and open windows. Time and ventilation help, but they’re slow.
Commercial deodorizing products and ozone treatment are stronger interventions for persistent smells. Enzymatic cleaners break down the organic compounds in smoke residue that cause odor. Spray them on, let them work, wipe them off. They’re particularly effective on wood because they penetrate the grain. Ozone generators are professional grade equipment that produce ozone gas, which neutralizes odor molecules. They work, but you can’t be in the house while they’re running because ozone irritates lungs. This is typically a professional service, not a DIY approach. Consider these options when natural methods haven’t worked after multiple attempts.
Sealing techniques are often the final step in complete odor elimination. Even after thorough cleaning and deodorizing, some smell may remain embedded in the wood. Odor blocking primer sealers create a barrier that locks in any remaining odor before you refinish or paint. These aren’t regular primers. They’re specifically formulated to block smoke odor and prevent staining from bleeding through new finish coats. Apply them to bare wood after cleaning and sanding, let them cure completely, then apply your final finish. This combination of deep cleaning, deodorizing, and sealing is what actually eliminates smoke smell permanently.
Repair or Replace: Making the Right Decision for Your Cabinets

The decision comes down to a few practical factors. How bad is the damage? What can you afford to spend? How quickly do you need your kitchen functional? Are you staying in this house long term? And yeah, environmental impact matters too. Restoration produces way less waste than replacement.
Signs that restoration is feasible:
-
Damage limited to surface staining without structural compromise. If the cabinet boxes are solid and the damage is just on surfaces you can clean or refinish, restoration works.
-
Cabinet boxes remain solid with intact joints. Open drawers, wiggle doors, check corners. If everything’s still tight and square, the structure is good.
-
No significant warping or heat deformation. Minor warping might be fixable, but doors that won’t close or drawer fronts that are visibly twisted often need replacement.
-
Odor can be controlled through cleaning and sealing. If test cleaning reduces the smell noticeably, complete cleaning and sealing will likely eliminate it.
-
Cost of restoration is less than 50% of replacement cost. This is the financial tipping point for most people. If restoration costs approach replacement costs, replacement might make more sense unless there are other factors like environmental concerns or attachment to custom cabinets.
Cabinet refacing is the middle option that makes sense for specific situations. The cabinet boxes are fine, but the doors and drawer fronts are too damaged to save. Refacing means keeping your existing boxes, replacing all the doors and drawer fronts, applying new veneer to the visible box surfaces (the face frames), and updating all the hardware. You get a basically new looking kitchen without the cost, mess, and timeline of complete replacement. This typically takes a few weeks and costs significantly less than full replacement while being more thorough than refinishing damaged surfaces.
| Option | Cost Range | Timeline | Environmental Impact | Best For |
|---|---|---|---|---|
| Professional Cleaning/Touch-Up | $200–$800 | 1-2 days | Very low | Light smoke damage, surface staining only, structurally sound cabinets |
| Professional Refinishing | $2,000–$6,000 | 3-5 days | Low | Moderate damage with discoloration that cleaning can’t remove, solid cabinet structure |
| Cabinet Refacing | $4,000–$10,000 | 2-3 weeks | Moderate | Damaged doors/fronts but solid boxes, want updated look without full replacement |
| Complete Replacement | $8,000–$25,000+ | 4-8 weeks | High | Structural damage, severe warping, deep charring, or water compromised cabinet boxes |
Full replacement is necessary when the structure is compromised. Extensive charring that goes into the wood, severe warping that affects cabinet function, deep water damage from fire extinguishing that’s caused swelling or mold inside the boxes, or when joints have separated and can’t be reliably repaired. Safety comes first. If cabinets aren’t structurally sound, restoration isn’t an option regardless of cost. Replacement is the most expensive option and takes the longest, but when it’s required, it’s required. That said, when cabinets are structurally sound, restoration typically offers better value and significantly lower environmental impact. Less waste in landfills, fewer trees cut, lower emissions from manufacturing and transportation.
Complete Refinishing Process for Smoke Damaged Cabinets

When cleaning gets the soot off but leaves permanent discoloration or yellowing that won’t budge, refinishing is the next step. How far you need to go depends on how deep the damage goes. Sometimes light sanding and a fresh topcoat does it, other times you’re stripping everything down to bare wood and starting over.
Assessing Refinishing Needs and Preparation
Start by figuring out whether you can save the existing finish. Rub the cleaned surface with fine sandpaper. If the discoloration is only in the topcoat, you can sand lightly and recoat. If the discoloration goes deeper into the finish or into the wood itself, you’ll need to strip completely. Smoke causes chemical changes in finishes that create yellowing you can’t just wipe away. The wood itself can absorb smoke particles into the grain, leaving permanent staining. Look closely at the depth of discoloration. Surface level yellowing responds to light sanding, but staining visible in the wood grain requires complete stripping.
Stripping and Surface Preparation
Complete refinishing means removing all the old finish. Use chemical strippers for paint or varnish removal. Apply according to product instructions, let them work, scrape off the softened finish, and clean thoroughly. Then sand. Start with 120-grit sandpaper to remove any remaining finish and smooth the surface. Move to 150-grit, then finish with 220-grit. Each step removes the scratches from the previous grit and creates a smoother surface. If smoke staining is still visible in the wood grain after sanding, you might need wood bleach. A chemical treatment that lightens discoloration in the wood fibers. Apply it, let it work, neutralize it, and sand again lightly. Between every sanding stage, wipe everything down with a tack cloth to remove all dust. Dust under a new finish shows up as bumps and imperfections.
Priming, Sealing and Odor Blocking
This step is critical for smoke damaged cabinets. Don’t skip straight to finish coats. Use a primer specifically designed to block smoke odor and stains. These odor blocking primers create a vapor barrier that prevents smoke particles embedded in the wood from continuing to release odors and from bleeding through your new finish. Shellac based or oil based odor blocking primers work better than water based products for severe smoke damage. Apply an even coat to all bare wood surfaces. Cabinet boxes, doors, drawer fronts, everything. Let it dry completely according to product instructions. Some primers need 24 hours or more. This drying time matters because incompletely cured primer won’t seal properly.
Final Finishing: Staining or Painting
Here’s where matching gets tricky. Cabinet stain colors shift over time from light exposure and oxidation, so even if you know the original stain color, it won’t match your aged cabinets. Test stain samples on an inconspicuous area. Inside a door, back of a drawer front. If you can’t get a good match, you’ll need to refinish all visible surfaces for a uniform appearance. Staining only the smoke damaged sections makes the color difference obvious. Apply stain in thin, even coats, wiping off excess. Let each coat dry, assess the color, add more coats if needed. For painting, use a high quality cabinet paint and apply multiple thin coats rather than one thick coat. Thin coats dry smoother and more evenly. Finish with a protective topcoat. Polyurethane for stained cabinets, often built into cabinet paint formulations for painted finishes. Apply at least two topcoat layers for maximum protection and durability.
Complete cabinet refinishing takes time and patience. DIY works best when you have a small kitchen, minor to moderate damage, decent skill with finishing work, and time to do it right. Rushing leads to drips, uneven color, and a finish that doesn’t hold up. Extensive damage, large kitchens, or situations where you want professional results benefit from hiring restoration services. Properly refinished cabinets with quality odor blocking primers and protective topcoats resist future damage better than most original factory finishes and can last another 10 to 15 years or more.
Dealing with Hardware, Hinges and Cabinet Doors
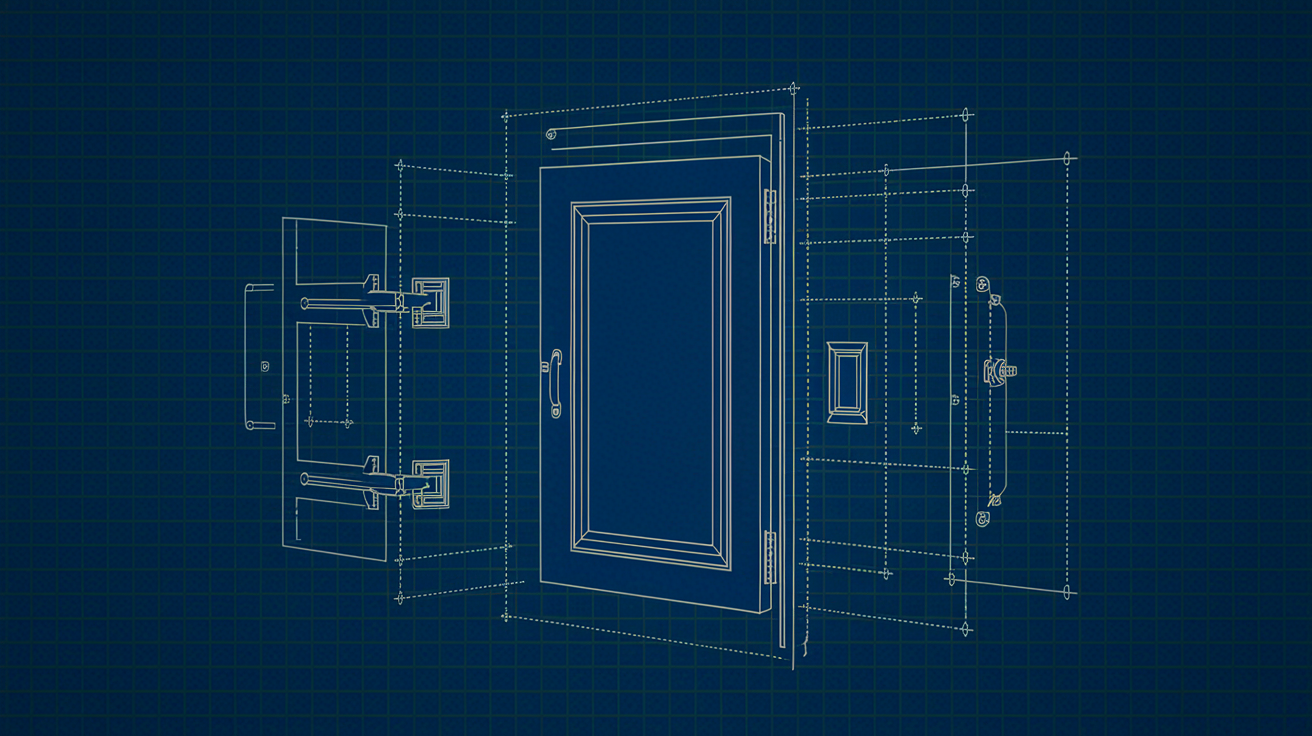
Cabinet doors and drawer fronts catch the most visible damage because they’re the largest exposed surfaces. Heat causes warping, smoke leaves heavy staining, and both together can make doors that won’t hang right or close properly. Hardware, hinges, handles, knobs, corrodes from smoke residue and gets damaged by harsh cleaning chemicals.
Hardware and door restoration process:
-
Remove all cabinet doors, drawer fronts, hinges and handles for separate treatment. Label everything with painter’s tape and a marker so you know what goes where. Doors from one cabinet might not fit another even when they look identical.
-
Clean hardware thoroughly or replace if corroded or permanently discolored. Soak metal hardware in warm soapy water, scrub with a brush, dry completely. If corrosion has pitted the surface or discoloration won’t come off, replacement is cheaper than trying to restore damaged hardware.
-
Assess doors and drawer fronts for warping that prevents proper closing. Lay each door on a flat surface. If it rocks or you can see gaps, it’s warped. Check drawer fronts by trying to fit them back on the drawer box. If they don’t sit flush, warping is the issue.
-
Clean, refinish, or replace doors based on damage severity and warping. Flat, cleanable doors get the full cleaning and refinishing treatment. Warped doors that affect function need replacement. You can’t un-warp wood that’s been heat damaged.
-
Reinstall using new hardware if originals cannot be restored. New hinges and handles are inexpensive compared to the rest of the restoration work and make everything look and function better.
Replacing just doors and drawer fronts while keeping the cabinet boxes is often more practical than trying to restore severely damaged components. When heat has warped doors so they won’t close flush, when staining goes through veneer to the substrate underneath, or when the cost of stripping and refinishing damaged doors approaches the cost of new components, replacement makes sense. You can order new doors and drawer fronts custom made to fit your existing cabinet boxes.
Mix and match works when damage varies across the kitchen. Maybe the cabinets near the stove need new doors but cabinets across the room cleaned up fine. The challenge is getting consistent appearance. New components won’t perfectly match old ones, even with careful stain matching, unless you refinish everything to create uniform color and sheen.
Professional Cabinet Restoration Services and What They Offer
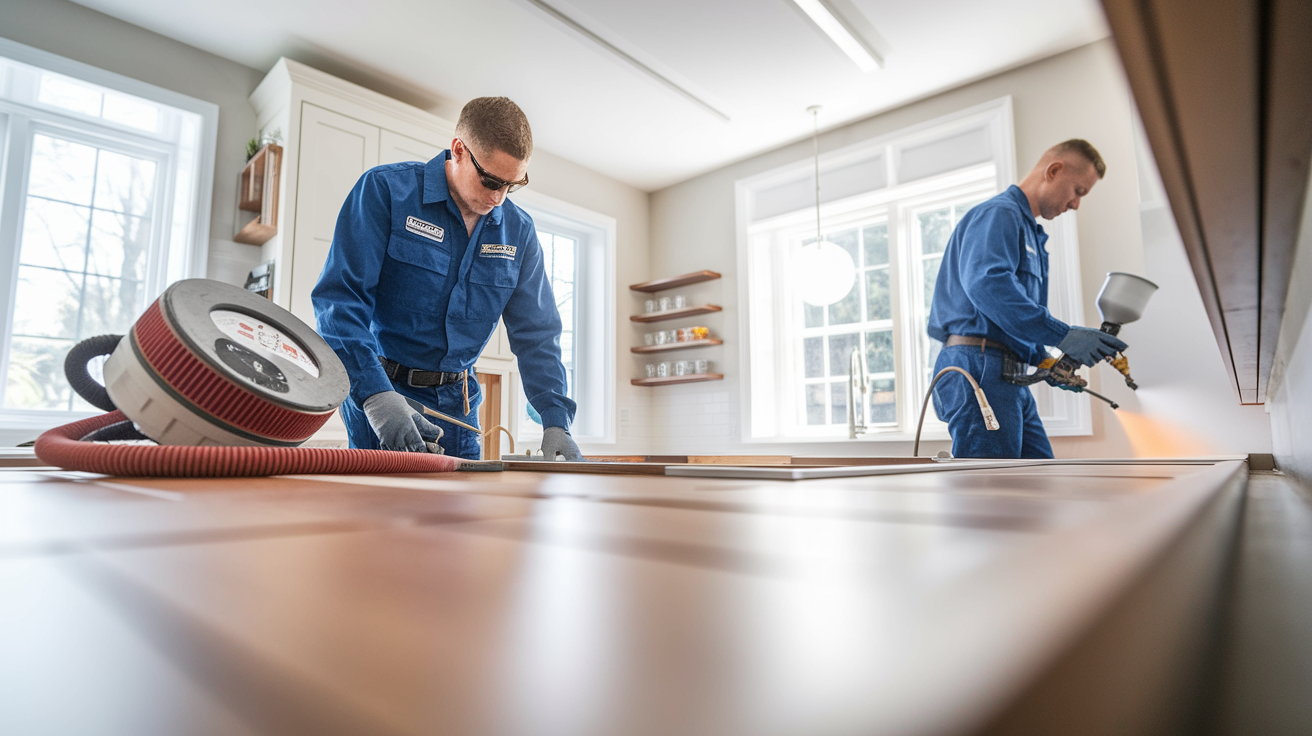
Professional restoration companies start with a detailed assessment that goes beyond what most homeowners can evaluate. Technicians examine cabinet composition. Solid wood, plywood, MDF, particleboard, because each material requires different treatment approaches. They identify the finish type since stripping oil based finishes requires different chemicals than water based finishes. They assess the damage source. Kitchen grease fires leave different residue than electrical fires or smoke from other rooms. And they check structural soundness by examining joints, looking for hidden water damage inside cabinet boxes, and testing for compromised wood that isn’t visible from outside.
The restoration process professionals use is more thorough than most DIY approaches. They use specialized HEPA equipment designed for smoke particle removal that captures particles too small for household vacuums. For structural damage, particularly water damage from extinguishing efforts, they can disassemble cabinets, repair or replace damaged components, and rebuild them to match the undamaged sections. Color matching on aged cabinets is both science and art. Professionals use stain samples, mix custom colors, and test on actual cabinet surfaces until they get it right. Many restoration companies now use environmentally friendly water based products that reduce chemical exposure during the restoration process and lower environmental impact. For more information on comprehensive damage restoration that addresses both fire and water damage from extinguishing efforts, see Water Damage Restoration.
Timeline expectations matter when you’re planning around a damaged kitchen. Simple cleaning and touch up work takes 1 to 2 days. The team comes in, deep cleans everything, addresses minor finish damage, deodorizes, and you’re done. Cabinet color changes through refinishing require about 3 to 5 days because they’re stripping, sanding, staining or painting, and applying protective topcoats with drying time between steps. Structural restoration or cabinet refacing takes longer, typically a few weeks, because doors and drawer fronts need to be ordered or custom made, veneer work is detailed, and installation takes time to get everything aligned and functioning properly.
Professional help is essential in specific situations. Extensive damage covering multiple cabinet sections is overwhelming and time consuming for DIY. Suspected structural compromise needs expert evaluation. If cabinets aren’t safe, you need to know before someone gets hurt. Insurance claim situations benefit from professional documentation and estimates that adjusters trust. And when you’ve tried DIY cleaning and the odor and staining persist, professionals have access to stronger products, better equipment, and more experience dealing with stubborn smoke damage.
Insurance Claims for Fire and Smoke Cabinet Damage

Document everything before you touch anything. Take photos from multiple angles. Wide shots showing the whole kitchen, close ups of specific damage on individual cabinets, interior shots with doors open showing smoke residue inside. The more documentation, the better. Take videos walking through the space explaining what you’re seeing. Create a written inventory describing the damage in detail. All this evidence supports your claim and prevents disputes about damage extent.
What to document: every cabinet surface showing smoke damage, all damaged contents inside cabinets (dishes, food, small appliances), affected appliances and countertops adjacent to cabinets, and any structural concerns like warping, charring, or separation at joints. Document the floor and ceiling near cabinets too if they show damage. Claims often cover related damage beyond just the cabinets themselves. Include dates and times on your photos if your camera supports it. Note any smells when you open cabinets because odor damage is real damage even when it’s not visible.
Professional inspection and estimates are critical for insurance purposes. Restoration companies assess the full scope of damage and provide detailed cost estimates that break down labor, materials, and timeline. These estimates are based on specific factors: number of cabinet units, cabinet style complexity (simple slab doors vs. intricate raised panels), kitchen size, wood species (refinishing oak costs differently than maple), required finishing processes (paint vs. stain vs. specialty finishes), and structural condition. Insurance adjusters need these details to process claims. Professional estimates carry more weight than homeowner guesses about repair costs.
Working with insurance adjusters gets easier when you have professional restoration companies involved. Many companies coordinate directly with adjusters, provide documentation in the format insurers require, and handle the back and forth about coverage questions. The typical timeline: file your claim within days of the incident, adjuster visits within a week or two, estimate review and approval takes another week to several weeks depending on complexity, then work can begin once approval comes through. Keep communication records, get everything in writing, and don’t start major work until the adjuster has assessed the damage unless it’s emergency mitigation to prevent further damage.
Homeowner responsibilities include maintaining temporary protective measures if needed (like covering exposed areas), preventing additional damage (don’t use damaged cabinets for storage if they’re structurally questionable), keeping all receipts for any emergency supplies or temporary repairs, and understanding disclosure obligations. If you plan to sell your house after restoration, most states require disclosure of past fire damage even after professional restoration. Keep all documentation, invoices, and warranties from the restoration work to provide future buyers. Proper documentation shows the issue was professionally addressed, which typically satisfies disclosure requirements and doesn’t significantly impact value.
Complete Cost Analysis: Cleaning Through Replacement
Restoration costs vary widely based on several factors. Damage severity is obvious. Light smoke staining costs less to clean than deep discoloration requiring complete refinishing. Kitchen size matters because you’re paying per cabinet unit or by the linear foot. Cabinet material and style affect costs since solid wood cabinets cost more to refinish than simple laminate cabinets, and ornate door styles take more labor than flat panels. Your chosen method (DIY vs. professional cleaning vs. refinishing vs. refacing vs. replacement) creates the biggest cost differences. And whether you hire professionals depends partly on labor costs in your region. Rates vary significantly between urban and rural areas.
| Restoration Type | Typical Cost Range | Timeline | Best For |
|---|---|---|---|
| Professional Cleaning Only | $200–$800 | 1-2 days | Light to moderate surface smoke damage, no permanent discoloration, structurally sound cabinets |
| DIY Refinishing | $300–$1,200 (materials only) | 1-3 weeks depending on kitchen size | Homeowners with time and basic finishing skills, moderate damage, small to medium kitchens |
| Professional Refinishing | $2,000–$6,000 | 3-5 days | Discoloration cleaning can’t remove, need consistent professional results, larger kitchens |
| Cabinet Refacing | $4,000–$10,000 | 2-3 weeks | Damaged doors but solid boxes, want updated look, budget allows more than refinishing |
| Complete Replacement | $8,000–$25,000+ | 4-8 weeks | Structural damage, severe warping or charring, water compromised boxes, or desire for completely new layout |
The main cost factors break down like this: number of cabinet units (a 10 foot kitchen costs half what a 20 foot kitchen costs), wood species matters because solid wood refinishing costs more than particleboard but also lasts longer and looks better, finish complexity affects labor (simple painted finish vs. custom stain matching and hand rubbed topcoats), structural repairs add costs if cabinet boxes need rebuilding or water damage correction, and regional labor rates vary from $40 per hour in some areas to $100+ per hour in expensive markets.
Total cost comparison needs to include time investment because your time has value. DIY saves money on labor but requires significant time. Cleaning and refinishing a full kitchen can take 40 to 80 hours spread over weeks when you include prep, multiple coats, and drying time. Professional restoration costs more upfront but you get your kitchen back faster and the results are usually more consistent. Replacement is most expensive in both money and time, taking months from ordering to installation, but it’s sometimes the only practical option. When cabinets are structurally sound, restoration typically delivers better value and lower environmental impact. Less waste, less resource consumption, lower overall costs. But make the decision based on your specific situation, not just general principles.
Preventing Future Smoke and Fire Damage to Cabinets
You can’t prevent every fire, but regular maintenance and smart safety measures reduce both the risk and the severity of damage when incidents happen. Small cooking fires are the most common source of kitchen smoke damage, and most are preventable with attention to what’s on the stove.
Prevention strategies for minimizing cabinet smoke damage:
-
Clean cabinets every 3 to 6 months to prevent grease buildup that intensifies smoke damage. Grease residue on cabinet surfaces attracts more smoke particles and makes damage worse when fires occur.
-
Install and maintain smoke detectors near but not directly above cooking areas. Direct placement over the stove causes too many false alarms from normal cooking, but nearby placement provides early warning.
-
Place an appropriate fire extinguisher within easy reach of the kitchen. Mount it near an exit, not behind the stove where you’d have to reach through flames to get it.
-
Ensure proper range hood ventilation to reduce airborne grease and smoke exposure. Clean or replace filters regularly so the hood actually removes smoke instead of just moving it around.
-
Keep cooking surfaces clean to prevent grease fires. Grease buildup on stovetops and in ovens is fuel for fires that spread to cabinets.
-
Inspect appliances regularly for electrical issues or malfunction signs. Frayed cords, flickering displays, or unusual smells mean something needs repair before it causes a fire.
-
Apply protective cabinet finishes that resist staining and are easier to clean. Quality polyurethane or conversion varnish topcoats on cabinets make future cleaning more effective and provide some protection against smoke penetration.
The three to six month cleaning schedule isn’t just about appearance. It prevents the grease and grime accumulation that makes smoke damage significantly worse when it happens. A greasy cabinet surface catches and holds smoke particles like a magnet. A clean surface lets you wipe away smoke residue more easily after minor incidents and reduces how deeply smoke penetrates during serious fires.
Simple maintenance practices make a difference: check smoke detector batteries twice a year when you change clocks for daylight saving time, inspect range hood filters monthly and clean or replace them when grease buildup is visible, address minor cabinet finish damage like chips or scratches promptly before they allow smoke and moisture to penetrate into the wood substrate, and keep the area around your stove clear of flammable materials like dish towels, paper towels, and packaging.
Final Words
Smoke damaged kitchen cabinets can be overwhelming to face, but most surface damage responds well to the right cleaning approach.
Start with safety checks and proper ventilation. Work through the cleaning process methodically. Be patient with stubborn stains.
When cleaning alone doesn’t cut it, refinishing or refacing gives you solid options before jumping to full replacement. Remember that restoration usually costs less, wastes less, and keeps structurally sound cabinets working for years to come.
If the damage feels too big to handle, or if you’re dealing with structural concerns, professionals can assess what’s salvageable and what’s not.
FAQ
How do you remove smoke damage from kitchen cabinets?
To remove smoke damage from kitchen cabinets, start by vacuuming loose soot with a HEPA vacuum, then clean surfaces with equal parts warm water and white vinegar plus dish soap. Spray the solution on one section at a time, let it sit for several minutes to break down residue, then wipe with a microfiber cloth using gentle circular motions. For stubborn stains, apply a baking soda paste and gently scrub before rinsing thoroughly with clean water and drying completely to prevent water damage.
Can smoke damaged furniture be saved?
Smoke damaged furniture can often be saved if the damage is primarily surface-level without structural compromise or deep charring. The salvageability depends on the furniture material—solid wood responds best to cleaning and refinishing, while particleboard and MDF absorb smoke deeply and may not be restorable. Professional assessment helps determine if cleaning, refinishing, or replacement is the most practical option based on damage extent and furniture value.
Can you paint over smoke damage?
You can paint over smoke damage only after thorough cleaning and applying an odor-blocking primer designed specifically for smoke damage. Painting directly over smoke residue or staining without proper preparation will allow odors to penetrate through the new paint and may cause yellowing or discoloration over time. The surface must be completely clean, dry, and sealed with vapor barrier primer before applying finish coats for lasting results.
Can damaged kitchen cabinets be repaired?
Damaged kitchen cabinets can be repaired when the damage is surface-level or cosmetic without affecting structural integrity. Repair options include cleaning and refinishing for smoke staining, replacing individual doors and drawer fronts while keeping boxes, or refacing with new veneer over existing structures. Complete replacement becomes necessary only when cabinets have severe warping, deep charring that compromises wood integrity, or structural damage from heat or water exposure during fire extinguishing.
How long does it take to clean smoke damaged cabinets?
Cleaning smoke damaged cabinets typically takes one to two days for basic surface cleaning and touch-ups in an average kitchen. More extensive projects requiring color changes or refinishing need three to five days to complete properly. Cabinet refacing or structural restoration may take several weeks depending on damage severity, with adequate drying time between cleaning sessions being critical to prevent finish damage and allow moisture to fully evaporate.
What cleaning solution works best for smoke damaged cabinets?
The best cleaning solution for smoke damaged cabinets combines equal parts warm water and white vinegar with a few drops of dish soap for mild to moderate damage. For heavier smoke buildup, baking soda paste applied to stubborn spots provides gentle abrasive action without damaging finishes. Always test any cleaning solution on a hidden cabinet area first and wait ten minutes to check for finish damage before treating entire surfaces.
When should you replace instead of restore smoke damaged cabinets?
You should replace smoke damaged cabinets when structural damage compromises safety, extensive charring penetrates deep into wood, severe warping prevents doors from closing properly, or restoration costs exceed fifty percent of replacement costs. Cabinets that suffered significant water damage during fire extinguishing may also require replacement if moisture caused joint failure or mold growth. Professional inspection helps determine if cabinet boxes remain structurally sound enough for restoration.
How do you eliminate smoke odor from kitchen cabinets?
To eliminate smoke odor from kitchen cabinets, clean all surfaces thoroughly, then place activated charcoal or open baking soda containers inside cabinets with doors open for several days to absorb odors. For persistent smells that survive cleaning and natural deodorizing, apply odor-blocking primer-sealer designed to trap remaining odor molecules before refinishing. Professional ozone treatment provides the strongest intervention when smoke has penetrated deeply into porous cabinet materials like MDF.
What safety equipment do you need before cleaning fire damaged cabinets?
Before cleaning fire damaged cabinets, you need an N95 or better respirator mask to protect from smoke particles, safety goggles to shield eyes from soot and cleaning chemicals, and heavy-duty gloves with long sleeves to prevent skin contact with residue. Ensure the area has proper ventilation by opening windows and using fans, and confirm that electrical systems are safe before beginning work to prevent shock hazards.
How much does professional cabinet smoke damage restoration cost?
Professional cabinet smoke damage restoration typically costs between cleaning-only services at the lower end and complete refinishing or refacing at the higher end, with exact pricing based on cabinet quantity, wood species, kitchen size, and required finishing processes. Simple cleaning and touch-ups represent the most affordable option, while cabinet refacing falls in the middle range, and complete replacement is most expensive but sometimes necessary for severe structural damage.
