
A burst pipe doesn’t give you much warning before hundreds of gallons start collecting in your ceiling, and that water weighs over eight pounds per gallon. What starts as a small drip can turn into a structural problem fast, and if you’re staring at a bulging ceiling or spreading water stain right now, you need to know what to do in the next few minutes, not next week. This guide walks you through the emergency steps that stop the damage from spreading, explains how to tell a burst pipe from other ceiling leaks, and lays out your repair options so you can make decisions with a clear head instead of guessing under pressure.
Identifying Burst Pipe vs. Other Causes of Ceiling Damage

If you’re standing under a dripping ceiling right now, you need the right answer fast. Misdiagnosing the source wastes time, money, and sends you chasing the wrong fix while water damage spreads.
The quickest diagnostic test is shutting off your main water valve. Go to the shutoff (usually near the water meter or where the main line enters your home) and turn it clockwise until it stops. Wait a few minutes. If the dripping slows and then stops completely, you’ve got a burst pipe or pipe leak. If water keeps coming even with the supply shut off, the source is somewhere else, probably your roof. This simple test tells you whether the problem is inside your plumbing system or coming from outside.
Look at the water itself. Clear water dripping steadily, regardless of weather conditions, points to a burst pipe. Pipe leaks keep going on sunny days, rainy days, and everything in between. Roof leaks behave differently. They show up during or right after rain, then slow down or stop when weather clears. The water from roof damage often looks brownish or rust colored from picking up debris and roofing material on the way down. Burst pipe water damage typically shows as clean water at first, though you might see brownish ceiling stains and dark rings forming around the leak point as drywall absorbs moisture.
Timing and secondary signs help confirm the source. A sudden water pressure drop throughout your home suggests a pipe problem. An unexplained spike in your water bill, even when you haven’t changed usage, means water’s going somewhere it shouldn’t, often into your ceiling. You might hear dripping sounds inside walls or above the ceiling between floor levels. With roof leaks, the pattern follows precipitation. The warning signs of a burst pipe include peeling paint that bubbles up around the damaged area, a sagging ceiling that feels soft or bows downward, and musty odors that develop as moisture soaks into insulation and drywall.
Water doesn’t always drip straight down. It travels along ceiling joists, beams, and framing before finding a weak point to come through. That means the visible ceiling damage (the stain or sag you can see) might be several feet away from where the actual pipe burst happened. Don’t assume the problem is directly above the drip.
Diagnostic signs specific to burst pipes:
- Clear water dripping steadily
- Leak continues during dry weather
- Leak stops when main water valve is shut off
- Brownish ceiling stains with dark rings
- Ceiling bulging or sagging
- Sudden water pressure decrease
- Unexplained water bill increase
- Dripping sounds inside walls or ceiling
Emergency Response Steps for Burst Pipe Ceiling Damage

A small half inch pipe can dump over 400 gallons in just a few hours. Water weighs more than 8.5 pounds per gallon, and that weight collects fast in ceiling cavities. What starts as a drip can turn into a collapse.
Cut the power first. Go to your electrical breaker box and shut off the circuit serving the area with ceiling damage from the burst pipe, especially if water is near light fixtures, outlets, or any electrical components. Water conducts electricity, and even a small amount around wiring creates shock risk. If you’re not sure which breaker controls the damaged area, flip the main breaker to kill power to the whole zone. Don’t skip this step to save a few minutes. Electrocution happens faster than ceiling collapse.
Find your main water valve and turn it clockwise until it stops completely. This is usually located where the water line enters your home (near the water meter in a basement, crawl space, utility room, or sometimes outside near the foundation). If you have a gate style valve, it might take several full rotations. If you have a ball valve with a lever handle, a quarter turn perpendicular to the pipe shuts it off. Stopping the water supply is the only way to stop a burst pipe from flooding. Every second counts.
If you see a ceiling bulging downward or sagging with visible water weight, you need controlled drainage before it collapses on its own terms. Grab a sturdy screwdriver or similar pointed tool. Place a large bucket or container directly under the lowest point of the sag. That’s where the water has pooled. Carefully puncture a small hole right at that low spot. Water will drain out in a controlled stream instead of the ceiling giving way all at once and dumping gallons in an unpredictable mess. This releases pressure and prevents sudden structural failure. Wear safety glasses and gloves. Ceiling material and insulation will be soaked and heavy.
Set up containment around the immediate area. Position buckets and large containers under all active drips and around the puncture point if you’ve created one. Lay plastic sheeting or tarps on the floor to protect flooring, carpets, and subflooring from water damage. Move furniture, electronics, rugs, and anything valuable away from the wet zone. Water spreads as it drips and can travel across floors. Keep children and pets completely away from any area where the ceiling is sagging, swollen, or bowing. Even after you’ve relieved some pressure, compromised drywall and framing can still give way. Monitor your containers and empty them as they fill. If the burst pipe was significant, drainage continues for a while even after shutoff as trapped water works its way out.
Emergency sequence steps:
- Cut power at breaker box to affected area
- Shut off main water valve immediately
- Keep children and pets away from damaged ceiling
- Place buckets and containers under active drips
- Lay tarps or plastic sheeting to protect floors
- Move furniture and belongings away from wet areas
- Relieve bulging ceiling pressure with controlled puncture using screwdriver at lowest sag point
- Monitor drainage and empty containers continuously
Common Causes Behind Burst Pipes in Ceilings

Pipes don’t just burst randomly. Something puts them under stress until they fail. Understanding what causes the break helps you prevent the next one.
Freezing temperatures are the most common culprit, especially in ceiling spaces like unheated attics, crawl spaces, and areas near exterior walls. When water inside a pipe freezes, it expands with tremendous force. Ice takes up about 9% more volume than liquid water, and that expansion creates pressure the pipe walls can’t handle. The burst often happens at a weak point: a joint, elbow, or section where the pipe was already slightly corroded. Even a small crack lets pressure escape violently once the ice thaws and water starts flowing again. Pipes in ceilings are especially vulnerable because heat rises away from them, and insulation meant to keep your house warm can actually trap cold air around the pipes above it.
High water pressure above 60 psi strains every joint, valve, and fitting in your system until something gives. Pressure that’s too high doesn’t just damage pipes. It wears out washers, loosens connections, and fatigues metal over time. Corrosion weakens pipes from the inside out. Older galvanized steel pipes rust and develop pinhole leaks that eventually enlarge into full breaks. Even copper pipes corrode when exposed to certain water chemistry or when dissimilar metals create galvanic reactions at joints. Severe clogs trapped in a pipe section create localized pressure buildup behind the blockage, especially if the clog combines with other stress factors like freezing or high system pressure. Faulty installation (poorly soldered joints, incorrect pipe sizing, inadequate support brackets, or pipes run too close to exterior walls without protection) sets up future failures.
| Cause | How It Leads to Pipe Burst | Risk Locations |
|---|---|---|
| Freezing temperatures | Ice expansion creates extreme pressure on pipe walls until they crack or split | Uninsulated attics, crawl spaces, exterior walls, unheated rooms |
| High water pressure | Pressure above 60 psi stresses joints and weakens pipe material over time | Entire system, especially older pipes and connection points |
| Pipe corrosion | Rust and mineral buildup thin pipe walls and create weak spots that rupture | Galvanized steel pipes, older copper, hard water areas |
| Severe clogs | Blockages trap water and create pressure buildup in isolated pipe sections | Supply lines, drainage pipes, areas with mineral deposits |
| Faulty installation | Poor joints, inadequate support, or improper pipe routing creates stress points | Recent renovations, DIY plumbing work, improperly supported ceiling runs |
Professional Assessment of Structural Damage

You can see the water stain and the sag. What you can’t see is how far the moisture traveled through insulation, along joists, and into framing before it finally dripped through. Visual inspection catches the obvious damage and misses the hidden rot setting in behind walls and above ceilings.
Professionals use moisture meters and thermal imaging cameras to map the full extent of water damage. A moisture meter measures water content in building materials (drywall, wood framing, insulation) and identifies areas that look dry but are still holding dangerous levels of moisture. Thermal imaging shows temperature differences that reveal wet insulation, trapped water in ceiling cavities, and moisture wicking along structural members. These tools find damage you’d never spot by eye, which means the difference between drying out the real problem and leaving wet material to rot and grow mold for months until you notice new stains or sagging. The water damage restoration process combines this detection technology with systematic drying, material removal, and reconstruction based on what the equipment actually finds, not just what’s visible.
Structural assessment focuses on load bearing components and safety. Ceiling joists can absorb moisture and lose strength, especially if they’re older dimensional lumber rather than engineered materials. Support beams and framing that got soaked need evaluation for deflection, rot, and whether they can still carry the designed load. Insulation that’s wet doesn’t just lose its R value. It holds moisture against wood, creating perfect conditions for decay. Drywall can look mostly intact but have enough water absorption that it’s soft, crumbly, and won’t hold fasteners. Professionals check whether framing needs sister joists for reinforcement, whether sections need replacement, and if ceiling structure can support new drywall or requires rebuilding. They test multiple points because, again, water travels. Structural compromise can extend well beyond the visible ceiling damage.
Drying and Preventing Mold After a Ceiling Pipe Burst

Mold starts within 24 to 48 hours. That’s the window you have to get moisture levels down before you’re dealing with a mold remediation problem on top of water damage.
Professional drying uses industrial air movers and dehumidifiers running continuously for 3 to 7 days, depending on how much water soaked in and how humid your climate is. Air movers create constant airflow across wet surfaces and through ceiling cavities, pulling moisture out of materials and into the air. Dehumidifiers pull that moisture out of the air and condense it into collection tanks. Professionals monitor with moisture meters daily, taking readings in multiple spots until everything reaches safe dry levels below 15% moisture content for wood and similar thresholds for drywall and insulation. Without this equipment, drying takes longer, often doesn’t reach hidden moisture, and leaves conditions perfect for mold.
For minor water damage (a small area, limited exposure time, materials that didn’t get fully saturated), you might handle drying yourself if you act immediately. Set up as many fans as possible to keep air moving constantly across the damaged area. Rent or buy a residential dehumidifier and run it continuously. If outdoor humidity is low and it’s not going to rain, open windows to increase ventilation and let moist air escape. Pull down any wet insulation because it won’t dry properly and holds moisture against framing. Check moisture levels daily if you have a meter, or at minimum feel the materials and look for any signs they’re staying damp.
Even with good drying, watch for mold. Musty smells, visible dark spots, or any fuzzy growth means mold has started and needs professional mold remediation. Mold isn’t just a cosmetic problem. It compromises indoor air quality and creates health hazards, especially for anyone with asthma, allergies, or respiratory issues. If you see mold, stop DIY efforts and call pros with proper containment equipment and antimicrobial treatments. If the ceiling damage from the burst pipe was extensive, skip DIY drying altogether and get professional help from the start. The cost of proper drying is far less than tearing out mold contaminated materials later.
Effective drying strategies:
- Increase air circulation with fans
- Run dehumidifiers continuously
- Open windows in dry weather
- Remove wet insulation and materials
- Monitor moisture levels daily
Ceiling Repair Options: Patching vs. Replacement
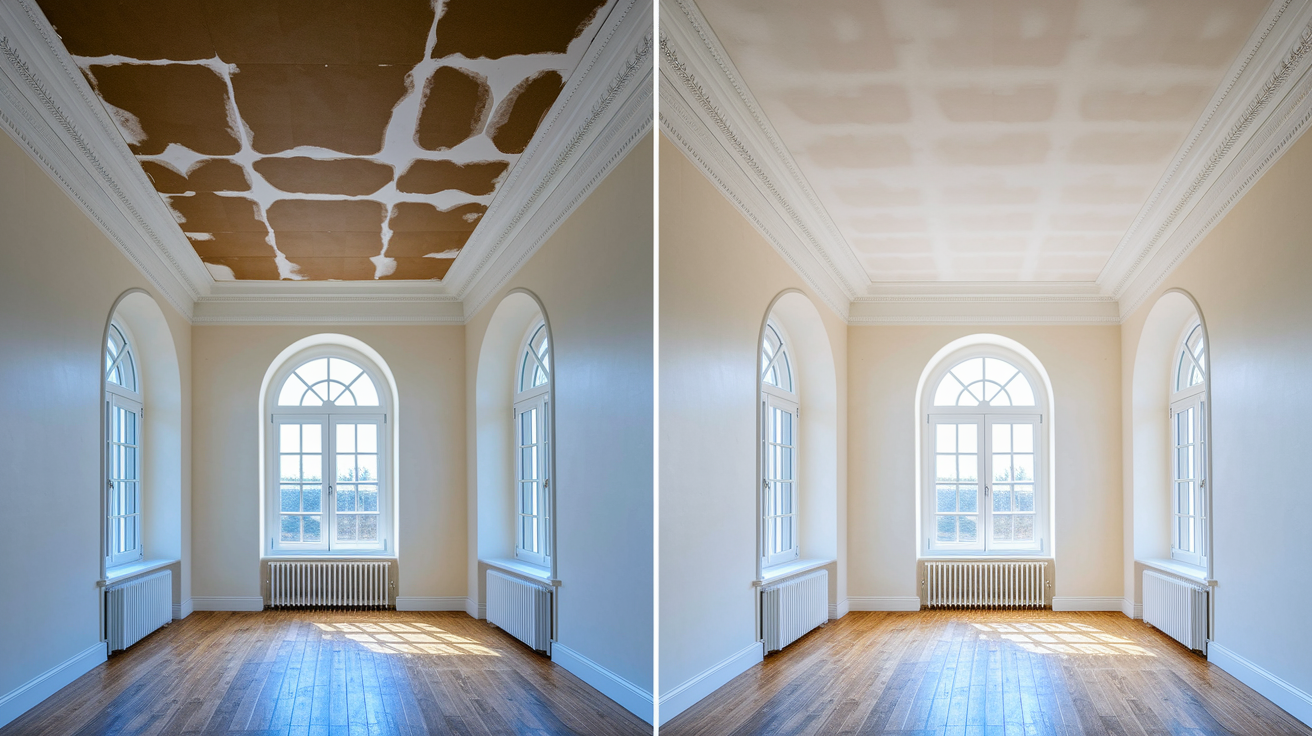
Once everything’s dry, you have to fix the ceiling itself. The decision between patching and full replacement depends on how much damage the materials took and whether they’re still structurally sound.
Minor water stains on otherwise solid drywall can be patched. If the drywall didn’t sag, isn’t soft or crumbly, and just has discoloration, you can seal the stain with a stain blocking primer, then patch any small holes with joint compound, sand smooth, and repaint. Texture matching takes some skill. If your ceiling has knockdown, orange peel, or popcorn texture, you’ll need to replicate it before painting or the patch will stand out. Moderate damage with some sagging or softness might need a section replacement. Cut out the compromised drywall in a clean square or rectangle back to solid ceiling joists, install a new piece of drywall, tape and mud the seams, match the texture, prime, and paint. This works when damage is localized and surrounding material is dry and intact.
Full ceiling replacement becomes necessary when drywall is sagging across a wide area, when it stayed wet long enough to crumble or lose structural integrity, or when mold growth has contaminated the material. At that point, trying to save sections just means you’ll have recurring problems (soft spots, cracks, more sagging, or mold returning). Replacement means pulling down all compromised drywall, inspecting and replacing any damaged insulation, checking framing for rot, installing new drywall across the affected area, finishing seams, applying texture to match the rest of the ceiling, priming, and painting. It’s more work and higher cost, but it’s the only way to ensure a safe, stable, long lasting repair.
| Damage Level | Repair Approach | Timeline |
|---|---|---|
| Minor water stains | Patch and paint | 1-2 days |
| Moderate sagging | Section replacement | 2-3 days |
| Severe structural damage | Full replacement | 3-5 days |
| Mold contamination | Removal and replacement | 4-7 days |
Cost Breakdown for Burst Pipe Ceiling Repairs

Costs add up across multiple services: plumbing, water damage restoration, structural repairs, and finishing work. A simple accessible pipe repair might run a few hundred dollars. Add water extraction, drying equipment, ceiling material replacement, and finishing, and you’re looking at $2,000 to $4,000 or more depending on damage extent.
Several factors push costs higher. Accessibility matters. A pipe hidden above a finished ceiling requires cutting access, which means more drywall repair. The amount of water that escaped before shutoff affects how much drying is needed and how far materials must be removed. Mold remediation adds cost for containment, specialized cleaning, and disposal of contaminated materials. If water damaged floors, walls, or belongings below the ceiling, restoration expands to those areas. If structural framing needs reinforcement or replacement, carpentry labor and materials increase the total. Emergency callouts, especially after hours or on weekends, typically cost more than standard service rates.
Most burst pipe ceiling repairs fall in the $2,000 to $4,000 range when all services are included, though extensive damage can run higher. Minor incidents caught fast might stay under $1,500. Severe structural damage requiring major reconstruction can exceed $6,000.
Cost components:
- Emergency plumber callout
- Pipe repair or replacement
- Water extraction services
- Drying and dehumidification
- Ceiling material replacement
- Painting and finishing work
DIY Temporary Fixes vs. Professional Pipe Repair

Temporary fixes are exactly that: emergency measures to stop active leaking until a professional can make permanent repairs. They are not long term solutions.
You can use temporary methods on small pinhole leaks in accessible pipes. Pipe clamp kits, which are metal sleeves with rubber gaskets and tightening screws, fit over the damaged section and compress to seal the leak. Fiberglass repair tape soaked in resin wraps around the pipe and hardens into a temporary seal. Epoxy putty can be molded over small cracks and holes, though it only works on dry pipes, so you’d need to drain the line first. Plumber’s putty serves as a quick seal for very minor seeps at joints. These fixes might hold for days or even weeks, but they’re stopgaps. Pressure, temperature changes, and continued water flow will eventually compromise them.
Professional repair is necessary for permanent solutions and for anything beyond a tiny accessible leak. If the pipe completely burst, if the damage is inside a wall or ceiling where you can’t easily reach it, if multiple sections are compromised, or if you’re dealing with old corroded piping that might fail elsewhere soon, call a licensed plumber. Professionals cut out the damaged section, install new pipe with proper fittings, test the system under pressure, and ensure the repair meets code. For ceiling pipe bursts, you typically need the plumber first to stop the water flow and fix the pipe, then a emergency plumbing services restoration company immediately after to handle water extraction, drying, mold prevention, and reconstruction. Some restoration companies offer integrated services that include both emergency plumbing and water damage restoration, which simplifies coordination.
When selecting contractors, verify licensing and insurance, check references or reviews, get written estimates that detail scope of work, and confirm they’ll handle necessary permits. For insurance claims, you might need contractors who work directly with adjusters and provide documentation in the format your carrier requires.
| Repair Type | DIY Appropriate? | Professional Required? |
|---|---|---|
| Pinhole leak in accessible pipe | Yes, as temporary fix | Yes, for permanent repair |
| Pipe completely burst | No | Yes, immediately |
| Concealed ceiling pipe | No | Yes, requires access and proper repair |
| Water-damaged ceiling materials | Minor patching only | Yes, for extensive damage |
| Mold contamination | No | Yes, requires containment and remediation |
Timeline Expectations for Complete Ceiling Restoration

From the moment a pipe bursts to when your ceiling looks finished again typically takes 1 to 2 weeks. That’s not continuous work. It’s sequential phases that each need time to complete properly.
Emergency pipe repair happens the same day you call. A plumber arrives, diagnoses the break, shuts off water if you haven’t already, and either repairs or replaces the damaged section. That’s a few hours of work in most cases. Water extraction starts immediately after or even simultaneously if you’ve called a restoration company. They pull out standing water with pumps and vacuums, which usually takes less than a day. Then comes the drying process, 3 to 7 days depending on how much water soaked into materials and how humid conditions are. You can’t skip or rush this. Wet framing and insulation need time and continuous airflow to reach safe moisture levels. Once moisture readings confirm everything’s dry, ceiling reconstruction begins. Removing damaged drywall, installing new sections, taping, mudding, and sanding takes 2 to 4 days depending on the size of the damaged area. Painting and finishing, including texture matching and primer coats, adds another 1 to 2 days, with drying time between coats.
Several factors extend timelines. Hidden damage discovered during demolition (rotted framing, mold, electrical issues) requires additional work before reconstruction. Material availability, especially for matching textures or specific drywall types, can delay installation. Complex ceiling features like coffered designs, vaulted ceilings, or integrated lighting take longer to reconstruct than flat drywall. Insurance approval processes sometimes pause work while adjusters inspect and authorize repairs. Weather affects drying time, especially in humid climates or rainy seasons.
During restoration, expect some disruption. The damaged area will be torn open with equipment running. Dehumidifiers and air movers are loud. Access to rooms might be restricted. Dust from demolition and drywall work spreads despite containment efforts. Plan to move belongings, cover furniture, and possibly relocate to unaffected areas of your home during active work phases. The inconvenience is temporary, but proper restoration doesn’t happen overnight.
Timeline phases with timeframes:
- Emergency pipe repair (same day)
- Water extraction (1 day)
- Drying process (3-7 days)
- Ceiling reconstruction (2-4 days)
- Painting and finishing (1-2 days)
Understanding Insurance Coverage and Claims Process

Homeowners insurance typically covers sudden and accidental burst pipes, but understanding what’s covered, what’s excluded, and how to file properly makes the difference between a smooth claim and a denied one.
Standard policies cover the immediate water damage from a burst pipe: the emergency plumbing repair, water extraction, drying, ceiling reconstruction, and damaged belongings. The key words are “sudden and accidental.” If a pipe bursts unexpectedly due to freezing, pressure, or sudden failure, that’s covered. What’s not covered is damage from long term neglect or maintenance issues. If the pipe was leaking for weeks or months and you ignored it, the insurer can deny the claim for lack of proper maintenance. Gradual damage (slow seepage that caused rot over time) isn’t covered. Flooding from sources like sewer backups, groundwater, or natural flood events requires separate flood insurance. Some policies exclude certain pipe materials or set coverage limits for older plumbing systems, so review your policy specifics.
Before you touch anything beyond emergency safety measures, document everything. Take clear photos and videos of the active water flow from the burst pipe, all ceiling damage including stains and sagging, water on floors, damaged belongings, and wet walls. Photograph the source of the leak from multiple angles once the plumber identifies it. Capture wide shots showing the extent of damage and close ups showing details like mold spots, crumbling drywall, or bulging areas. Record the date and exact time you discovered the burst pipe. Make a written list of everything affected: furniture, electronics, flooring, ceiling areas, stored items. This documentation proves the extent of damage and supports your claim amount.
Contact your insurance company within 24 to 48 hours of discovering the damage. Most policies require prompt notification. Explain what happened, when it happened, and what immediate steps you’ve taken. The insurer will assign an adjuster who’ll schedule an inspection. The adjuster examines the damage, reviews your documentation, and determines what’s covered and the claim value. Have your photos, videos, and written damage list ready for this inspection.
Get repair estimates from licensed contractors before the adjuster visit if possible, or at minimum right after. Detailed estimates showing labor, materials, and specific work scope help justify claim amounts. Some restoration companies work directly with insurance adjusters, providing documentation in the formats insurers require and even handling direct billing. This streamlines the process and reduces back and forth. Keep every receipt for emergency repairs, equipment rental, temporary lodging if you had to leave your home, and any other burst pipe related expenses. These support reimbursement requests. Understand your deductible and coverage limits before authorizing major work. If your deductible is $2,500 and total damage is $3,000, you’re paying $2,500 and the insurer covers $500. Know whether that makes a claim worthwhile or if you’d rather pay out of pocket to avoid a claim on your record.
Insurance process elements:
- Photograph active water flow and source
- Capture all water stains and ceiling damage
- Document bulging or sagging areas
- Photograph damaged belongings and furnishings
- Record exact date and time of discovery
- Notify insurance company within 24 to 48 hours
- Schedule adjuster inspection promptly
- Understand deductible and coverage limits before proceeding
Long-Term Effects of Untreated Ceiling Water Damage
Skipping proper water damage restoration or trying to cover up damage without actually fixing it creates problems that compound over months and years. Wood framing exposed to moisture begins to rot. Ceiling joists lose structural strength, sag further, and eventually fail completely, leading to collapse. Even if collapse doesn’t happen, compromised framing can’t safely support the designed load, which becomes a serious safety hazard. Drywall that dried on the surface but retained moisture inside stays soft and crumbly. It won’t hold paint, develops cracks, and continues deteriorating. Electrical wiring that got wet corrodes, creating fire hazards and system failures. Insulation that stayed wet loses all effectiveness, increases energy costs, and holds moisture against wood, accelerating rot.
Mold and mildew don’t stop growing just because you can’t see them anymore. Without proper drying and treatment, mold spreads through ceiling cavities, insulation, and ductwork. It releases spores into your indoor air continuously. Respiratory problems, allergic reactions, asthma attacks, and persistent sinus issues affect anyone living in the space, with children, elderly individuals, and anyone with existing health conditions facing the greatest risk. Musty odors permeate the home and don’t go away because the source is still there, hidden above the ceiling. Air quality stays poor, and no amount of air fresheners or cleaning fixes it.
Financially, untreated water damage destroys property value. Home inspections reveal hidden moisture, mold, and structural issues, which either kill sales or force major price reductions. Even if you don’t disclose the damage, you’re legally liable for problems you knew about and didn’t fix. Future buyers can sue for misrepresentation. Attempting to sell a home with a history of water damage and improper repairs creates liability that follows you even after closing. The cost of doing restoration right the first time is always less than dealing with these long term consequences.
Long-term consequences:
- Chronic mold and mildew growth
- Weakened ceiling joists and framing
- Compromised electrical systems
- Persistent musty odors
- Reduced indoor air quality
- Decreased property resale value
- Potential liability during property sale
Preventing Future Pipe Bursts in Ceiling Spaces
Preventing the next burst pipe is cheaper, easier, and far less stressful than dealing with another emergency. Most preventive measures are straightforward and don’t require professional help.
Winter protection focuses on keeping pipes above freezing. Insulate any pipes running through unheated attics, crawl spaces, or exterior wall cavities using foam pipe insulation sleeves. Seal air leaks around windows, doors, rim joists, and any gaps where cold air can reach pipes. Keep your thermostat set to at least 55 degrees Fahrenheit even when you’re away. The cost of a bit of extra heat is nothing compared to burst pipe repairs. On extremely cold nights, let faucets drip slightly to keep water moving through pipes, which prevents ice formation. Disconnect and drain outdoor hoses before winter, and shut off water to exterior faucets if your system has isolation valves for those lines. Open cabinet doors under sinks on exterior walls to let warm air circulate around pipes.
Pressure regulation and routine maintenance catch problems before they become emergencies. Install a pressure regulator on your main water line if you don’t already have one, and set it to keep pressure below 60 psi. Check the gauge periodically to confirm it’s working. Schedule annual plumbing inspections where a professional tests pressure, examines pipe joints for corrosion or leaks, checks that fittings are tight, and identifies any sections of old piping that should be replaced before they fail. Flush your water heater annually to remove sediment buildup that causes corrosion. If you have hard water, install a water softener to prevent mineral deposits inside pipes that lead to blockages and pressure issues. Fix small leaks at faucets, toilets, and appliances immediately instead of letting them worsen.
Modern monitoring technology adds another protection layer. Install water leak detectors in high risk areas like near water heaters, under sinks, in laundry rooms, and in attics where ceiling pipes run. These battery powered sensors sound alarms and send smartphone alerts the moment they detect moisture, allowing you to catch leaks before they become major water damage. Smart home systems can integrate leak detectors with automatic shutoff valves that close the main water supply when sensors trigger. Even basic detectors without connectivity give you early warning.
Annual professional inspections are the best prevention investment. A plumber can spot early warning signs you’d miss: slight corrosion, joints starting to weep, pressure fluctuations, or aging materials nearing end of life. Catching and fixing these issues costs hundreds, not thousands. Inspections also verify that previous repairs are holding and that your preventive measures are working as intended.
| Prevention Measure | Best Time | Frequency |
|---|---|---|
| Pipe insulation installation | Fall, before first freeze | Once, then inspect annually |
| Pressure regulator check | Spring and fall | Every 6 months |
| Plumbing system inspection | Spring or early summer | Annually |
| Water heater flushing | Fall | Annually |
| Leak detector battery check | When changing smoke alarm batteries | Every 6 months |
| Thermostat minimum setting verification | Before leaving for extended periods | As needed, minimum before winter travel |
Final Words
Ceiling damage from burst pipes hits fast, but knowing the signs, shutting things down properly, and understanding your next steps makes a huge difference.
Some repairs you can handle temporarily. Most need a professional to make sure the job’s actually done right, from hidden moisture to structural checks.
Document everything, contact your insurance, and don’t wait on drying. Mold doesn’t take days off.
Prevention matters too—insulated pipes, annual inspections, and a thermostat that stays above 55 degrees can save you from doing this all over again.
You’ve got a plan now. Use it.
FAQ
Will insurance pay for ceiling damage?
Insurance will typically pay for ceiling damage from a burst pipe if the damage is sudden and accidental, but policies generally exclude damage from ongoing leaks, neglect, or maintenance issues that should have been addressed earlier.
Can a water damaged ceiling be fixed?
A water damaged ceiling can be fixed through patching for minor stains or complete replacement for sagging, mold-contaminated, or structurally compromised sections, depending on the extent and type of damage present.
How long does it take for a ceiling to collapse from water damage?
A ceiling can collapse from water damage within hours to days depending on water volume and ceiling material strength, with bulging or sagging sections indicating imminent collapse risk requiring immediate controlled drainage.
What to do if a pipe bursts in the ceiling?
If a pipe bursts in the ceiling, immediately shut off power at the breaker box, turn off the main water valve, place buckets under drips, and carefully puncture bulging areas at the lowest point to control drainage.
How do I know if ceiling damage is from a burst pipe or roof leak?
Ceiling damage is from a burst pipe if clear water drips steadily regardless of weather and stops when you shut the main water valve, while roof leaks show discolored water only during or after rain.
How long does professional ceiling drying take after a pipe burst?
Professional ceiling drying takes 3 to 7 days using industrial air movers and dehumidifiers, depending on damage extent, humidity levels, and how much water saturated the ceiling and surrounding materials.
When should I replace the ceiling instead of patching it?
You should replace the ceiling instead of patching when drywall is sagging, shows mold growth, has structural compromise, or when water damage covers large areas that patching cannot adequately restore.
How much does burst pipe ceiling repair cost?
Burst pipe ceiling repair costs typically range from $2,000 to $4,000 or more, depending on pipe accessibility, water damage extent, ceiling replacement needs, and whether mold remediation is required.
Can I temporarily fix a burst ceiling pipe myself?
You can temporarily fix small pinhole leaks in accessible pipes using pipe clamps, repair sleeves, or fiberglass tape as emergency measures only, but professional repair is required for permanent solutions and hidden pipes.
How quickly does mold grow after a ceiling pipe burst?
Mold grows within 24 to 48 hours after a ceiling pipe burst when moisture remains present, making immediate water extraction and thorough drying critical to preventing contamination and health hazards.
What causes pipes in ceilings to burst?
Pipes in ceilings burst from freezing temperatures causing water expansion, excessive water pressure above 60 psi, corrosion in aging pipes, severe clogs creating pressure buildup, or faulty installation and connections.
Do I need a structural assessment after ceiling water damage?
You need a structural assessment after ceiling water damage because moisture meters and thermal imaging reveal hidden damage to ceiling joists, support beams, insulation, and framing that visual inspection alone cannot detect.
How long does complete ceiling restoration take after a burst pipe?
Complete ceiling restoration takes 1 to 2 weeks total, including same-day emergency pipe repair, 3 to 7 days drying, 2 to 4 days ceiling reconstruction, and 1 to 2 days painting and finishing.
What documentation do I need for insurance claims on ceiling damage?
For insurance claims on ceiling damage, photograph active water flow, all stains and sagging areas, damaged belongings, record the exact discovery time, and notify your insurance company within 24 to 48 hours.
What happens if ceiling water damage is not treated properly?
Untreated ceiling water damage leads to chronic mold growth, weakened ceiling joists and framing, compromised electrical systems, persistent odors, reduced air quality, and decreased property value requiring disclosure during sale.
How do I prevent pipes from bursting in my ceiling?
Prevent pipes from bursting in your ceiling by insulating pipes in unheated areas, maintaining heat at minimum 55 degrees, installing pressure regulators below 60 psi, and scheduling annual plumbing inspections.
