
A burst pipe can dump 400 gallons into your basement in an hour, turning a regular Tuesday into a race against structural damage and mold. Most people waste the first 15 minutes looking for towels or panicking instead of shutting off the main water valve, which means hundreds more gallons flooding in while they scramble. This guide walks you through the exact emergency steps that stop water flow, protect your electrical system, and start extraction before the damage spreads into your walls and floor joists.
Immediate Response: Stopping Water Flow and Securing Your Basement
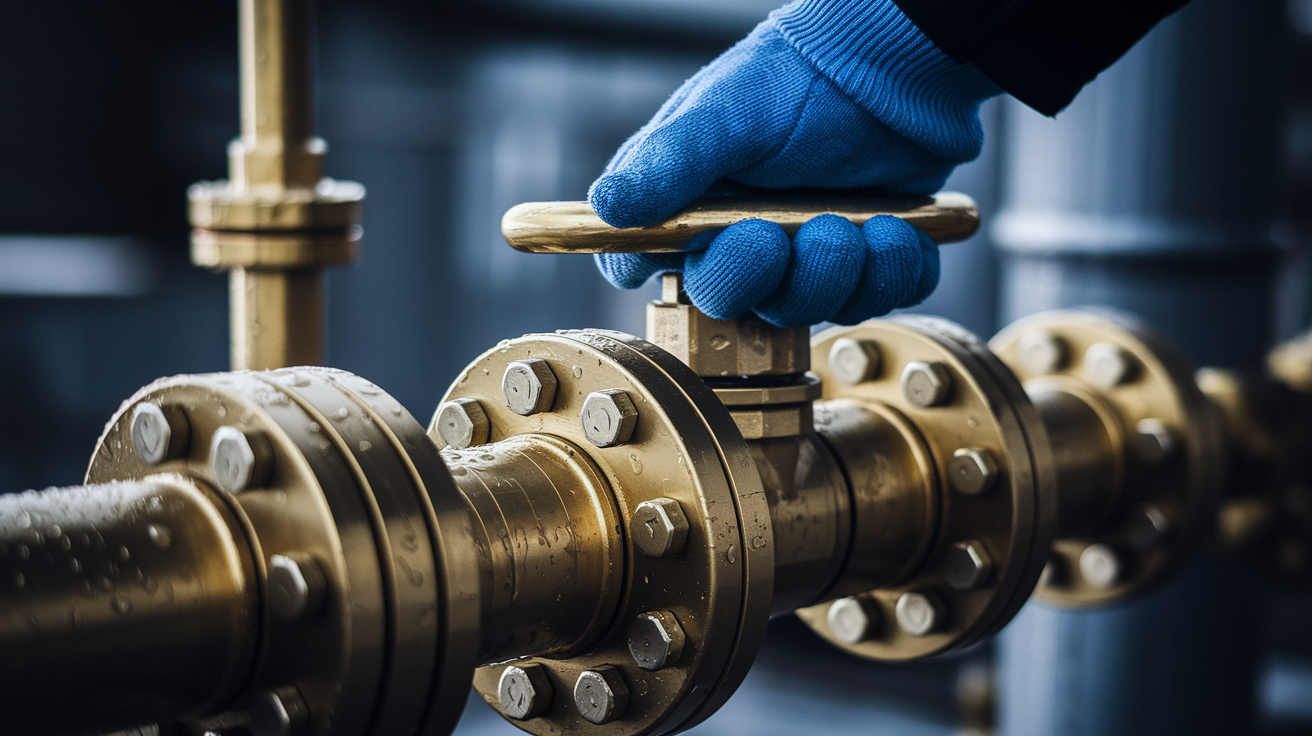
Shut off your main water valve right away to stop the flooding. You’ll usually find the valve where the water line enters your home, typically in the basement along an exterior wall, in a utility room, or near the water heater. Turn it clockwise all the way. If you can’t safely access the basement valve, look for the street-level shutoff near your water meter.
-
Find your main water shutoff valve before you step into the flooded area. Most homes have it where the water line comes through the foundation, usually along an exterior wall facing the street. Some homes keep the valve near the water heater, tucked in a utility closet, or in a crawl space. If you’ve never looked for this valve before, do it now while you can still move around safely.
-
Check out the flooding from the basement stairs or doorway without going in. Watch for electrical hazards like sparking, buzzing sounds from outlets or appliances, or water touching electrical panels. Look for structural problems like walls bowing inward, cracks spreading across the foundation, or ceiling sections sagging from water weight above.
-
Shut off power to the basement at your main circuit breaker if water’s reached outlets, appliances, or the electrical panel. Don’t wade through standing water to get to the shutoff. If your breaker box is in the flooded zone, call your utility company to disconnect power from outside. Never touch electrical wiring, switches, or appliances while you’re standing in water or on wet surfaces.
-
Turn the main water valve clockwise until it won’t turn anymore, usually several full rotations. The valve should close completely to stop all water flowing into your plumbing. If it’s stuck or won’t budge, grab a pipe wrench for leverage, but don’t force it so hard you crack the valve body. Can’t close it? Contact your water utility to shut off service at the street connection.
-
Open faucets throughout the house to drain whatever water’s left in the supply lines. Start upstairs, then hit the main floor fixtures, and finally basement taps if you can reach them safely. This releases pressure in the system and drains water that would otherwise keep flowing from the burst pipe.
-
Only attempt temporary pipe repairs after you’ve confirmed the water supply is completely off and electrical hazards are gone. For small cracks or pinhole leaks, wrap the damaged section tight with rubber patches and hose clamps, or apply epoxy putty made for plumbing repairs. Press the putty firmly around the leak, covering at least two inches past the damage on each side, and hold it in place for the time the product packaging says (usually 3 to 5 minutes). For bigger ruptures, wrap the pipe with thick rubber sheeting and secure it with multiple metal hose clamps spaced every inch along the damaged section.
-
Document the burst pipe location and initial flooding with photos and video from multiple angles. Get close-ups of the pipe failure point showing the break or rupture, wide shots showing water coverage across the basement floor, and photos of the water line on walls indicating how high it got. Snap pictures of your water meter reading to document consumption during the burst. Record video while you narrate what you’re seeing, including timestamps and damage descriptions.
-
Contact an emergency plumber and your insurance company within the first hour of finding the burst. Tell the plumber specifics about pipe location, material type if you know it, and whether you’ve managed to shut off water completely. When you call your insurer, report it immediately even if you haven’t finished documenting damage. Most policies require fast notification of flooding events.
-
Start water extraction only after you’ve confirmed the area is safe to enter with no electrical hazards and stable structure. Use a wet-dry vacuum for shallow water under two inches, or a portable sump pump for deeper flooding. Start removing water from the area farthest from your floor drain and work toward it, letting gravity help move what’s left.
-
Pull wet materials out of the basement as fast as you can, starting with stuff that soaks up water quickly. Haul up soaked area rugs, move cardboard boxes to dry spots, and relocate furniture with fabric upholstery. Wet drywall, insulation, and carpeting that stayed underwater for more than 24 hours should be removed and tossed to prevent mold. Frozen pipes might not show leaks until they thaw, potentially dumping thousands of gallons into your basement if you don’t monitor things during temperature changes.
-
Set up air circulation right after you remove standing water. Put box fans in doorways and windows to create cross-ventilation, aiming them across wet surfaces rather than straight at walls. Place a dehumidifier in the center of the affected area and empty its bucket every few hours, or route the drain hose to a floor drain or sump pit for continuous operation.
-
Secure the burst pipe area to prevent more damage while you wait for permanent repairs. If the pipe is exposed, support it with pipe hangers or temporary bracing to prevent further separation at joints. Mark the area clearly with caution tape or barriers if sharp metal edges are sticking out from the rupture.
Don’t enter standing water that looks discolored or smells weird, which might mean sewage contamination requiring professional hazmat protocols. Never try temporary repairs while water’s still flowing. Even a small stream makes epoxy putty useless and keeps rubber patches from sealing. Don’t use space heaters or heat guns to speed drying until all electrical systems have been inspected and cleared. Timing matters because water spreads fast through porous materials like drywall and insulation, and a pipe leaking at just 1 gallon per minute can release over 40,000 gallons in a month if nobody fixes it, soaking building materials and creating conditions for extensive mold growth within 48 hours.
Removing Water and Starting the Basement Drying Process
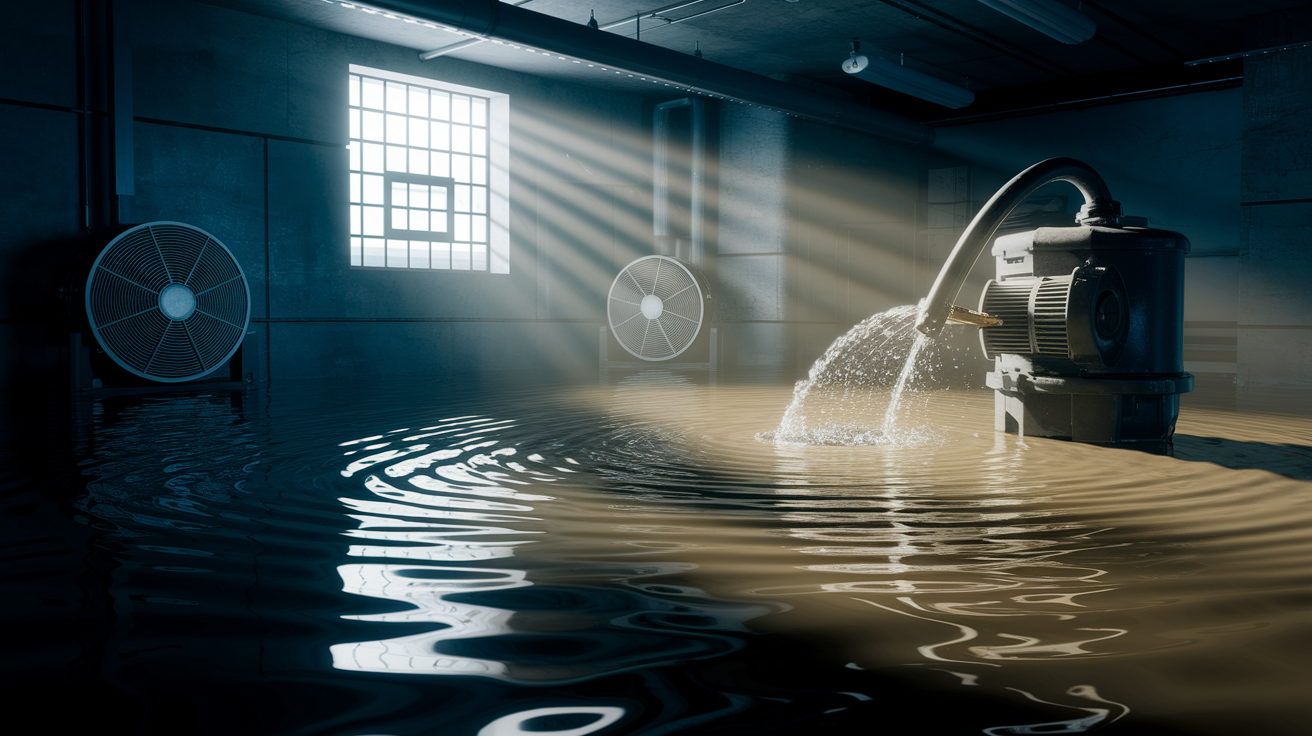
Fast water removal prevents the kind of deep soaking that buckles hardwood floors, dissolves drywall, and creates the dark, damp spots where mold colonies set up shop within two days. The longer water sits against foundation walls, floor joists, and stored stuff, the more it soaks upward and outward through porous materials, expanding the damage zone beyond what you can see on the surface.
-
Check water depth and total volume to pick the right extraction equipment. For flooding under 2 inches deep, a standard wet-dry vacuum with a 5 to 6 gallon capacity will pull out water effectively, though you’ll empty it a lot. For water 2 to 6 inches deep covering more than 200 square feet, rent or buy a portable submersible pump rated for at least 1,500 gallons per hour. For deeper flooding above 6 inches, use a trash pump or sewage pump that can handle small debris and move 3,000 to 5,000 gallons per hour to a storm drain or appropriate discharge point at least 20 feet from your foundation.
-
Pull out standing water methodically starting from areas farthest from your floor drain or sump pit. Put your pump or vacuum in the deepest water pocket and work toward natural drainage points, letting gravity concentrate what’s left where extraction equipment can reach it. Use a wide floor squeegee to push water toward the pump intake or vacuum nozzle, especially in corners and along walls where water pools. If your basement has a floor drain, squeegee water straight into it while running extraction equipment in areas where the floor slopes away from the drain.
-
Clear out wet materials and belongings right after you remove most of the standing water. Carry soaked cardboard boxes, fabric items, and upholstered furniture outside or to a garage where they can dry without dumping moisture back into the basement air. Remove area rugs and carpet padding within the first 24 hours. These materials hold several times their weight in water and rarely dry completely before mold shows up. Pull up any carpet that stayed wet for more than 6 hours if you’re planning to save it, and hang it over sawhorses or a deck railing with the backing exposed to air.
-
Set up drying equipment in a pattern that gets air movement across all wet surfaces. Place one high-velocity air mover (or box fan) for every 200 square feet of affected area, positioning them at 45-degree angles to blow across the floor rather than straight down. Set up a commercial dehumidifier rated for at least 50 pints per day for basements up to 1,000 square feet, or a 70-pint unit for larger spaces. Empty dehumidifier buckets every 8 to 12 hours, or connect a drain hose that runs to a floor drain or sump pit so it operates continuously without stopping when the bucket fills.
-
Open windows and doors to outside air only if outdoor humidity is lower than basement humidity, typically when outside humidity drops below 60 percent. Run fans and dehumidifiers continuously for the first 72 hours, checking progress by looking for visible moisture on concrete floors, feeling basement walls for dampness, and watching the dehumidifier’s water collection rate. If the unit still pulls multiple gallons per day after three days, keep running equipment for another week.
Position air movers so they create overlapping airflow patterns instead of isolated pockets. Each fan should blow toward the area covered by the next fan, creating a continuous air stream that sweeps across the entire floor and up wall surfaces. Point at least one fan straight at each section of wet drywall, keeping the fan 3 to 4 feet from the wall to prevent over-drying that can crack the surface. Tilt fans upward at a 20-degree angle to push air behind baseboards and into wall cavities where water may have soaked upward into insulation.
You’ll need one week or more for visible moisture to disappear in moderate floods that covered the floor 2 to 4 inches deep. Expect two weeks for severe flooding above 6 inches that soaked walls and storage areas. What you see on exposed surfaces dries faster than hidden moisture. Water behind walls or inside air ducts can take two weeks or more to fully evaporate even when surface areas feel dry to the touch. Check drying progress by pressing your hand firmly against the bottom two feet of drywall sections that were underwater. If the surface feels cool or leaves a damp outline of your handprint, moisture’s still working its way out from behind the paint and paper facing.
Monitor moisture levels by checking how much water your dehumidifier collects each day. If it’s still pulling more than a quart per day after five days of continuous operation in a typical basement, significant moisture remains in building materials or concrete. Hidden water pockets often hang around in corners where floor and wall meet, underneath bottom wall plates where drywall sits on the foundation, and in cracks between the basement floor and foundation walls.
Preventing Mold Growth After Pipe Burst Flooding

Mold can start growing within 24 to 48 hours after flooding, setting up colonies on wet surfaces before you even finish the initial cleanup. The real risk isn’t just the visible mold on basement walls. It’s the hidden growth developing behind drywall, inside wall cavities, and underneath flooring materials where moisture stays trapped for weeks. Hidden moisture behind walls or inside air ducts can take two weeks or more to fully evaporate, creating extended timeframes where mold spores find the dark, damp conditions they need to spread.
Materials most vulnerable to mold and whether you can save them:
- Drywall and wallboard get soaked through their paper facing and gypsum core. You can only save it if it dries completely within 48 hours and shows no visible staining, warping, or soft spots. Toss any sections that stayed wet for more than 72 hours.
- Carpet and padding soak up water like a sponge and rarely dry thoroughly before mold starts. Only try to save it if flooding was from clean water, carpet dried within 24 hours, and professional cleaning follows. Toss padding in almost all flood scenarios.
- Insulation (fiberglass and cellulose) loses effectiveness when wet and holds moisture against wall studs and floor joists. Can’t be dried effectively once it’s saturated. Remove and replace any insulation that absorbed floodwater.
- Ceiling tiles and acoustic panels absorb water fast and discolor permanently. Can’t be cleaned effectively once wet. Remove and toss any tiles that show water staining or sagging.
- Wood framing and structural lumber can be dried and saved if exposed to air circulation and dehumidification. Watch closely for warping, soft spots, or dark staining that signals the beginning of rot or mold penetration. Treat with antimicrobial solution if flooding involved contaminated water.
Clean all surfaces with household cleaners first, then follow up with disinfectant or diluted bleach solution as a second treatment. Start by scrubbing floors, walls, and hard surfaces with an all-purpose cleaner or detergent mixed with warm water, using a stiff brush to remove dirt, mud, and debris left by floodwater. This initial cleaning removes the surface gunk that would otherwise block disinfectants from reaching the material underneath. After the cleaned surface dries for 15 to 20 minutes, apply a disinfecting solution. Either use an EPA-registered disinfectant following label instructions, or make a bleach solution from 1 cup of household bleach mixed into 1 gallon of water. Apply the disinfectant with a pump sprayer, sponge, or mop, covering all surfaces that contacted floodwater, and let it sit for 10 minutes before wiping or allowing it to air dry.
Watch for signs of developing mold problems. Musty odors that smell earthy or like wet socks even after cleaning, dark spots or discoloration appearing on walls or ceilings, and allergic symptoms like sneezing, coughing, or eye irritation that started after the flood and get worse when you’re in the basement. If you spot fuzzy growth in corners, along baseboards, or around pipes within the first week after flooding, surface cleaning won’t cut it. The growth you see signals deeper colonization behind the visible surfaces. You need antimicrobial treatment when mold appears across more than a 10-square-foot area, when you smell persistent musty odors after thorough cleaning and drying, or when anyone in the household develops respiratory issues that improve when they leave the basement. Toss items that can’t be dried quickly, especially porous materials like cardboard, fabric, and particle board that stayed wet for more than 48 hours.
Documenting Burst Pipe Damage for Insurance Claims

Good documentation directly impacts whether your claim gets approved at all, how much the insurance company pays, and whether you get enough to cover both immediate repairs and hidden damage that shows up later. Adjusters process dozens of claims each week, and the ones with clear, organized evidence of damage and losses move through approval faster and with fewer disputes about what the policy should cover.
-
Take initial damage photos within the first hour of discovering the burst, capturing the pipe failure point from multiple angles. Photograph the exact location where the pipe ruptured, including close-ups showing the break, crack, or separated joint. Take wide shots that show the pipe in relation to nearby walls, the water heater, or other fixed landmarks that establish its position in the basement. Toss a ruler or common object like a coin in close-up shots to provide scale for the size of the rupture.
-
Document water coverage and depth across the entire basement floor before you start extraction. Take photos from each corner of the basement showing how far the water spread and which areas stayed dry. Place a ruler, yardstick, or tape measure vertically against the wall in several locations and photograph the water line marking maximum depth. If water reached stored stuff, appliances, or furniture, photograph each affected item while still in the flooded position.
-
Create a video walkthrough while narrating what you’re seeing, starting from the burst pipe and panning slowly across all affected areas. State the date and time, describe what happened and when you discovered it, and point out specific damage as you move through the space. Record close-ups of the water meter reading to show consumption during the burst. A damaged pipe leaking at 1 gallon per minute can waste over 40,000 gallons in a month, and the meter reading helps establish the failure timeline.
-
Write a detailed inventory of damaged belongings, building materials, and systems affected by flooding. List each item with its approximate age, original purchase price if known, and current condition. Group items by category: furniture, electronics, tools, stored household goods, building materials. For valuable items like electronics or equipment, include model numbers and serial numbers if you can access them safely.
-
Identify and photograph the specific pipe location, material type, age, and failure point. Note whether the burst pipe is copper, galvanized steel, PEX, or PVC, and estimate its age based on home construction date or previous plumbing work if you have that information. Photograph any visible corrosion, mineral buildup, or external damage that may have contributed to the failure. If the pipe shows signs of freezing damage like bulging, splits along seams, or separation at joints, document these details because they affect how the claim is processed.
-
Measure and map the affected area showing which sections of the basement flooded and which stayed dry. Sketch a simple floor plan noting dimensions of wet zones, location of the burst pipe, placement of damaged belongings, and areas where water soaked into walls. Mark the approximate water depth in different zones: deeper near the pipe, shallower toward drainage points.
-
Keep receipts for all emergency expenses including temporary repairs, water extraction equipment rental, cleaning supplies, and emergency plumber visits. These immediate costs are often reimbursable separate from the main damage claim. Save receipts for pipe clamps, epoxy putty, fans, dehumidifiers, wet-dry vacuum rental, and any materials you bought to prevent additional damage.
Claim adjusters look for clear evidence that the damage resulted directly from the pipe burst and not from pre-existing conditions, deferred maintenance, or gradual deterioration. They want to see the failure point, understand what caused it, and verify that the damage you’re claiming matches the flooding pattern they’d expect from that specific burst location. Organize documentation into folders or digital albums labeled by category: pipe damage photos, basement flooding extent, damaged belongings inventory, receipts, and repair estimates. This organization speeds up the review process and cuts down on the chance that important evidence gets overlooked.
Contact your insurance company within 24 hours of discovering the burst. Most policies require “prompt notification” of water damage events, and delays can give insurers reason to question the claim timeline or deny coverage for damage that got worse while you waited to report it. When you call, have basic information ready including when you discovered the burst, what caused it if you know, whether the water supply is shut off, and your initial estimate of damage severity.
Replacement value coverage pays to replace damaged items with new equivalents at current prices, while actual cash value coverage pays replacement cost minus depreciation based on age and condition. Post-cleanup repairs may include replacing soaked drywall, insulation, carpet, and warped flooring, and the difference between these coverage types determines whether you get $800 to replace that 8-year-old carpet or $350 after depreciation is deducted. If your policy includes replacement value coverage, you typically need to complete the repairs and submit receipts before getting the full payout. The initial check covers actual cash value, and a second payment covers the depreciation amount after you prove the work was done.
Professional Assessment and Restoration Services After Flooding

Burst pipe flood damage extends beyond visible water on the floor. It includes moisture trapped in wall cavities, compromised structural framing you can’t see without opening walls, contamination risks from where the water traveled through the plumbing system, and electrical systems that may have sustained hidden damage even if they still appear to function. You need professional services to safely remove water and restore damaged areas to pre-flood condition when the complexity or hazards exceed what standard cleanup can address.
Situations requiring professional restoration services:
- Electrical system exposure to water. If flooding reached outlets, switches, circuit breakers, or any electrical panel components, a licensed electrician must inspect the system before power is restored. Water inside electrical boxes can cause delayed failures, short circuits, or fire hazards days after the basement appears dry.
- Sewage contamination concerns. When the burst pipe causes backflow from drains or if floodwater mixed with sewage from floor drains, the water contains bacteria and pathogens requiring specialized cleaning protocols, protective equipment, and antimicrobial treatments beyond household disinfectants.
- Structural integrity questions. If you notice cracks spreading across foundation walls, floors that feel spongy or slope differently than before, or support posts that shifted position, a structural engineer should check whether flooding compromised load-bearing elements.
- Hidden moisture detection. Professional restoration companies use thermal imaging cameras and moisture meters to find water trapped behind walls, under flooring, and in ceiling cavities where continued dampness leads to rot and mold even after surface areas dry.
- Extensive material damage requiring coordination. When flooding damaged more than 500 square feet of finished space, destroyed multiple systems (plumbing, electrical, HVAC), or requires removing and replacing major building components, restoration companies coordinate the sequence of trades. Plumbers, electricians, drywall contractors, flooring installers work in the correct order.
- Insurance coordination needs. Restoration companies familiar with insurance claims provide detailed documentation, work directly with adjusters, and supply the specific estimates and photo evidence insurers require, reducing the back-and-forth disputes about what repairs are necessary versus optional.
Restoration companies check several specific factors during initial evaluation: moisture levels in building materials using pin-type or pinless moisture meters, thermal imaging to locate hidden water pockets, air quality sampling if mold is suspected, structural stability by checking for shifted supports or foundation movement, and electrical safety by testing circuits and outlets that contacted water. They map the affected area, calculate the total volume of water removed, and create a drying plan that specifies equipment placement, expected timeline, and daily monitoring protocols. The assessment also identifies which materials can be saved through drying and cleaning versus what must be removed and replaced based on saturation level and contamination.
The typical restoration timeline starts with emergency water extraction within 24 hours of your call, followed by 3 to 7 days of intensive drying with commercial dehumidifiers and air movers running continuously. Demolition of unsalvageable materials happens once moisture readings confirm adjacent areas are dry enough to prevent further wicking, usually 5 to 10 days after flooding. Reconstruction follows in phases: rough plumbing and electrical repairs first, then insulation and drywall installation, followed by finishing work like flooring, trim, and paint. A moderate basement flood affecting 400 to 600 square feet typically requires 3 to 4 weeks from emergency call to final walkthrough, while severe flooding involving sewage contamination or structural repairs can stretch to 6 to 8 weeks.
Pick licensed, insured contractors who carry both general liability coverage and workers’ compensation insurance. Ask to see current certificates for both before signing any agreement. Verify certifications from industry organizations like the Institute of Inspection, Cleaning and Restoration Certification (IICRC), which trains technicians in water damage restoration, structural drying, and applied microbial remediation. Check that the company holds appropriate state and local licenses for the specific work involved. Plumbing contractors need plumbing licenses, electrical work requires licensed electricians, and general contractors should carry current contractor licenses in your jurisdiction.
Why Pipes Burst in Basements and Cause Flooding

Water pipes are built to handle significant internal pressure, typically rated for 60 to 80 pounds per square inch in residential systems, but burst pipes mean that stresses exceeded the material’s structural capacity or that the pipe itself degraded to the point where normal operating conditions became too much to handle. The failure isn’t random. It results from specific physical forces, environmental conditions, or installation defects that compromise pipe integrity.
Major causes of basement pipe bursts:
- Freezing temperatures creating ice blockages and expansion pressure. Water pipes start to freeze at 20 degrees Fahrenheit, with vulnerable sections becoming frozen solid within 6 to 8 hours at this temperature, and wind chill can speed up the freezing process beyond the 6 to 8 hour timeframe. As water freezes it expands by roughly 9 percent, creating pressure that can reach several thousand pounds per square inch, enough to split copper pipes or crack plastic supply lines. Frozen pipes might not show leaks until thawing occurs, potentially releasing thousands of gallons into crawl spaces or basements if nobody’s watching.
- Aging infrastructure suffering material degradation. Both plastic pipes (become brittle) and metal pipes (subject to corrosion) have finite lifespans that can be shortened by harsh weather and poor maintenance. Copper supply lines typically last 50 to 70 years but can develop pinhole leaks from internal corrosion after 20 to 30 years in areas with acidic water. Galvanized steel pipes corrode from the inside out, with rust buildup narrowing the interior diameter and weakening walls until pressure causes rupture. PEX and PVC plastic pipes become brittle when exposed to UV light or extreme temperature cycles, developing stress cracks at connection points.
- External physical forces damaging buried or exposed pipes. Underground water leaks are tough to locate and expensive to repair, often caused by tree roots growing into pipe joints seeking moisture, soil settlement creating pressure points where pipes cross foundation footings, or ground vibrations from heavy equipment and vehicles driving over buried supply lines. Earthquakes, tremors, and soil shifts from excessive rain can crack or break underground pipes near home foundations. Even minor impacts to exposed basement pipes from moving stored items or accidental contact can crack joints or create pinhole leaks in older, brittle material.
- Pressure buildup from clogs and mineral deposits. Mineral buildup in water pipes can restrict or block flow, creating pressures that lead to burst pipes. Hard water deposits pile up over years, especially in hot water lines where minerals settle faster, gradually narrowing the interior passage and increasing pressure against pipe walls. When a partial blockage combines with normal pressure surges from fixtures turning on and off, the stress concentrates at weak points like joints, bends, and corroded sections.
- Improper installation creating structural weak points. Pipe joints are the most vulnerable points in a pipe system and require proper reinforcement. Pipe layering (joining larger pipes to smaller pipes of lesser thickness) creates excessive water pressure that can cause structural failure because the pressure increases as water moves from larger diameter into smaller diameter sections. Incorrect joint connections that rely on inadequate solder, poorly threaded fittings, or misaligned compression fittings create leak paths that worsen under normal pressure fluctuations.
- Corrosion accelerated by water chemistry and environmental factors. Acidic water with pH below 6.5 dissolves copper from pipe walls, creating the greenish staining you sometimes see at fixtures and eventually leading to pinhole leaks that grow into ruptures. Galvanic corrosion happens when dissimilar metals touch in the presence of water, like copper pipe connected directly to galvanized steel fittings, causing accelerated breakdown at the connection point. Chlorine and chloramines added to municipal water supplies can degrade rubber seals and gaskets, leading to joint failures.
The relationship between pipe age and burst risk follows a curve where failure rates stay relatively low for the first 20 to 30 years, then speed up as corrosion and material fatigue build up. A home built in the 1970s or earlier with original plumbing faces way higher burst risk than a home with pipes installed in the last 15 years, especially if the older home has galvanized steel supply lines that corrode predictably. Even copper pipes, generally considered durable, develop problems as they age. The thin-wall copper popular in the 1980s and 1990s proves more vulnerable to pinhole leaks than the thicker-wall Type L copper used in earlier decades.
Multiple factors often combine to cause failure rather than a single cause acting alone. A copper pipe weakened by 30 years of gradual corrosion might handle normal pressure fluctuations without issue, but when a cold snap drops basement temperatures to 15 degrees and ice starts forming in the weakened section, the combination of brittle cold material plus expansion pressure from freezing causes the rupture. Same thing with pipes with minor leaks at poorly soldered joints that might drip slowly for months, but when a pressure surge from the municipal supply line hits during a main break repair, the surge pushes the weakened joint apart and transforms a small drip into a flood.
Repair Costs and Material Replacement After Pipe Bursts

The wide cost spread for burst pipe flood repairs depends mostly on how much water escaped before the supply shut off, which building materials absorbed that water, and whether damage stayed stuck to easily accessed areas or spread behind walls and into ceiling cavities. A basement flood contained to a 200-square-foot unfinished area requires far different repairs than one that soaked 800 square feet of finished living space with drywall, carpet, and ceiling materials.
| Repair Type | Typical Cost Range | Factors Affecting Price |
|---|---|---|
| Drywall replacement | $1.50 to $3.50 per square foot | Wall height, whether insulation needs replacement, texture matching, number of corners and openings, disposal of wet material |
| Insulation replacement | $1.00 to $2.50 per square foot | Insulation type (fiberglass batts vs. spray foam), wall cavity depth, accessibility, whether vapor barriers need replacement |
| Flooring removal and installation | $6.00 to $15.00 per square foot | Flooring type being installed (vinyl, laminate, tile, hardwood), subfloor condition and replacement needs, floor prep and leveling, baseboard removal and reinstallation |
| Carpet removal and disposal | $1.00 to $2.00 per square foot | Carpet thickness and weight, padding disposal, stairs vs. flat areas, haul-away distance, disposal fees at local facilities |
| Ceiling repair | $2.00 to $4.50 per square foot | Ceiling height, water staining extent, texture type, light fixture removal and reinstallation, whether joists need drying or treatment |
| Foundation crack sealing | $400 to $1,200 per crack | Crack length and width, interior vs. exterior access, injection method vs. surface sealing, whether structural reinforcement is needed |
| Plumbing repair or replacement | $450 to $1,800 for localized repair; $2,500 to $8,000 for section replacement | Pipe material and diameter, accessibility of burst location, length of pipe requiring replacement, number of fittings and connections, whether walls need opening |
| Full basement restoration | $8,000 to $35,000+ | Basement square footage, finish level before flooding, extent of mechanical system damage, mold remediation needs, whether structural repairs are required |
Costs run higher when initial water extraction reveals hidden damage that wasn’t obvious during the emergency phase. Water that traveled through wall cavities to upper floors, moisture that spread through HVAC ductwork and now requires duct cleaning or replacement, or foundation cracks that allowed water to seep into adjacent rooms. Material quality choices also drive final costs substantially. Replacing water-damaged carpet with basic builder-grade carpet and pad runs $3 to $6 per square foot installed, while upgrading to better quality carpet with upgraded padding reaches $8 to $12 per square foot. Drywall work varies depending on whether you accept orange-peel texture that won’t perfectly match existing smooth walls, or pay extra for skim coating and sanding to blend repairs invisibly into surrounding surfaces.
Emergency mitigation costs (the immediate water extraction, drying equipment rental, and temporary repairs) are separate from restoration costs that cover rebuilding and replacing damaged materials. Most restoration companies bill mitigation services at $2,000 to $5,000 for typical basement floods, covering the first 48 to 72 hours of emergency response, water removal, equipment setup, and initial antimicrobial treatment. Restoration costs then begin after mitigation is complete and cover demolition, material replacement, and reconstruction. Insurance policies often separate these cost categories in claim processing, with emergency mitigation approved quickly to prevent further damage, and restoration costs requiring detailed estimates, adjuster review, and sometimes negotiation about what repairs are truly necessary versus cosmetic upgrades.
Depreciation factors in insurance payouts reduce what you actually get compared to full replacement costs, especially for materials that were already aging before the flood. If your basement carpet was 9 years old when flooding destroyed it, and typical carpet lifespan is 10 to 12 years, the insurance company depreciates the payout to reflect that the carpet already delivered most of its useful life. You might get $400 after depreciation for carpet that costs $1,200 to replace, leaving an $800 gap between the insurance check and your out-of-pocket expense. Replacement value policies close this gap by paying the full replacement cost after you submit proof that the work was completed, but actual cash value policies only pay the depreciated amount with no additional recovery.
Long-Term Prevention Strategies for Burst Pipe Flooding

Prevention costs a fraction of what you’ll spend on emergency repairs, water extraction, and material replacement after a burst pipe floods the basement. Investing $500 to $1,500 in insulation, monitoring equipment, and maintenance catches problems before they become disasters that cost $10,000 to $30,000 to fix.
| Prevention Category | Specific Actions | Implementation Timeline |
|---|---|---|
| Pipe insulation | Wrap exposed pipes in unheated areas with foam sleeves or fiberglass insulation; seal gaps where pipes penetrate exterior walls; install heat cable on pipes in crawl spaces or along exterior walls | Complete before first freeze; inspect and replace damaged insulation each fall |
| Temperature monitoring | Install wireless temperature sensors in basement, crawl spaces, and near exterior wall pipes; set alerts for temperatures dropping below 40°F; maintain basement heat above 55°F during winter | Install sensors in early fall; check battery levels monthly during winter |
| Pressure regulation | Install or verify pressure reducing valve if municipal supply exceeds 60 psi; test water pressure annually; install water hammer arrestors on fixtures that cause pipe vibration when shut off quickly
Final WordsBasement flooding from burst pipe events moves fast, but your response can be faster. Shut off that water supply, stay clear of electrical hazards, and get the extraction started as soon as it’s safe. Document everything before you start pulling out wet materials. The drying process takes longer than most people think, and mold doesn’t wait. Modern leak detection systems and seasonal maintenance can prevent most of these emergencies before they happen. If the damage goes beyond surface-level cleanup or you’re dealing with hidden moisture, structural concerns, or insurance questions, we’ll handle the full restoration so you can get back to normal. FAQCan a basement flood due to a pipe burst?A basement can flood due to a pipe burst, often releasing hundreds or thousands of gallons of water within hours. Freezing temperatures, aging pipes, excessive water pressure, and corrosion are common causes that lead to sudden pipe failures in basement plumbing systems. Will homeowners insurance pay for a flooded basement?Homeowners insurance will typically pay for flooded basements caused by sudden pipe bursts, covering water extraction, drying, and repairs. Coverage depends on your policy limits, deductible, and whether you have replacement value or actual cash value coverage for damaged materials. Is basement dampness bad for the house after a pipe burst?Basement dampness after a pipe burst is bad for your house because it creates conditions for mold growth within 24 to 48 hours and can cause structural damage to drywall, insulation, flooring, and wood framing if moisture remains trapped behind walls or in hidden spaces. How do you unflood a basement?You unflood a basement by first shutting off the water supply, then using wet-dry vacuums, pumps, or portable sump pumps to remove standing water, followed by clearing out wet materials and setting up dehumidifiers and air movers to dry the space over one to two weeks. What should I do immediately after a pipe bursts in my basement?Immediately after a pipe bursts in your basement, shut off the main water valve by turning it clockwise until fully closed, cut power at the circuit breaker if water is near electrical sources, and avoid entering the basement if standing water poses electrocution or structural collapse risks. How long does it take to dry out a basement after flooding?Drying out a basement after flooding takes one week or more for visible moisture to disappear in moderate floods, while severe flooding or hidden moisture behind walls and inside air ducts can require two weeks or longer with continuous dehumidification and air circulation. What are the signs a pipe is about to burst?Signs a pipe is about to burst include unusual dripping or hissing sounds, visible water stains on walls or ceilings, unexplained drops in water pressure, discolored or rusty water, frost on exposed pipes, bulging pipe sections, and persistent musty odors near plumbing. When should I call a professional after a basement flood?You should call a professional after a basement flood when electrical systems are exposed to water, sewage contamination is possible, structural damage like bowed walls appears, hidden moisture needs detection with specialized equipment, or extensive material damage requires coordinated restoration and insurance claims. How much does it cost to repair a basement after a pipe burst?Repairing a basement after a pipe burst costs vary widely based on damage severity, but expect expenses for drywall replacement, insulation, flooring removal and installation, plumbing repairs, and potential foundation crack sealing, with total costs ranging from hundreds to tens of thousands of dollars. Can mold start growing after a pipe burst flood?Mold can start growing after a pipe burst flood within 24 to 48 hours when wet materials and surfaces remain damp. Hidden moisture behind walls, inside air ducts, and under flooring creates ideal conditions for mold development if not properly dried and treated. What prevention steps stop pipes from bursting in basements?Prevention steps that stop pipes from bursting include insulating exposed pipes before temperatures drop to 20 degrees Fahrenheit, maintaining consistent heating, monitoring water pressure, scheduling regular plumbing inspections, upgrading aging pipes, and installing smart leak detection systems with automatic shutoff valves. Do smart water sensors prevent basement flooding?Smart water sensors help prevent basement flooding by detecting leaks early and sending smartphone alerts, allowing you to respond quickly before minor leaks become major floods. When paired with automatic shutoff valves, these systems can stop water flow immediately without requiring you to be home. |
