
That musty smell in your bathroom isn’t just unpleasant. It’s mold actively degrading your air quality and your home’s structure, and it won’t stop spreading on its own. Most people wait too long because they think a little discoloration in the grout or a dark spot on the ceiling isn’t urgent. But mold colonies double fast in damp conditions, and what you see on the surface is usually a fraction of what’s growing behind your tiles and inside your walls. Professional bathroom mold removal stops contamination at the source, protects your family’s health, and prevents thousands in structural damage down the line.
Get Professional Bathroom Mold Removal: Service Details and Free Quote
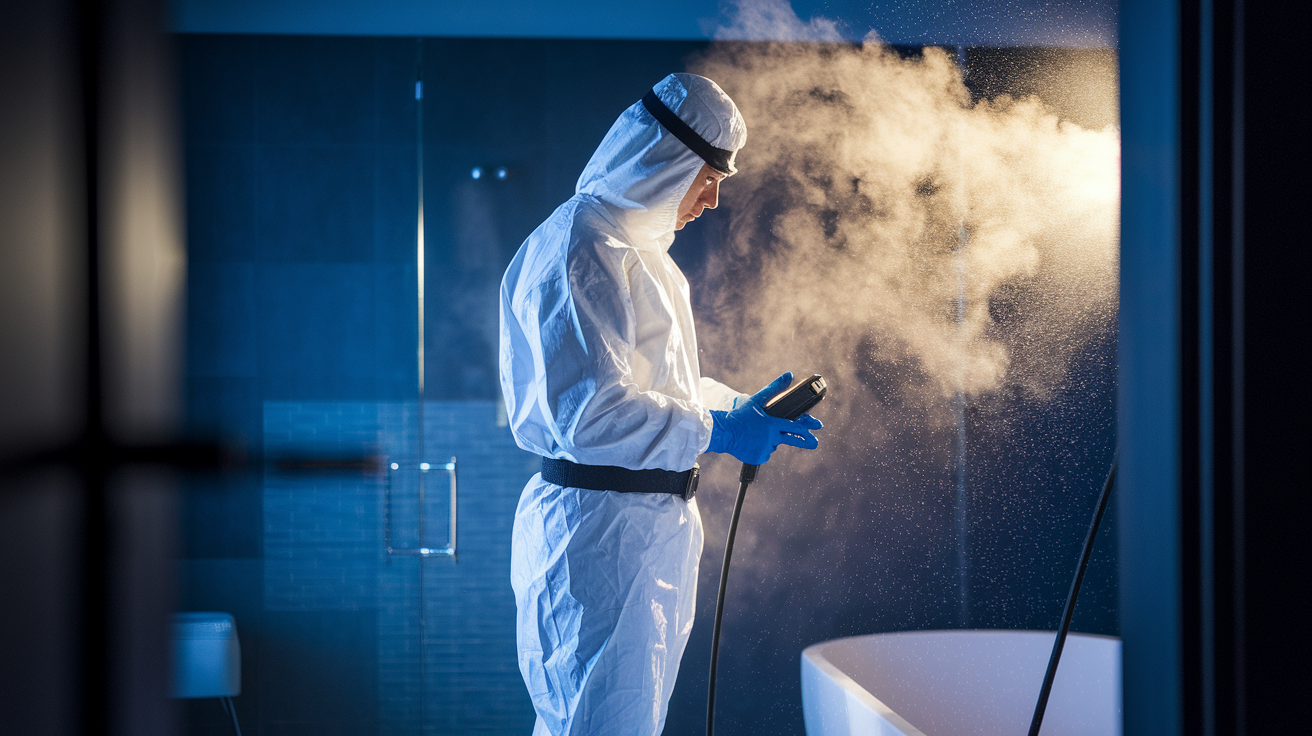
Call now for a free quote on bathroom mold removal. Most certified contractors offer 24/7 emergency response with same day service when you’re dealing with urgent situations. Local providers cover wide service areas and can typically schedule an on site consultation within hours of your call. You’ll get a detailed estimate before any work begins, with clear pricing and a timeline that fits your schedule. Whether you’re staring at visible mold in your shower grout right now or dealing with a sudden plumbing leak that’s already creating damp conditions, qualified professionals can respond fast and start containment the same day.
Licensed contractors carry proper credentials that verify their expertise and protect your property. Look for IICRC certification. Some companies maintain 30+ years of continuous certification in water damage and mold remediation. Verify state licensing with specific license numbers you can check through regulatory agencies. EPA guideline compliance ensures safe, effective removal that protects both your family and the technicians doing the work. Full insurance coverage protects you from liability during remediation. Years of specialized experience matter because bathroom mold often hides behind tiles, inside walls, and beneath flooring where inexperienced workers might miss it.
Professional bathroom mold removal services include these core components:
Initial inspection and assessment using moisture meters and infrared cameras to locate all affected areas, including hidden mold behind walls and ceilings.
Mold testing and identification through laboratory analysis when needed to determine specific species and appropriate treatment methods.
Containment with safety protocols including plastic sheeting barriers and negative air pressure systems that prevent spores from spreading to clean areas during removal.
Removal and remediation using specialized equipment and EPA approved antimicrobial solutions designed for different surface types and contamination levels.
Sanitization and disinfection of all affected surfaces and air treatment to eliminate remaining spores and prevent immediate regrowth.
Prevention recommendations covering ventilation improvements, moisture control strategies, and maintenance plans to keep your bathroom mold free long term.
Professional services are recommended for mold covering more than 3 square feet. That’s roughly a patch bigger than a standard floor tile. Certified technicians complete removal correctly the first time with minimal disruption to your daily routine. Most bathroom projects wrap up within 1 to 3 days depending on severity, getting your space back to safe, clean condition fast.
Health Risks and Safety Concerns of Bathroom Mold

Mold releases microscopic spores into the air constantly. When those spores accumulate in your bathroom and spread through your home’s ventilation system, they degrade indoor air quality with every breath. Bathrooms create perfect conditions for spore production because constant moisture keeps mold colonies active and reproducing. You’re inhaling these spores whether you see visible mold or not. The black spots on your ceiling or the discoloration in your grout lines are just the surface growth.
Respiratory problems show up first for most people. Coughing that won’t quit, wheezing when you breathe, chest tightness after a shower. Mold spores irritate lung tissue and trigger allergic reactions even in people who’ve never had allergies before. If you already deal with asthma, bathroom mold makes attacks more frequent and more severe. Skin contact causes rashes and irritation, especially on sensitive skin. Your eyes water and itch. Headaches become regular, sometimes intense enough to disrupt your day.
People with weakened immune systems face the most serious risks. Young children, elderly family members, anyone going through cancer treatment or managing autoimmune conditions. Their bodies can’t fight off mold exposure the way healthy adults can. Existing allergies get worse. Respiratory infections become more common.
Black mold produces musty odors that spread from the bathroom throughout your house, but the smell is the least of your problems. Mold also compromises structural integrity over time. It breaks down drywall, weakens wooden beams, and damages ceiling materials. What starts as a health issue becomes a property value problem that costs thousands to repair if you wait too long.
Bathroom Mold Causes and High-Risk Locations

Bathrooms combine everything mold needs to thrive. Regular water contact, enclosed spaces, and surfaces that stay damp between uses. Understanding where moisture comes from and where mold colonizes helps you spot problems early and explains why some bathrooms develop serious contamination while others stay relatively clean.
Primary Moisture Sources
Hot water use creates the biggest humidity problem. Every hot shower releases steam that condenses into water droplets on mirrors, walls, ceilings, and inside cabinets. In properties experiencing changing weather patterns or during winter months when outdoor air is cold, condensation happens faster and heavier. That transition from steam to liquid water sitting on surfaces gives mold exactly what it needs.
Exhaust fans only work when they’re vented to the exterior of your home, not into your attic or a wall cavity. Fans that dump humid air into enclosed spaces just move the moisture problem somewhere less visible. If your bathroom fan runs but steam still fogs everything up, check where the vent actually goes.
Leaking fixtures create moisture pockets behind walls and under floors. A dripping faucet, a showerhead with a slow leak, pipes that sweat condensation. These constant water sources soak porous materials that never get a chance to dry out. Sweating toilets drip water onto floor tiles and grout for hours after each flush.
Multi floor buildings face compounded issues when water from upper floor bathrooms seeps through tile and grout, then compromises ceiling drywall and wooden beams on lower floors. What looks like a small leak upstairs becomes structural damage downstairs.
Common Mold Growth Locations
Shower and tub enclosures top the list. Check your grout lines between tiles, the tile surfaces themselves, and every silicone seal around the tub edge and door frame. Constant moisture exposure makes these areas highly susceptible to colonization.
Bathroom ceilings accumulate condensation when ventilation is inadequate. Look for discoloration, dark spots, or peeling paint directly above your shower or tub.
Walls adjacent to showers and tubs get wet from splash and steam. Mold develops behind paint or tiles where you can’t see it until the problem is severe enough to show through.
Floors harbor mold growth under broken or cracked tiles and in damaged grout lines. Water infiltrates through these openings and sits on the subfloor or in the adhesive layer.
Behind toilets and under sinks, plumbing connections sometimes leak slowly for months before anyone notices. Inside vanity cabinets near supply lines, moisture damage and mold growth happen in dark, enclosed spaces.
Window frames and sills in bathrooms with windows collect condensation and develop mold along the edges and in corners.
Vulnerable Materials and Surfaces
Porous materials absorb water and hold moisture deep inside where surface cleaning can’t reach. Drywall, grout between tiles, caulking, cellulose materials, and insulation all fall into this category. Once mold penetrates porous materials, removal usually means replacement rather than cleaning. You can’t scrub mold out of drywall that’s been wet for weeks.
Damaged or failing grout and caulking allow water penetration behind tiles into wall cavities. What starts as surface moisture becomes a hidden contamination problem inside your walls.
Nonporous surfaces like ceramic tile, glass, and metal are easier to clean because mold can’t penetrate the material itself. But even nonporous surfaces develop mold when moisture sits on them long enough, especially in grout lines and joints where water pools.
Step by Step Professional Mold Remediation Process

Professional bathroom mold removal follows structured protocols based on IICRC S520 Guidelines and EPA recommendations. These industry standards protect both the technicians doing the work and everyone living in your home. You’re not just paying for mold removal. You’re paying for a methodical approach that finds hidden contamination, contains it during removal, and verifies complete remediation before the job is finished.
The remediation workflow breaks down into seven distinct steps.
First, initial inspection and assessment using specialized detection equipment to locate all affected areas, measure moisture levels in building materials, and identify the water source causing the problem. Technicians map the full extent of contamination, including mold you can’t see behind walls and above ceilings.
Second, mold testing and laboratory analysis when species identification is necessary to determine the most effective removal methods and assess health risks. Not every project requires testing, but professionals know when lab analysis will change the remediation approach or provide documentation for insurance claims.
Third, containment setup with plastic sheeting and negative air pressure to isolate the work area from the rest of your home. This prevents mold spores from spreading into clean rooms during the physical removal process. Doorways get sealed, ventilation gets controlled, and the contaminated space becomes a contained zone.
Fourth, air filtration using HEPA equipment and air scrubbers that continuously clean the air inside the containment area and create negative pressure that pulls air inward rather than allowing spores to drift outward. These machines run throughout the entire remediation process.
Fifth, physical mold removal from surfaces using techniques appropriate for each material type. HEPA vacuuming for surface contamination, antimicrobial solutions for nonporous surfaces, complete removal and disposal of porous materials like drywall and insulation that can’t be effectively cleaned.
Sixth, treatment of affected materials with antimicrobial solutions that kill remaining spores and prevent immediate regrowth. Different products work for different surfaces and contamination levels.
Seventh, final clearance testing and documentation to verify that spore counts have returned to normal levels and all visible contamination has been removed. You get written proof that the remediation worked before technicians leave your property.
Specialized equipment makes the difference between surface cleaning and complete remediation. Moisture meters detect hidden water sources inside walls and under floors that keep feeding mold growth even after you remove visible colonies. Infrared cameras identify temperature differences that indicate wet building materials behind surfaces. HEPA vacuums contain spores during removal instead of spreading them into the air. Air scrubbers maintain negative pressure and filter particles down to 0.3 microns, smaller than mold spores.
Technician safety protocols protect workers and property inhabitants throughout the entire process. Professionals wear respirators, protective clothing, and gloves that prevent spore exposure. Containment procedures keep contamination isolated. Negative air pressure and air filtration systems prevent cross contamination to clean areas. These aren’t optional safety measures. They’re required procedures that separate professional remediation from amateur attempts.
Bathroom Mold Removal Pricing and Cost Variables

Bathroom mold removal costs vary significantly based on how much area is affected, how deep the contamination goes, and what materials need treatment or replacement. Free estimates are available from most contractors, and you should get detailed quotes before any work starts. Pricing differences between companies often reflect experience level, equipment quality, and how thoroughly they address underlying moisture problems rather than just removing visible mold.
Seven major factors determine your final cost.
Square footage of affected area. EPA and IICRC guidelines recommend professional service for mold exceeding 3 square feet. Small surface patches cost less to treat than contamination covering entire walls or ceilings.
Severity and depth of contamination. Surface mold on tiles costs a fraction of what you’ll pay for mold that’s penetrated drywall, spread into wall cavities, or compromised structural elements.
Type of affected materials. Porous materials like drywall and insulation require removal and disposal while nonporous surfaces can often be cleaned and restored. Replacement costs add up fast when you’re rebuilding sections of walls or ceilings.
Accessibility challenges including mold behind walls that requires demolition to reach, inside ceilings that need openings cut for access, and multi floor water damage scenarios where contamination has spread vertically through the building structure.
Testing and laboratory analysis fees for species identification when you need to know exactly what you’re dealing with or when insurance claims require documentation of specific mold types.
Restoration or replacement costs for damaged materials including new drywall installation, tile replacement, grout and caulking, painting, and reconstruction of removed sections.
Emergency service premiums for 24/7 response when you need immediate containment and can’t wait for regular business hours.
Typical pricing ranges give you a general framework, but every bathroom mold situation is different. Small projects under 10 square feet, maybe some grout line mold and ceiling spots in one corner, typically run $300 to $1,000 for professional cleaning and treatment. Medium projects covering 10 to 100 square feet might involve an entire shower enclosure, adjacent walls, and some ceiling damage, usually costing $1,000 to $4,000 depending on materials affected and necessary repairs. Large projects over 100 square feet that require drywall replacement, structural repairs, or multi room contamination can easily reach $4,000 to $15,000 or more. These are general estimates only. Your actual cost depends on your specific situation.
Request free detailed estimates from multiple licensed contractors. Ask about insurance claim assistance and what documentation they’ll provide for your records. Verify exactly what services are included in quoted prices. Does it cover just removal, or does it include repairs, repainting, and restoration? Are testing fees extra or included? What about follow up inspections to verify the work? Clear pricing transparency up front prevents surprise charges later.
DIY Bathroom Mold Removal vs Professional Service
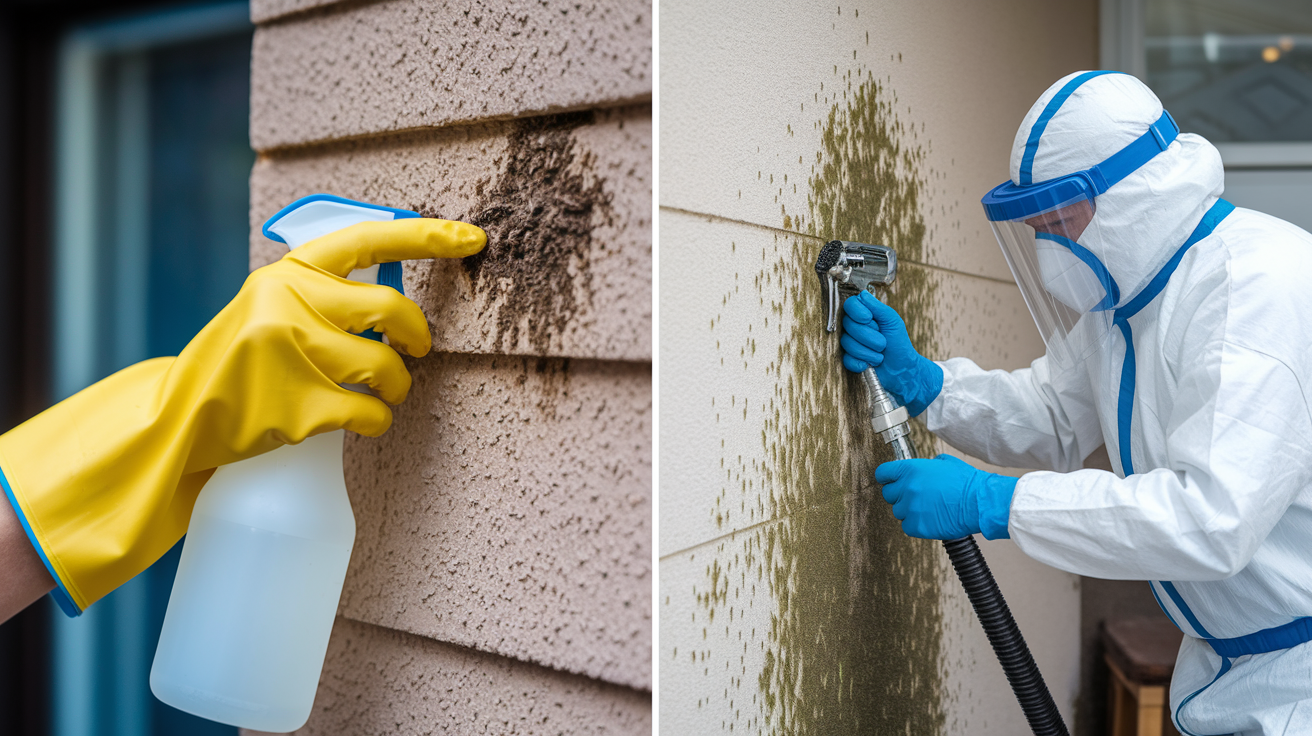
The EPA and IICRC establish 3 square feet as the dividing line between DIY cleaning and professional remediation. That’s roughly a patch bigger than a standard floor tile. If your mold coverage exceeds this threshold, professional help is recommended for safety and effectiveness.
DIY cleaning makes sense for small surface mold on nonporous surfaces like tile or glass, especially when it’s recent growth, you have no underlying moisture issues, and nobody in your household is experiencing health symptoms. Think small grout line discoloration you just noticed last week, or minor spots on your shower door that haven’t spread.
Four cleaning solutions work for small DIY projects.
Bleach and water mixture at a 1:10 ratio. One part bleach to ten parts water. Spray it on, let it sit for 10 minutes, then scrub and rinse thoroughly. Bleach should always be mixed with water before application. Straight bleach is unnecessarily toxic and can discolor fabrics and damage some surfaces. Work in a ventilated space and never mix bleach with other cleaning products, especially ammonia.
White vinegar undiluted sprayed directly on moldy surfaces. Let it sit for 10 to 15 minutes before scrubbing with a brush and rinsing with water. Vinegar is less harsh than bleach and works well on tile and grout.
Hydrogen peroxide 3% solution applied with a spray bottle. Give it 10 to 15 minutes to work before scrubbing and rinsing. Hydrogen peroxide is gentler than bleach but still effective on surface mold.
Baking soda paste made by mixing baking soda with a small amount of water until it forms a thick paste. Apply it to moldy grout or caulking, let it sit for 30 minutes to an hour, then scrub vigorously and rinse clean.
DIY cleaning requires proper safety equipment even for small areas. Wear puncture resistant gloves to protect your hands from cleaning solutions and mold contact. Use masks or respirators. HEPA filter masks provide better protection than basic dust masks, especially if you’re scrubbing aggressively and creating airborne particles. Wear eye protection like safety glasses because mold spores and cleaning solutions can both irritate your eyes. Open windows or run your exhaust fan during cleaning to maintain ventilation.
Call professionals when you’re dealing with mold exceeding 3 square feet, mold growing behind walls or inside ceilings where you can’t reach it with surface cleaning, black mold that looks slimy or particularly dark, growth that keeps coming back despite repeated cleaning attempts, or any situation where people in your home are experiencing respiratory symptoms, allergic reactions, or other health issues. Professional help is also necessary when you’re dealing with porous materials like drywall or insulation that can’t be cleaned effectively, or when you’ve had structural water damage from leaks or flooding.
Preventing Bathroom Mold After Professional Removal

Removing existing mold is only half the solution. Controlling moisture and improving ventilation prevents recurrence and protects your investment in professional remediation. Mold will return if the conditions that caused it in the first place don’t change.
Eight prevention measures keep your bathroom mold free long term.
Run exhaust fans during and 20 to 30 minutes after showers to remove humid air while surfaces dry. Set a timer if you forget to turn the fan off.
Ensure exhaust fans vent to exterior not attic because dumping humid air into enclosed spaces just relocates the moisture problem where you can’t see it.
Repair plumbing leaks promptly including dripping faucets, leaking showerheads, sweating toilets, and any pipe connections showing moisture or corrosion.
Use dehumidifiers in humid climates to maintain indoor humidity below 50%, especially during summer months or in areas with poor natural ventilation.
Apply mold resistant paint on ceilings and walls when repainting after remediation or during routine maintenance. These paints contain antimicrobial additives that inhibit mold growth on painted surfaces.
Replace damaged grout and caulking every 1 to 2 years before it fails completely and allows water penetration behind tiles and into wall cavities.
Use mold resistant shower curtains and bath mats instead of fabric versions that stay damp and develop mildew quickly. Wash or replace them regularly.
Wipe down wet surfaces after bathing including shower walls, tub edges, and countertops where water pools. A quick squeegee or towel wipe removes the surface moisture mold needs to grow.
Professional maintenance plans offer periodic inspections, maybe every 6 or 12 months, that catch moisture problems early before they become visible mold growth. These programs include checking grout and caulking condition, testing moisture levels in walls and ceilings, inspecting plumbing connections, and verifying that exhaust fans are working properly and venting correctly. Addressing underlying moisture sources is part of comprehensive prevention. Fixing plumbing issues, improving drainage around fixtures, adding or upgrading ventilation systems, and applying waterproofing measures in high exposure areas like shower enclosures.
Prevention costs a fraction of what you’ll pay for repeated remediation. Moisture control is the foundation of successful long term mold prevention. Eliminate the water source and you eliminate the mold problem.
Emergency Bathroom Mold Removal Response

Bathroom mold emergencies require immediate professional response when you’re dealing with sudden water damage events, extensive growth discovered during renovations, residents experiencing severe health symptoms, or visible structural concerns like ceiling sagging or bulging walls. These situations can’t wait for regular business hours or next week scheduling.
Scenarios requiring emergency response include burst pipes causing flooding in or above your bathroom, toilet overflows that soak floors and walls, sewage backups that contaminate bathroom surfaces with dangerous pathogens, storm damage with water intrusion through roofs or windows, multi floor water seepage where an upper bathroom is compromising structural elements on lower floors, and sudden discovery of extensive hidden mold behind walls or above ceilings during repairs or renovations. Immediate attention is required for excess water from leaking toilets and burst pipes. Waiting even a few hours allows water to penetrate deeper into building materials and spread contamination further.
Emergency service includes rapid assessment with on site arrival within hours of your call, immediate containment to prevent mold spores from spreading throughout your property while remediation is being planned, water extraction and emergency drying when you’re dealing with active flooding or standing water, and expedited remediation scheduling that prioritizes your project to minimize property damage and health exposure. Emergency teams bring the specialized equipment needed for water damage restoration along with mold specific containment and removal tools.
Most certified contractors maintain 24/7 availability through emergency hotlines. Typical response time for true emergencies is 2 to 4 hours from initial contact to technicians arriving on site. When you call, have specific information ready. What caused the problem (burst pipe, overflow, leak discovery), how long it’s been happening, approximate square footage affected, whether water is still actively leaking, and whether anyone is experiencing health symptoms. This information helps emergency teams bring the right equipment and personnel on the first trip.
Bathroom Mold Service for Landlords and Rental Properties

Landlords and property managers have legal responsibilities for maintaining habitable rental properties. That includes responding promptly to tenant mold complaints, addressing underlying moisture issues that cause mold growth, and preventing recurrence through proper maintenance. Failure to act can create liability for tenant health problems and property damage.
Tenant notification requirements vary by state, but good practice includes informing tenants about scheduled inspection and remediation work, explaining what to expect during the process, and documenting all communication. Access coordination gets complicated when tenants work during business hours or have concerns about contractors entering their unit. Work with your remediation company to schedule service at convenient times and minimize disruption. Temporary relocation might be necessary for extensive projects where containment procedures, demolition, or strong cleaning solutions make the unit temporarily uninhabitable. Documentation protects you legally. Keep records of tenant complaints, inspection reports, remediation work performed, before and after photos, and clearance testing results.
Multi unit challenges complicate bathroom mold in apartment buildings. Cross contamination risks exist when ventilation systems connect units or when remediation in one apartment releases spores that travel to adjacent spaces. Shared plumbing systems can spread moisture problems when leaks from one unit affect others. Multi floor water migration is particularly problematic. An upper floor bathroom leak compromises ceiling drywall and wooden beams on lower floors, often affecting tenants who had nothing to do with the original problem.
Professional services tailored for rental properties include flexible scheduling options that work around tenant availability and minimize vacancy time between renters. Comprehensive documentation provides tenant communication materials and legal protection if disputes arise. Follow up inspections verify complete remediation and give you proof that the problem is resolved. Preventive maintenance programs protect property value through regular assessments that catch problems before they become expensive emergencies.
Proactive mold prevention and rapid response to tenant complaints are cost effective property management strategies. They reduce liability, preserve tenant relationships, minimize turnover costs, and protect your long term property value. Ignoring a tenant’s mold complaint until it becomes a major remediation project costs more in every way.
Insurance Coverage for Bathroom Mold Removal

Insurance coverage for bathroom mold removal typically depends on what caused the mold growth in the first place. Sudden and accidental water damage events like burst pipes, toilet overflows, and storm damage are often covered under standard homeowners insurance policies. Gradual issues from poor maintenance, chronic leaks you ignored for months, or general neglect are usually excluded from coverage. Read your policy carefully. Mold coverage varies significantly between insurance companies and policy types.
Documentation requirements for successful claims are strict. Take photographs of all damage before and during remediation showing the extent of mold growth, affected materials, and water damage. Get professional inspection reports with mold identification, moisture readings showing where water infiltrated building materials, and documentation of the water source that caused the problem. Obtain detailed remediation scope documents and cost estimates from licensed contractors. Keep records of immediate mitigation efforts you took to minimize damage after discovering the problem. Insurance companies want to see that you acted reasonably to prevent the situation from getting worse.
Review your specific policy coverage and exclusions before filing claims. Some policies have mold coverage limits or sub limits that cap payouts regardless of actual damage costs. Report claims promptly after discovery. Most policies require notification within 24 to 48 hours of discovering damage. Work with remediation companies experienced in insurance documentation and claims assistance. These contractors know what insurance adjusters need to see and can provide detailed reporting that supports your claim.
Out of pocket costs typically include prevention related improvements like upgrading ventilation systems, maintenance issues that caused the problem in the first place (repairs to chronic leaks you should have fixed earlier), and your policy deductible. Coverage focuses on the remediation itself when caused by covered perils. The actual mold removal and restoration of damaged materials. Prevention and upgrades are on you.
Selecting the Right Bathroom Mold Removal Contractor
Researching multiple providers and requesting free consultations before making a decision protects you from hiring unqualified contractors or overpaying for services. Not all mold removal companies operate at the same level of expertise, and the cheapest bid isn’t always the best value.
Seven selection criteria help you evaluate contractors.
Verify state licensing and insurance coverage by asking for license numbers and insurance certificates, then confirming them through state regulatory agencies and insurance providers. Don’t take someone’s word for it.
Check IICRC certification and EPA compliance to ensure the company follows industry standard remediation protocols and stays current on best practices through continuing education.
Read customer reviews and testimonials on independent platforms like Google, Yelp, and Better Business Bureau rather than just the reviews featured on the company’s own website.
Request detailed written estimates with scope of work breakdown that specifies exactly what services are included, what materials will be removed or treated, and what the timeline looks like from start to final clearance.
Ask about warranty and satisfaction guarantees on completed work including what happens if mold returns within a certain timeframe after remediation.
Inquire about specific experience with bathroom mold issues and years in business. Companies with decades of experience handling bathroom contamination have seen every scenario and know how to address hidden problems.
Confirm availability and typical response times for both routine service and emergency situations, especially if you’re dealing with active water damage that needs immediate attention.
Red flags to avoid include unusually low bids that seem too good to be true and probably are. They indicate shortcuts, inexperienced workers, or hidden costs that show up later. High pressure sales tactics demanding immediate decisions without time to compare options suggest the company is more focused on closing sales than doing quality work. Reluctance to provide credentials, references, or proof of licensing and insurance means they’re hiding something. Vague scopes of work without specific details about what they’ll actually do leave room for disagreements about what was included in the price. Unwillingness to answer your questions or explain their process clearly indicates poor communication that will continue throughout your project.
Free on site consultations and estimates provide accurate project assessment rather than ballpark phone quotes. Different bathrooms have different challenges, and seeing the actual contamination helps contractors price appropriately. Companies offering comprehensive property restoration services beyond just mold, like fire damage restoration services and water damage repair, often bring more extensive experience and equipment to bathroom mold projects.
Ask for references from recent similar projects so you can hear from actual customers who dealt with bathroom mold remediation. View before and after documentation or case studies that show the company’s work quality and problem solving approach. Select contractors who prioritize clear communication and transparency throughout the remediation process. You should always know what they’re doing, why they’re doing it, and what comes next.
Final Words
Bathroom mold doesn’t fix itself, and small problems turn into bigger ones fast.
The good news is you don’t have to handle it alone. A professional bathroom mold removal service can assess the situation, contain the spread, and get your bathroom back to safe and clean.
Whether it’s surface mold on tile or hidden growth behind the walls, trained technicians follow proven methods to remove it completely and help you prevent it from coming back.
You’ve got the information. Now it’s about taking the next step and protecting your home and your health.
FAQ
How much does bathroom mold treatment cost?
Bathroom mold treatment costs $300 to $1,000 for small areas under 10 square feet, $1,000 to $4,000 for medium projects covering 10-100 square feet, and $4,000 to $15,000+ for large projects over 100 square feet. Costs depend on square footage, contamination severity, affected materials, accessibility challenges, testing needs, and whether porous materials like drywall require replacement.
Is professional mold removal worth the investment?
Professional mold removal is worth it for areas exceeding 3 square feet, mold behind walls or ceilings, black mold presence, recurring growth, structural damage, and when residents experience health symptoms. Professionals follow EPA guidelines and IICRC S520 standards, use specialized detection equipment, prevent spore spread through proper containment, and protect both property value and occupant health.
What kills 100% of bathroom black mold?
Professional-grade antimicrobial treatments kill black mold when applied by certified technicians following IICRC S520 protocols. For small surface areas under 3 square feet, undiluted white vinegar applied for 10-15 minutes, hydrogen peroxide 3% solution left for 10-15 minutes, or bleach-water mixture (1:10 ratio) can kill surface mold. Porous materials like drywall often require replacement rather than cleaning.
What are the warning signs of mold sickness?
Mold sickness signs include respiratory problems like coughing and wheezing, aggravated asthma and allergies, skin rashes and irritation from direct contact, eye irritation, and persistent headaches. Airborne mold spores affect indoor air quality and cause more severe symptoms in individuals with weakened immune systems, existing allergies, young children, and elderly residents. Seek professional mold removal if experiencing these symptoms.
When should you call professionals for bathroom mold?
Call professionals when mold exceeds 3 square feet per EPA and IICRC guidelines, appears behind walls or ceilings, involves black mold, recurs despite cleaning, causes resident health symptoms, shows structural damage like sagging ceilings, or affects porous materials like drywall and insulation. Emergency situations include burst pipes, toilet overflows, multi-floor water seepage, and sudden discovery of extensive hidden mold.
How do you prevent bathroom mold after removal?
Prevent bathroom mold by running exhaust fans during and 20-30 minutes after showers, ensuring fans vent to exterior not attic, repairing plumbing leaks promptly, maintaining humidity below 50% with dehumidifiers, applying mold-resistant paint, replacing damaged grout and caulking every 1-2 years, using mold-resistant shower curtains, and wiping down wet surfaces after bathing.
Does homeowners insurance cover bathroom mold removal?
Homeowners insurance typically covers bathroom mold removal when caused by sudden and accidental water damage like burst pipes, toilet overflows, and storm damage. Coverage usually excludes mold from gradual issues, poor maintenance, chronic leaks, or neglect. Document damage with photographs, professional inspection reports, moisture readings, detailed estimates, and immediate mitigation efforts to support insurance claims filed within 24-48 hours.
What credentials should mold removal contractors have?
Qualified mold removal contractors hold IICRC certification with 30+ years experience examples, state licensing with verifiable license numbers, EPA guideline compliance, and full insurance coverage. They follow IICRC S520 Guidelines and proper safety protocols, use specialized detection equipment including moisture meters and infrared cameras, and provide detailed written estimates with scope of work breakdown and satisfaction guarantees.
