
Did someone really just tell you a burst pipe is “sudden and accidental” so insurance will obviously cover it? Not always. Insurance companies deny thousands of water damage claims every year based on exclusions most homeowners never saw coming. The claim process itself has specific steps, tight deadlines, and documentation requirements that can make or break your settlement. This guide walks you through the entire burst pipe insurance claim process, from the moment you discover the leak to final payment, so you know exactly what to do, what to avoid, and how to protect your coverage.
What to Do Immediately When You Discover a Burst Pipe
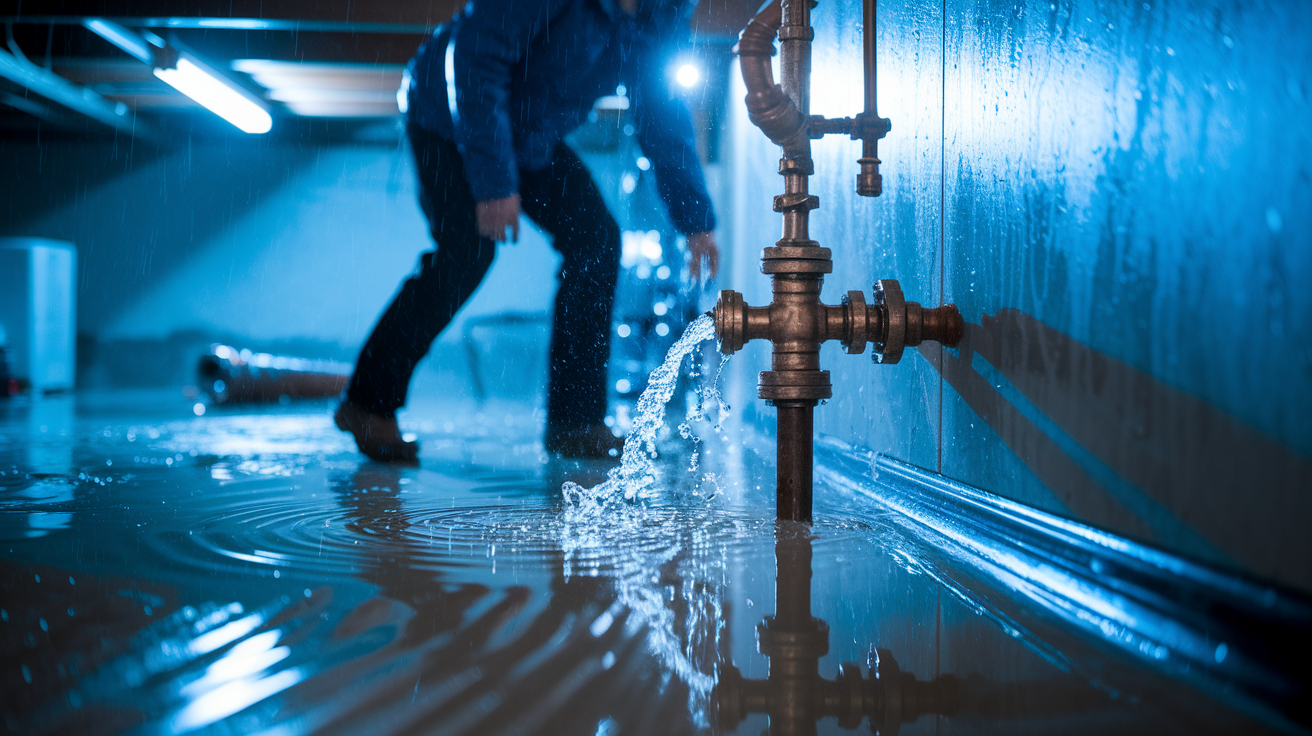
Water spraying from a broken pipe creates an urgent situation that needs immediate action. The steps you take in the first minutes and hours can protect both your property and your insurance claim.
Here’s what to do right now:
-
Locate and shut off the main water valve immediately to stop water flow. Your main shutoff is typically near the water meter, in the basement, or where the water line enters your home. Turn it clockwise to close.
-
Turn off electricity to affected areas if water is near outlets or electrical systems. Water and electricity create dangerous conditions. Flip the breaker for any rooms with standing water or wet walls.
-
Contact an emergency plumber for professional pipe repair. Don’t wait. A qualified plumber needs to assess the pipe, make repairs, and confirm no additional pipes are at risk. Keep the invoice.
-
Document everything with photos and videos before any cleanup begins. Capture the burst pipe location, water source, all affected rooms, wet walls, damaged floors, soaked belongings, and standing water. This evidence supports your claim.
-
Begin water removal and drying process within 24 to 48 hours to prevent mold. Water seeps into floors, walls, and electrical wiring quickly. Professional water damage restoration services use industrial equipment to extract water and dry hidden moisture before mold develops.
Track these mitigation expenses for reimbursement:
- Emergency plumber call out fees and temporary pipe repairs
- Water extraction and removal services
- Industrial drying equipment and dehumidifiers
- Moisture detection and monitoring
- Temporary tarping or boarding of damaged areas
- Contents pack out and storage for protection
- Antimicrobial treatments to prevent mold growth
Your insurance policy requires immediate mitigation to prevent further damage. Reasonable mitigation expenses are typically reimbursable when you submit receipts and invoices. Failure to take prompt action can result in claim reduction or denial based on negligence, so acting fast protects both your home and your coverage.
Filing Your Claim: Step by Step Process From Contact to Adjuster Assignment

Once emergency mitigation is underway, the formal claim filing process begins. Following the correct process and preparing thoroughly ensures smooth claim handling without unnecessary delays.
Here’s the filing process from start to finish:
-
Review your insurance policy for coverage details and exclusions. Confirm burst pipes are covered under your specific policy and check for any limitations or conditions that apply.
-
Contact your insurance company immediately, within 24 to 48 hours maximum. Most policies require prompt notification. Call the claims phone number on your policy or insurance card.
-
Provide detailed information including date, time, cause of burst, location, extent of visible damage. The more specific you are during first notice, the faster the process moves. Mention if water affected multiple rooms or floors.
-
Obtain your claim number and adjuster contact information. Write down your claim number immediately and confirm the name and phone number of the adjuster assigned to your case.
-
Organize all documentation including photos, videos, and mitigation receipts. Gather everything in one folder (digital or physical) so you can access it quickly when the adjuster requests information.
-
Schedule the adjuster inspection visit at earliest availability. The sooner the adjuster sees the damage, the sooner you receive a settlement offer. Coordinate a time when you can be present.
-
Be present during inspection to point out all damaged areas including potential hidden damage. Walk through every affected room with the adjuster. Point out water stains on ceilings, damp baseboards, warped flooring, and any areas where water may have traveled behind walls.
The adjuster’s role is evaluating damage extent, determining repair costs, and making settlement recommendations to the insurance company. During the inspection, they’ll ask when you discovered the burst, what emergency steps you took, and whether you’ve started any repairs. They’ll measure damaged areas, take their own photos, and assess what needs replacement versus repair. Walk through all affected spaces slowly and mention concerns about hidden moisture or potential mold growth in wall cavities or under flooring.
Insurance companies dispatch their own assessors, but you can retain independent experts for a second opinion. This option makes sense for complex claims involving potential mold, structural damage, or disputes over damage severity. Public adjusters work exclusively for policyholders (not the insurance company) and can identify damage the insurance adjuster might minimize or overlook. Their expertise often uncovers additional covered damage that increases your settlement.
Documentation Requirements and Evidence Collection for Pipe Burst Claims

Thorough documentation is the foundation of successful claims. In 2021, over 23 percent of homeowners insurance claims were water damage related, and the claims that settled quickly and fairly had one thing in common: organized, complete evidence.
Gather and organize this documentation:
- Photos and videos of the burst pipe location and water source
- Images of all affected rooms, walls, floors, and ceilings
- Pictures of damaged furniture, belongings, and personal property
- Itemized inventory list of damaged items with estimated values
- Emergency plumber invoices and repair estimates
- Receipts for temporary repairs and mitigation costs
- Professional contractor assessments and quotes
- Records of any previous maintenance or inspections
- Communication logs with insurance company including dates, times, and names of representatives
Organize your documentation chronologically, starting with discovery photos and moving through mitigation receipts to repair estimates. Keep digital copies backed up in cloud storage and physical copies in a dedicated folder. When the adjuster requests additional documentation (and they will), you can provide it immediately without scrambling to locate receipts weeks later. This preparation speeds up the process and demonstrates that you’re a credible, organized policyholder who took the claim seriously from day one.
Understanding Your Insurance Coverage for Burst Pipe Damage

Most standard homeowners insurance policies cover sudden and accidental burst pipe damage under dwelling and contents coverage. Policy specifics determine the exact scope of what’s covered, which is why reviewing your policy language before filing prevents surprises later.
Dwelling coverage handles structural damage including walls, floors, ceilings, drywall, subflooring, framing, and built in fixtures. If the burst pipe soaked your drywall, warped your hardwood floors, or damaged ceiling joists, dwelling coverage pays for repairs or replacement. Contents coverage addresses personal belongings like furniture, electronics, clothing, appliances, and other possessions damaged by the water. These two coverage types work together to restore both your home’s structure and the items inside it.
Common exclusions can derail claims if you’re not aware of them. Insurance policies typically exclude gradual damage that occurred over time, wear and tear from aging plumbing systems, lack of maintenance, negligence on the part of the homeowner, and preventable damage from frozen pipes in unheated areas where reasonable winterization wasn’t performed. If the pipe burst because it was old and corroded, and you had warning signs of leaks or deterioration that you ignored, the insurer might deny coverage based on gradual damage or lack of maintenance. If you left your home unheated during a winter freeze without draining the pipes, that could be considered negligence.
Review your specific policy language before filing and note any coverage limits or deductibles that apply. Policies often cap water damage coverage at a certain percentage of your dwelling coverage, and your deductible (typically $500 to $2,500) comes out of the settlement before you receive payment. Understanding these numbers upfront helps you set realistic expectations for what you’ll actually receive.
Common Coverage Exclusions That Can Lead to Claim Denials

Not all burst pipe damage is automatically covered. Understanding exclusions helps you avoid claim denials and prepares you to address potential challenges before they become problems.
Insurance companies scrutinize burst pipe claims for conditions that fall outside policy coverage. Knowing these exclusions ahead of time allows you to gather evidence that counters denial reasons and demonstrates the damage qualifies for coverage.
Common exclusions that lead to denials:
- Gradual damage from slow leaks over time
- Wear and tear from aging plumbing systems
- Negligence or failure to maintain the property
- Pre existing conditions known to the homeowner
- Damage from faulty appliances or fixtures
- Lack of preventive measures during owner absences
- Failure to take immediate mitigation steps after discovery
Maintain records of plumbing maintenance and preventive efforts including professional inspections, pipe repairs, winterization steps, and appliance maintenance. Dated receipts and inspection reports demonstrate reasonable care and counter claims of negligence or lack of maintenance. If you’ve had annual plumbing inspections and the pipe burst despite proper care, that documentation strengthens your claim and makes denial based on maintenance issues harder to justify.
Timeline Expectations: How Long Does the Claim Process Take?

The typical timeline from initial filing to payment runs like this: 24 to 48 hours for adjuster assignment after you file, 3 to 7 days for the inspection to occur, 1 to 3 weeks for the initial settlement offer after the inspection, and 2 to 6 weeks for payment after you agree to the settlement. That’s roughly 4 to 9 weeks total for straightforward claims without disputes.
Widespread weather events dramatically increase claim volume and processing times. During the 2021 Texas winter freeze, State Farm received 18,900 frozen pipe claims in one week compared to only 75 frozen pipe claims in all of 2020. When thousands of claims flood in simultaneously, adjusters get overwhelmed, inspections get delayed, and settlement processing slows down. If your burst pipe happened during a regional freeze event, expect longer timelines.
Factors that extend timelines include disputes over damage extent (when you and the adjuster disagree on what needs repair), the need for independent assessments from structural engineers or mold specialists, supplemental claims for hidden damage discovered during repairs, and negotiation of settlement amounts when the initial offer doesn’t cover full repair costs. Complex claims involving mold remediation, structural damage, or electrical system replacement take longer than simple drywall and flooring repairs. Follow up regularly on claim status and document all communications to keep the process moving.
Additional Coverage Benefits: Living Expenses and Temporary Housing During Repairs

Additional living expense (ALE) or loss of use coverage is a benefit many policyholders overlook. If burst pipe damage makes your home temporarily uninhabitable, your policy likely covers the extra costs of living elsewhere during repairs.
ALE typically covers hotel or rental housing costs, meals above your normal food expenses (for example, if you spend $200 more per week eating out versus cooking at home), laundry services if your washer is damaged or inaccessible, pet boarding if temporary housing doesn’t allow pets, and reasonable transportation costs. The key word is “additional.” Insurance covers costs above your normal living expenses, not your entire lifestyle. Save all receipts for reimbursement including hotel invoices, restaurant receipts, laundry service bills, and pet boarding statements.
Coverage limits often run 20 to 30% of your dwelling coverage, and time restrictions typically align with the reasonable time needed to complete repairs. If your dwelling coverage is $300,000, ALE might max out at $60,000 to $90,000. Confirm your specific policy limits before incurring expenses, and notify your adjuster immediately if repairs are taking longer than expected and you’re approaching your ALE limit.
Understanding Policy Deductibles and Settlement Payment Structures

Understanding payment structures prevents surprise costs and confusion when your settlement check arrives lower than the total damage estimate.
| Payment Method | What It Means | When You Receive Full Amount |
|---|---|---|
| Replacement Cost Value | Insurance pays to replace damaged property with new items of similar quality, with no deduction for age or wear | After repairs are completed and you submit receipts proving the work was done |
| Actual Cash Value | Insurance pays replacement cost minus depreciation for age and wear, resulting in lower payout | Immediately upon settlement agreement, but amount is reduced by depreciation |
Deductibles (typically $500 to $2,500) must be paid out of pocket before insurance covers remaining costs. The deductible is subtracted from the total settlement amount, not paid separately. If your damage totals $15,000 and your deductible is $1,000, you receive $14,000 from insurance and pay $1,000 yourself. That $1,000 usually goes directly to your contractor as part of your total payment to them.
Mortgage lender endorsement requirements apply when significant structural damage needs repair and your home secures a mortgage. The lender must co-sign settlement checks to ensure funds go toward repairs that protect their collateral. Replacement Cost Value policies often use a two payment structure: an initial Actual Cash Value payment (replacement cost minus depreciation) when you file the claim, then the depreciation amount (the “holdback”) after repairs are completed and you submit contractor invoices and receipts. This structure incentivizes completing repairs and prevents policyholders from pocketing insurance money without fixing the damage.
Hidden Damage Concerns: Mold, Structural Issues, and Supplemental Claims

Burst pipe water damage often extends beyond visible areas, seeping into wall cavities, subfloors, insulation, and electrical systems where it causes hidden deterioration. Water travels along framing, soaks insulation, pools above ceilings, and saturates materials you can’t see without removing drywall or flooring.
Mold growth can occur within 24 to 48 hours after water damage. Once water reaches hidden spaces, the clock starts. Professional moisture detection equipment identifies water trapped in concealed spaces before mold develops. Thermal imaging cameras spot temperature differences indicating wet insulation behind walls, moisture meters measure water content in framing and subfloors, and hygrometers track humidity levels that signal ongoing moisture problems. Don’t rely on visual inspection alone. Wet drywall can look dry on the surface while holding moisture behind the paint. Professional mold remediation services use specialized equipment to find and treat these hidden problems before they become health hazards.
Common hidden damage includes compromised structural framing where water soaked wooden beams lose strength and stability, electrical hazards from water infiltration into wiring and junction boxes, insulation saturation that destroys R value and requires replacement, subfloor deterioration where water pools under finished flooring, and ceiling cavity water pooling above drywall that spreads damage across large areas. These issues often don’t appear until weeks after the initial burst when you notice sagging ceilings, musty odors, or visible mold growth.
File supplemental claims for damage discovered after the initial settlement. The process requires thorough inspection during repairs and prompt notification to your insurer when additional damage is found. If your contractor tears out wet drywall and discovers mold growth or rotted framing, photograph it immediately, stop work, and contact your adjuster before proceeding. Supplemental claims require the same documentation as original claims (photos, contractor assessments, and repair estimates), but they’re common in water damage cases where the full extent isn’t visible until demolition begins. Don’t delay reporting newly discovered damage. The longer you wait, the harder it becomes to prove the damage resulted from the original burst pipe versus a separate incident.
When to Hire a Public Adjuster for Your Pipe Burst Claim

Public adjusters work exclusively for policyholders as independent advocates, not for insurance companies. They’re licensed professionals who assess damage, prepare claim documentation, and negotiate with insurers on your behalf.
Consider hiring a public adjuster in these situations:
- Large or complex claims involving significant structural damage
- Disputes over damage extent or repair costs with insurance company
- Initial settlement offer seems inadequate for full repairs
- Homeowner lacks time to manage extensive documentation and negotiations
- Multiple areas of damage requiring detailed itemization
- Previous claim denial or underpayment concerns
The Texas Department of Insurance found that engaging an advocate increases property insurance claim payments by an average of 308 percent. Public adjusters identify overlooked damage, maximize coverage by finding policy provisions that apply to your specific situation, and negotiate higher settlements using detailed damage assessments and repair cost documentation. Their expertise in policy language and claim valuation often uncovers covered damage the insurance company’s adjuster minimized or missed entirely. They know which questions to ask contractors, how to document hidden moisture damage, and what language in your policy supports higher payouts.
Typical fee structure runs 5 to 15% of the final settlement, paid only when you receive payment from the insurance company. If you don’t get paid, they don’t get paid, which aligns their incentives with maximizing your claim. While paying a percentage sounds expensive, their expertise often results in net gain despite fees. If a public adjuster increases your settlement from $20,000 to $50,000 and charges 10%, you pay $5,000 but net $45,000 instead of $20,000. A $25,000 improvement. For complex claims with disputed damage or inadequate initial offers, that math works in your favor.
Dealing With Claim Denials: Appeal Process and Next Steps
Claim denials happen, but they can often be successfully appealed with the proper approach. Don’t accept a denial as final without understanding your options.
First steps after denial include requesting a written explanation of the specific denial reasons (insurers must provide this), reviewing your policy language related to the denial justification to understand whether the denial is valid, and gathering additional evidence to counter the denial rationale such as independent expert assessments, maintenance records, or technical documentation that contradicts the insurer’s position.
The formal appeal process requires submitting a written appeal with supporting documentation within the policy specified timeframe, typically 60 to 180 days from the denial date. Your appeal should address each denial reason specifically, provide evidence that contradicts the insurer’s conclusion, reference policy language that supports coverage, and include expert opinions or professional assessments when relevant. Don’t just restate your original claim. Add new evidence and arguments the insurer hasn’t seen.
Escalation options beyond internal appeals include invoking the appraisal clause for valuation disputes (when you and the insurer disagree on repair costs but not on whether damage is covered), filing complaints with your state insurance department which investigates bad faith practices and policy violations, and pursuing arbitration or mediation as policy alternatives to litigation. These options often resolve disputes faster and cheaper than going to court.
Consult property insurance attorneys when you encounter bad faith insurance practices like unreasonable delays or denial without proper investigation, complex policy interpretation issues where coverage depends on legal definitions, or litigation consideration when appeals fail and the amount in dispute justifies legal action. Attorneys can review denial reasons, gather additional evidence, and build cases for pre suit appeals or litigation that often result in settlements before trial.
Maximizing Your Claim Settlement: Negotiation Strategies
Initial settlement offers are often negotiable. You have the right to advocate for full coverage when the offer doesn’t reflect the true cost of restoring your property.
Effective negotiation strategies:
- Obtain multiple independent contractor estimates for comparison and leverage
- Document all damage thoroughly including hidden and secondary damage the adjuster may have missed
- Include long term impact costs like mold prevention, structural monitoring, and moisture control systems
- Request detailed breakdown of how the insurer calculated the settlement amount
- Challenge depreciation amounts that undervalue replacement costs or use outdated pricing
- Include code upgrade costs when repairs require bringing plumbing, electrical, or structural systems to current building standards
- Present an organized documentation package supporting higher valuation with contractor quotes, material pricing, and expert assessments
Professional estimates and thorough documentation strengthen your negotiation position by shifting the burden back to the insurance company to justify why their offer is adequate despite evidence showing higher costs. When you present three contractor estimates averaging $35,000 and the insurer offers $22,000, they need to explain the gap. Persistence and detailed justification often result in increased settlements, especially when you can demonstrate the insurer overlooked damage, undervalued materials, or failed to account for code compliance requirements.
Preventing Future Burst Pipe Claims: Property Maintenance and Risk Reduction
Prevention reduces the risk of burst pipes and strengthens your position for any future claims by demonstrating reasonable care. Documented preventive measures can prevent denial based on negligence or lack of maintenance when the unexpected happens despite your efforts.
Winterization and Frozen Pipe Prevention
Water freezes in pipes at temperatures below 32 degrees, creating blockages that build pressure between the ice and faucets until pipes burst. Attic and exterior wall pipes are most vulnerable because they’re exposed to colder temperatures than pipes inside heated spaces.
Protect pipes during cold weather by insulating exposed pipes in attics and exterior walls with foam pipe insulation, maintaining minimum heat levels of 55°F when the property is occupied or vacant during winter months, opening cabinet doors during freezes to allow warm air circulation around pipes under sinks, draining pipes when the property will be unoccupied during freezing temperatures by shutting off the main water valve and opening all faucets to release pressure, and understanding that prevention matters more during extended freezes when temperatures stay below 32 degrees for days.
Regular plumbing inspection and maintenance matters year round, not just during winter. Schedule annual professional inspections to identify aging pipes, corrosion, or deterioration before failure occurs. Replace aging supply lines and hoses every 5 to 7 years, especially rubber washing machine hoses that become brittle and crack. Monitor pipe condition in vulnerable locations like attics and exterior walls where temperature fluctuations and exposure increase failure risk.
Document all maintenance activities with dated receipts and inspection reports. Maintenance records demonstrate reasonable care and can prevent denial of future claims based on negligence or lack of maintenance. Insurance companies scrutinize claims for evidence of proper property care, and a folder of annual inspection reports and maintenance receipts shows you took preventive steps despite the burst occurring anyway. That documentation shifts the narrative from “negligent homeowner” to “responsible homeowner who experienced an unpreventable failure despite proper maintenance.”
Final Words
A burst pipe insurance claim process doesn’t have to feel overwhelming when you know the steps.
Shut off the water, document everything, call your insurer fast, and keep organized records. Those actions protect both your home and your settlement.
Most claims move through smoothly when homeowners take quick mitigation steps, stay present during inspections, and push back on low offers with solid evidence.
If things get complicated, you’ve got options. Public adjusters, independent contractors, and appeal processes exist for a reason.
Your home can recover from this. Follow the process, keep the receipts, and you’ll get there.
FAQ
Can you file an insurance claim for a burst pipe?
You can file an insurance claim for a burst pipe if the damage was sudden and accidental. Most standard homeowners insurance policies cover burst pipe damage to your home’s structure and belongings, but you should review your specific policy for coverage details and exclusions before filing.
Do insurance companies pay out for burst pipes?
Insurance companies pay out for burst pipes when the damage results from sudden, accidental incidents covered under your policy. However, they may deny claims if the burst resulted from lack of maintenance, gradual wear and tear, negligence, or preventable damage from frozen pipes in unheated areas.
What is the average insurance payout for water damage?
The average insurance payout for water damage varies widely based on damage extent, affected areas, and necessary repairs. Settlement amounts depend on your policy limits, deductible, repair estimates, and whether your policy pays replacement cost value or actual cash value minus depreciation.
What not to say to an insurance claim adjuster?
When speaking to an insurance claim adjuster, avoid admitting fault, speculating about damage causes, downplaying damage severity, or accepting blame for negligence. Stick to factual descriptions of what happened, when you discovered the burst pipe, and what emergency mitigation steps you took immediately.
How quickly must you report a burst pipe to your insurance company?
You must report a burst pipe to your insurance company within 24 to 48 hours of discovery to meet most policy notification requirements. Delaying claim filing makes it harder to prove damage was caused by the burst pipe and can result in claim denial based on late notification.
What mitigation steps are required after discovering a burst pipe?
Required mitigation steps after discovering a burst pipe include shutting off the main water valve immediately, removing standing water, beginning the drying process within 24 to 48 hours to prevent mold, and documenting all damage with photos before cleanup begins.
Will insurance cover emergency plumber costs for a burst pipe?
Insurance covers emergency plumber costs for burst pipe repairs as part of reasonable mitigation expenses when you take immediate action to stop water flow and prevent further damage. Keep all receipts for plumber call-out fees, temporary repairs, and related emergency services for reimbursement.
How does mold growth affect burst pipe insurance claims?
Mold growth affects burst pipe insurance claims because it can develop within 24 to 48 hours after water damage occurs. Taking immediate mitigation steps to dry affected areas prevents mold development and protects your claim, while delayed action can result in mold exclusions or reduced settlements.
What documentation do you need for a burst pipe insurance claim?
Documentation needed for a burst pipe insurance claim includes photos and videos of the burst pipe location, all affected areas, damaged belongings, itemized inventory lists with estimated values, emergency plumber invoices, mitigation service receipts, contractor repair estimates, and records of all insurance company communications.
Can you negotiate a burst pipe insurance settlement?
You can negotiate a burst pipe insurance settlement by obtaining multiple independent contractor estimates, documenting all damage thoroughly including hidden damage, requesting detailed breakdowns of the insurer’s calculations, and challenging inadequate depreciation amounts with organized documentation supporting higher repair costs.
