
Did you know smoke damage from a kitchen fire can mess up rooms the flames never touched? Soot travels through your HVAC system and settles on walls, furniture, and inside cabinets three rooms away while you’re still dealing with the burned stove. A thorough kitchen fire damage assessment isn’t just about what burned. It’s about mapping where smoke went, checking if your floor joists are still solid, and catching hidden problems before they turn into safety hazards or insurance headaches.
Essential Safety Protocols Before Assessing Kitchen Fire Damage
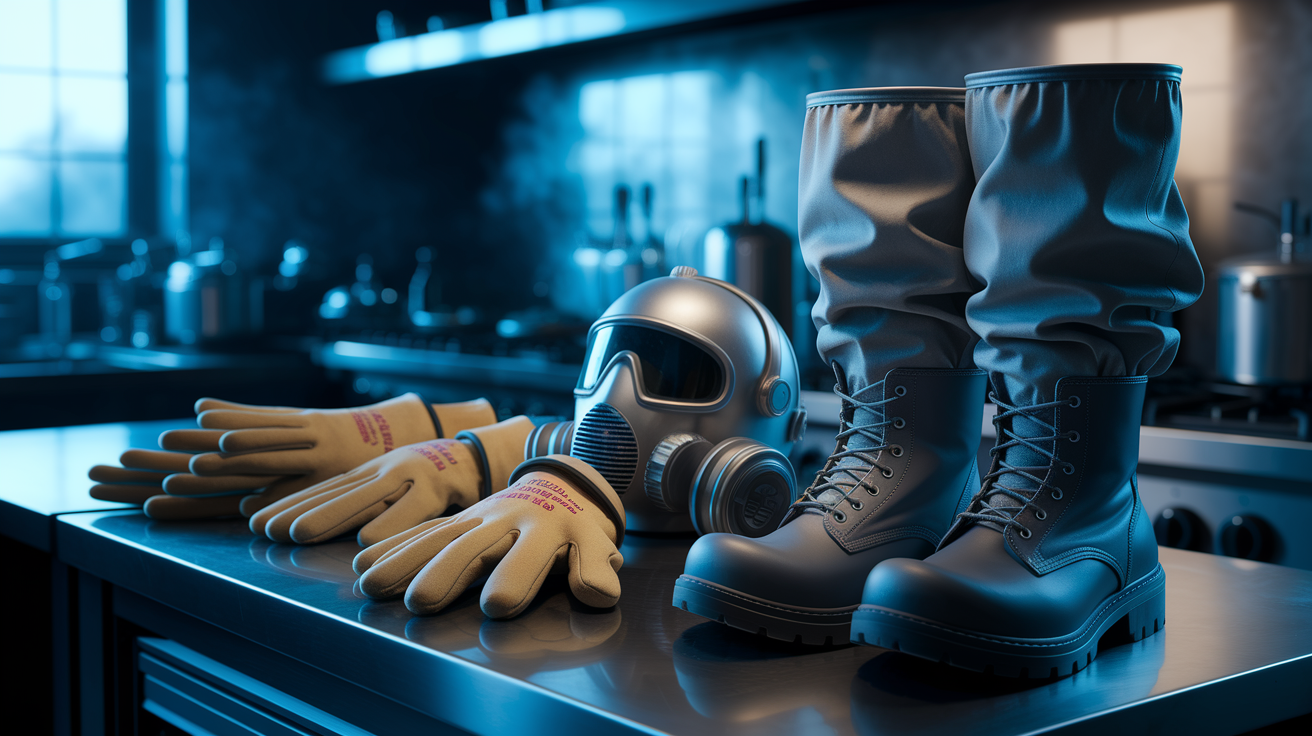
Safety comes first. Always. Rushing into a fire-damaged kitchen to see what you can save might end badly. Before you start taking pictures or thinking about repairs, you need to know the space won’t hurt you.
Wear full protective gear. That means heavy-duty gloves, an N95 respirator (dust masks don’t cut it), boots with thick soles, long pants, and sleeves that cover your arms completely. You don’t want toxic residue touching your skin.
Shut off everything at the main panel or meter. Electricity, gas, water lines. Keep them off until someone who knows what they’re doing says it’s safe.
Check if the structure looks stable before you walk in. Stand in the doorway and look for sagging ceilings, cracked walls, floors that seem off. If anything looks wrong, don’t go in.
Watch for air quality problems. Carbon monoxide detectors going off, weird chemical smells, trouble breathing near the entrance. These are all stop signs.
Soot and ash aren’t just dirty. They’re toxic. Burned plastics and synthetic materials leave chemical residue that coats everything and gets into the air when you move around. That stuff is dangerous.
If fire officials, your insurance company, or restoration professionals tell you to wait, listen to them. Don’t enter until they clear it.
Never eat or drink anywhere near contaminated areas. Those toxic particles jump from surfaces to food to your mouth easier than you’d think.
Keep kids, pets, and anyone without proper protective equipment away from fire-damaged spaces. Just because you’re geared up doesn’t mean they are.
Electrical systems and gas lines need professional eyes even when the fire looked small. Heat damages wire insulation inside walls where you can’t see it. That creates shock and fire risks that won’t show up until someone flips a switch later. Gas connections can warp from heat and develop slow leaks that build up without you knowing. Get a licensed electrician and gas technician to verify these systems before you turn anything back on, no matter how minor the fire seemed.
Hidden problems go beyond what you can see or smell. Ceiling joists or wall studs might look fine but lost strength from the heat, making them ready to collapse under normal weight. Toxic stuff from burned plastics, chemicals, and household materials hangs in the air long after the smoke clears, causing breathing problems and headaches. Materials still smoldering in walls, insulation, or debris keep producing carbon monoxide hours after firefighters leave. These invisible threats make professional clearance critical before you start any assessment work.
Comprehensive Assessment Process for Kitchen Fire Damage

Fire damage assessment means looking at three connected categories. Structural compromise from heat and flames. Smoke and soot contamination spreading through your home. Water damage from firefighting that creates its own set of problems. Each type hits different materials, needs different fixes, and affects your total repair costs and timeline differently. Understanding how these overlap helps you see the whole picture.
Why bother with systematic evaluation before cleanup? Proper documentation supports insurance claims by proving how bad things are and why restoration matters. Visual assessment before you disturb anything captures evidence of fire patterns, how damage progressed, and loss severity that disappears once cleanup starts. Knowing when each damage type needs deeper investigation versus professional help prevents you from missing hidden problems or trying repairs you shouldn’t.
Start by verifying safety clearance and utility status. Make sure fire officials say it’s okay to enter, utilities are safely off, and there’s no collapse danger. Check the detailed safety protocols from the previous section for complete guidance.
Do a preliminary structural inspection for obvious problems. Look for sagging ceilings, cracked walls, unstable floors, or visible damage to support elements before you walk through. Detailed structural assessment procedures get covered in Section 3.
Map where smoke and soot went throughout your kitchen and nearby areas. Note how far discoloration and residue extend beyond where the fire started. Comprehensive smoke damage documentation gets explained in Section 4.
Find all water-damaged areas from firefighting. Check floors, walls, ceilings, cabinets for saturation, standing water, dampness. Detailed water assessment process is outlined in Section 5.
Photograph everything from multiple angles before you touch anything. Get wide shots showing entire spaces and close-ups of specific damage to items and surfaces.
Look at appliances and electrical systems for visible damage. Document melted parts, charred surfaces, heat deformation. Don’t touch or test anything. Complete appliance evaluation guidance is in Section 6.
Create a detailed written list of all damaged and destroyed items. Every affected item with descriptions, approximate age, and condition.
Document where the fire started and burn patterns for insurance and restoration planning. Note where damage is worst and how it gets lighter with distance from the origin.
Check ventilation systems and ductwork for smoke beyond the kitchen. Remove vent covers and look inside ducts for soot deposits.
Figure out what’s salvageable and prioritize getting it out. Determine which undamaged or lightly damaged items can be safely removed to prevent more contamination.
Note all areas needing professional evaluation. Mark structural concerns, electrical damage, gas lines near the fire, HVAC contamination, extensive water saturation for specialist inspection.
Put together a documentation package for your insurance claim and restoration planning. Organize photos, written inventory, observations, and preliminary damage notes into one complete record.
This checklist gives you the framework for thorough assessment. But significant fires affecting structure, electrical, gas lines, or causing major smoke and water damage require professional inspection and testing equipment to find hidden problems visual assessment can’t detect.
Evaluating Structural Fire Damage in Your Kitchen

Structural assessment focuses on how heat and flames compromised walls, ceilings, floors, and support elements. Intense heat weakens materials even without direct flame contact, reducing their ability to carry loads or stay stable.
Wall and Ceiling Damage Indicators
Look for visible cracks running vertically or horizontally across walls, especially near corners or where walls meet ceilings. Sagging sections mean the material behind lost strength or separated from supports. Discoloration patterns show where heat got in even if flames didn’t, with brown or yellow staining revealing thermal stress. How deep charring goes matters. Surface charring might just be cosmetic, but deep charring that goes through drywall into studs signals serious structural loss.
Drywall and plaster react differently to heat. Moderate heat causes discoloration and brittleness. Higher temperatures make drywall crumble when you touch it and plaster crack and pull away from lath. Paint bubbling, peeling, or changing color shows where heat affected the wall even if the surface looks mostly okay. Bulging or separation from studs means fasteners failed or the material warped, creating an unstable surface that could detach.
Floor and Foundation Assessment
Heat goes through flooring materials in ways that aren’t always obvious from above. Tile can crack from thermal stress or separate from what’s underneath. Hardwood warps, darkens, or develops soft spots where heat damaged the wood fibers. Laminate melts or comes apart in layers. Beneath what you can see, subfloors take heat damage that weakens the structural platform your kitchen sits on.
Check joist damage if the fire started near or below floor level, or if you can get to the space beneath your kitchen. Flames directly hitting joists char the wood and reduce how much weight they can carry. Water from firefighting soaks into subflooring and joists, causing swelling, warping, and potential rot if not dried fast. Test floor stability by walking carefully and noting soft spots, unusual movement, sagging, or areas that feel unstable compared to unaffected floors.
Load-Bearing Elements and Support Structures
Find compromised beams, joists, and support columns by looking for charring, cracks, sagging, or separation from connection points. Load-bearing walls require professional assessment if fire damage is suspected, since these walls support the weight of your home’s structure above them. You can’t safely tell if a load-bearing wall lost integrity just by looking.
Support structures within walls and above ceilings hide from view but carry the building’s weight. When fire or intense heat affects these areas, the damage might not show on visible surfaces but still creates dangerous conditions. Posts, beams, and headers near the fire area need professional structural engineering evaluation.
Structural damage goes beyond visible surface damage. Heat weakens materials behind intact surfaces, reducing strength even when there’s no charring or discoloration you can see. Connections between structural elements (where joists attach to beams, where walls connect to ceilings) can fail from heat without obvious visual signs. Hidden support structures within walls and above ceilings take damage that only reveals itself through testing or when loads shift. Structural problems get worse over time as weakened materials keep deteriorating from moisture and normal building movement. Professional structural engineers should evaluate any suspected load-bearing element damage before restoration begins, since trying repairs without proper assessment risks collapse during reconstruction.
Documenting Smoke and Soot Damage Throughout Your Kitchen

Smoke travels beyond the immediate fire area through ventilation systems, doorways, and wall openings, sticking to porous materials throughout the home and creating damage far from where the fire started. Smoke particles are tiny and travel easily on air currents, settling on every surface they touch. Once settled, they bond with materials, causing discoloration, odor absorption, and surface deterioration that gets worse the longer they stay.
Visible soot deposits on countertops, appliances, and walls represent only part of the contamination. Hidden soot behind cabinet doors, inside drawers, within ductwork, and on surfaces in other rooms often goes unnoticed during initial assessment but contributes to ongoing odor and health concerns. Pull open every cabinet and drawer to inspect interiors. Check inside your range hood and ventilation system. Walk through rooms connected to your kitchen and look for the telltale gray-black film on surfaces that weren’t anywhere near flames.
Documenting smoke damage patterns helps you understand how the fire spread and identify all affected areas. Start at the fire origin and work outward, photographing smoke staining and soot deposits as they get lighter with distance. Check inside cabinets by removing items and photographing interior surfaces. Pull appliances away from walls to document damage on sides and backs. Remove vent covers to inspect ductwork interiors with a flashlight. Enter rooms next to the kitchen with careful attention to smoke odor, surface discoloration, and particle deposits that show smoke traveled beyond the kitchen itself.
| Surface/Area | Smoke Damage Indicators | Assessment Priority |
|---|---|---|
| Cabinet Interiors | Soot film on shelves and walls, discoloration, strong odor when opened, residue on stored items | High. Contents require cleaning or disposal, wood absorbs odor |
| Cabinet Exteriors | Visible soot deposits, discoloration patterns, finish damage, warping from heat | High. Visible damage affects usability and value |
| Appliances | Soot coating on surfaces, discoloration, odor absorption in seals and vents, control panel damage | High. Impacts function and safety, expensive to replace |
| Walls and Ceilings | Discoloration patterns, soot deposits, smoke staining, paint damage, odor penetration into porous surfaces | Medium. Often cleanable but extensive damage requires repainting or replacement |
| Ventilation and Ductwork | Heavy soot deposits inside ducts and vents, discolored filters, smoke odor when HVAC runs | High. Spreads contamination throughout home if not cleaned |
| Countertops | Soot film, discoloration, heat damage to surfaces near fire origin, odor absorption in porous materials | Medium. Cleaning often works unless heat caused structural damage |
| Electronics | Soot on surfaces and in vents, operational issues from particle infiltration, discoloration | Medium. Smoke particles damage internal components over time |
| Hidden Spaces Behind/Under Cabinets | Soot deposits on walls and floors not visible without moving cabinets, concentrated odor | High. Hidden contamination keeps causing odor and requires access for cleaning |
| Adjacent Rooms and Hallways | Faint soot film, subtle discoloration, smoke odor, deposits near doorways and vents | Medium. Shows smoke spread beyond kitchen, requires cleaning to prevent odor persistence |
Assessing Water Damage From Firefighting Efforts

Primary fire damage comes from flames and heat. Secondary water damage comes from the water used to put those flames out. Both matter equally during assessment since water from hoses, sprinklers, or suppression systems can cause extensive harm to materials that survived the fire itself. Water doesn’t respect boundaries the way fire does. It flows, spreads, and goes everywhere gravity and absorption take it.
Water accumulates in predictable patterns once you know what to look for. Floors nearest the fire show standing water or obvious saturation. Walls absorb water at the base where firefighting spray hit them, with dampness wicking upward into drywall and insulation. Ceilings hold water if spray was directed upward or if upper-floor firefighting soaked through. Insulation acts like a sponge, holding water long after visible surfaces dry. Cabinets, especially base cabinets near the floor, trap water inside where you can’t see it without opening doors and pulling items out. Structural elements (studs, joists, subflooring) absorb water and hold it within their mass. Document water by touching surfaces with your bare hand (gloves prevent you from feeling dampness), looking for discoloration, and noting any musty smell that indicates saturation.
Hidden water damage includes saturation within wall cavities where drywall looks fine from the outside but holds water against studs and insulation. Above ceiling tiles or drywall, water pools on the backside, creating sagging and staining that might not be visible from below initially. Beneath flooring, water soaks into underlayment and subflooring, trapped between the visible floor surface and the structural platform below. Inside insulation, water saturates the material and stays there, creating perfect conditions for mold while the insulation looks undisturbed from the outside. You can’t see this water without cutting into walls, lifting flooring, or removing ceiling material. But it’s there, and it’s causing damage.
Mold growth starts within 24 to 48 hours of water exposure in the right conditions. That timeline makes immediate water damage documentation and mitigation critical for both restoration success and insurance claim validation. Your insurance company wants to see that you documented water damage quickly and took reasonable steps to prevent mold growth. Professional moisture detection equipment reveals water presence that visual inspection misses, using infrared cameras to show temperature differences where water cools surfaces, and moisture meters that measure saturation levels inside materials without cutting them open. This hidden water drives up restoration costs when discovered late and can invalidate insurance claims if the insurer argues you delayed mitigation unreasonably.
Kitchen Appliance and Electrical System Damage Inspection

Appliance and electrical assessment focuses on documenting visible damage and identifying which systems require professional evaluation. You’re not testing whether appliances work or checking if circuits are safe. That’s for licensed professionals. You’re recording what you can see so professionals know what to inspect and insurance adjusters understand what needs replacing.
Visible damage indicators on appliances and electrical components include melted wire insulation, which looks shriveled, discolored, or completely missing from copper conductors. Discolored outlets and switches show heat exposure through brown, black, or melted plastic. Charred appliance surfaces reveal direct fire or intense heat contact. Damaged control panels display melted buttons, cracked displays, or warped plastic housings. Heat-warped components on appliances bend, bubble, or deform from their original shape. These observations inform professional inspection scope rather than replace it. You’re documenting evidence, not making safety determinations.
Inspect your refrigerator for exterior damage, control panel function (without plugging in if the unit was unplugged during fire response), heat warping on sides facing the fire origin, and soot getting into vents.
Check your stove and oven for control damage, heating element condition, burner operation concerns, heat damage to surfaces, and whether the unit was involved in where the fire started.
Examine your microwave for exterior charring, control panel damage, door seal integrity, interior smoke damage, and heat warping of plastic components.
Assess your dishwasher for control panel condition, door seal damage, exterior heat exposure, and visible electrical connection damage.
Evaluate your range hood for grease buildup, fire damage to filters and housing, motor function concerns, and ductwork connection integrity.
Document small countertop appliances (toaster, coffee maker, blender, etc.) for smoke contamination, heat damage, electrical cord condition, and whether being close to the fire makes them salvageable.
Visible damage to document includes melting (plastic components that deformed from heat), charring (blackened or burned surfaces), electrical arcing marks (small burn spots where electricity jumped gaps), control malfunction indicators (displays not working, buttons damaged), unusual odors (burning plastic, electrical smell, smoke absorption), and heat deformation (warped, bubbled, or bent components). Appliances are likely salvageable when they’re far from where the fire started with only smoke residue and no heat damage, when they have only exterior soot that can be cleaned without affecting function, and when controls and electrical components show no damage. Appliances require replacement when they were at the fire origin or in direct flame contact, when heat warped plastic or metal components, when electrical systems show burning or melting, when control panels don’t function, and when smoke got into sealed component areas.
Document each appliance with model numbers (usually on labels inside doors or on back panels), purchase dates (estimate if you don’t have receipts), and damage descriptions specific enough for insurance evaluation. Take photos showing overall appliance condition, close-ups of damage areas, and serial/model number plates. Keep this documentation organized with your other assessment records.
Licensed electricians must inspect all electrical circuits, panels, and wiring in fire-affected areas, and gas line professionals must verify the integrity of gas connections and lines, regardless of visible damage, as required for safe restoration and often mandated by insurance and building codes.
Creating Insurance Documentation During Your Kitchen Fire Assessment

Document everything before any cleanup or repairs begin. Disturbing the scene by removing debris, cleaning surfaces, or throwing away damaged items can invalidate claims or reduce settlement amounts. Insurance companies need to see the damage exactly as the fire left it, and they need your documentation to verify what you’re claiming was damaged or destroyed.
Insurance adjusters look for damage progression patterns that show how the fire spread from origin to surrounding areas. They verify origin by examining where damage is most severe and whether your description matches physical evidence. They validate loss by confirming items you claim were damaged actually show fire, smoke, or water damage in your photos. They justify restoration necessity by seeing whether damage truly requires professional help or represents cosmetic issues you could address yourself.
Take comprehensive photographs from multiple angles. Get overview shots of the entire kitchen (from the doorway looking in, from multiple corners, capturing all walls and ceiling) and close-ups of specific damage (charred cabinets, melted appliances, water-stained floors, smoke-damaged walls).
Photograph each damaged item individually with clear identifying details visible. Brand names, model information, specific damage, and context showing where the item was located.
Create a detailed written inventory including item descriptions (what it is, what it does, material, color), approximate age (purchase year or how long you’ve owned it), purchase price (original cost or estimate), and replacement cost estimates (current price for equivalent item).
Get the official fire department report documenting incident date, time, origin, and response actions by contacting your local fire department records office, usually available within a few days of the incident.
Collect receipts for emergency expenses. Temporary housing if your kitchen is unusable, emergency repairs to prevent further damage, protective equipment purchased for assessment, and emergency food costs if you can’t use your kitchen.
Request written estimates from licensed contractors for structural repairs, electrical system assessment and repair, plumbing work, smoke and water damage restoration, and complete kitchen rebuild if necessary.
Keep timeline documentation of all communications (dates and content of calls with insurance company, emails with adjusters, contractor visits), inspections (who came, what they looked at, what they found), and assessment activities (when you documented damage, what you observed, what actions you took).
Working with professional public adjusters versus handling claims yourself depends on fire severity and claim complexity. Simple claims for minor fires with straightforward damage often work fine with direct homeowner-insurance company interaction. Complex claims benefit from public adjuster expertise when damage is extensive, when structural or hidden damage complicates assessment, when the insurance company disputes your claim or offers a low settlement, or when you don’t have time to manage the claims process yourself. Restoration companies often help with insurance documentation and communication, providing detailed damage reports that break down what they found room by room, photographic evidence from professional assessment showing damage your photos might have missed, and scope of work estimates explaining what restoration requires and why. Keep your own complete documentation set even when professionals help, maintaining copies of everything in case you need to reference it later or switch to a different restoration company.
Understanding Repair Costs and Restoration Timeline Estimates

Costs vary dramatically based on fire severity, damage extent (whether fire stayed in one area or spread throughout the kitchen), affected systems (which of your structural, electrical, or plumbing systems need work), and secondary damage from smoke, water, and mold. A small stovetop fire might cost a few thousand dollars to fix. A fire that spreads to cabinets, walls, and ceilings can run into tens of thousands for complete restoration.
| Damage Type | Minor Fire Costs | Moderate Fire Costs | Severe Fire Costs | Typical Timeline |
|---|---|---|---|---|
| Smoke/Soot Cleanup | $1,500 – $3,000 | $3,000 – $8,000 | $8,000 – $15,000+ | 2-5 days for minor, 1-2 weeks for severe |
| Structural Repairs | $2,000 – $5,000 | $10,000 – $25,000 | $25,000 – $50,000+ | 1-2 weeks for minor, 4-8 weeks for severe |
| Appliance Replacement | $500 – $2,000 | $3,000 – $8,000 | $8,000 – $15,000+ | 1-2 weeks for delivery and installation |
| Electrical System Work | $800 – $2,000 | $3,000 – $7,000 | $7,000 – $15,000+ | 3-7 days for minor, 2-3 weeks for complete rewiring |
| Complete Kitchen Rebuild | N/A | $25,000 – $45,000 | $45,000 – $100,000+ | 6-12 weeks depending on scope and materials |
Things that push costs beyond initial estimates happen in predictable ways. Hidden damage discovered during demolition (like rotted studs behind drywall or compromised joists beneath flooring) adds repair scope you couldn’t see during assessment. Code compliance upgrades required during repairs mean bringing electrical, plumbing, or structural elements up to current building codes, which often exceeds simple replacement of what burned. Material availability and supply chain delays stretch timelines and sometimes force upgrades to available alternatives that cost more. Permit requirements add fees and inspection costs. The need for temporary kitchen facilities during extended restoration (whether that’s a makeshift setup in another room or eating out for weeks) adds daily costs that pile up quickly.
Professional restoration estimates may differ from initial homeowner assessments as hidden damage within walls, ceilings, ductwork, and structural elements becomes apparent during the restoration process. You see surface damage during assessment. Professionals see that plus what’s behind surfaces, what testing equipment reveals about moisture and air quality, and what building codes require for proper repair. Detailed professional assessment reduces unexpected cost escalation by identifying hidden problems before work begins, though some surprises still pop up once demolition starts. A thorough upfront professional evaluation costs money but typically saves more by preventing mid-project scope changes and giving your insurance company complete damage documentation from the start. For comprehensive Fire and Smoke Damage Restoration guidance and professional service scope, understanding what restoration involves helps you evaluate estimates and timelines accurately.
Common Causes and Origin Points to Note in Your Fire Assessment

Identifying the origin point and cause matters for complete assessment, insurance claim processing, prevention of future incidents, and determination of liability in cases involving defective appliances or electrical systems. Your insurance company will investigate cause, but your observations during assessment provide valuable information. In some cases, proving a defective appliance or electrical component caused the fire can shift liability to manufacturers or previous contractors.
Unattended cooking shows up as concentrated damage on or around the stovetop, burnt cookware still sitting on burners, the heaviest damage at the cooking surface with decreasing severity as you move away, and cabinet damage directly above the stove where flames spread upward.
Grease fires leave yellow-brown residue patterns coating surfaces near the fire origin, damage to the range hood and surrounding cabinets from flames traveling upward, characteristic flame spread reaching the ceiling in a V-pattern from the stovetop, and heavy grease deposits inside the range hood and ductwork.
Electrical malfunctions create damage concentrated at outlets, switches, or appliance cord connections where the failure started, evidence of arcing (small black spots or burns at connection points), melted wire insulation, and sometimes a circuit breaker that tripped during the fire.
Appliance defects show fire origin within appliance housing rather than from external sources, failure of internal components like heating elements, motors, or control boards, and recall history of that appliance model (check manufacturer and CPSC recall databases).
Oven fires display interior oven damage with charring inside the oven cavity, door seal failure that allowed flames to escape, heating element failure evidence like broken or melted elements, and control panel damage near the oven controls.
Range hood ignition involves grease buildup in the hood and ductwork that caught fire from cooking heat, fire spread through the ventilation system into walls or ceiling spaces, heavy damage to the hood housing, and sometimes fire extension into areas far from the kitchen through ductwork.
Cooking equipment failure includes timer malfunction that allowed unattended cooking to continue too long, temperature control failure that caused overheating, automatic shut-off system failure that should have prevented the fire, or control board issues that prevented normal appliance operation.
Flame patterns, burn severity gradients, and damage concentration help determine fire origin and cause. V-shaped burn patterns on walls point back to the origin at the bottom of the V. Depth of charring shows where the fire burned longest and hottest, typically the origin point. Direction of smoke staining reveals which way heat and smoke moved, flowing away from the origin. Damage concentration creates a gradient from severe at origin to moderate nearby to light at the edges. Document this information with photographs that show these patterns clearly, include it in your insurance claim documentation with notes explaining what you observed, share it with fire investigators if they request information, and provide it to restoration professionals for comprehensive fix plans that address the full extent of damage.
Professional Assessment vs. DIY Evaluation: Understanding the Scope
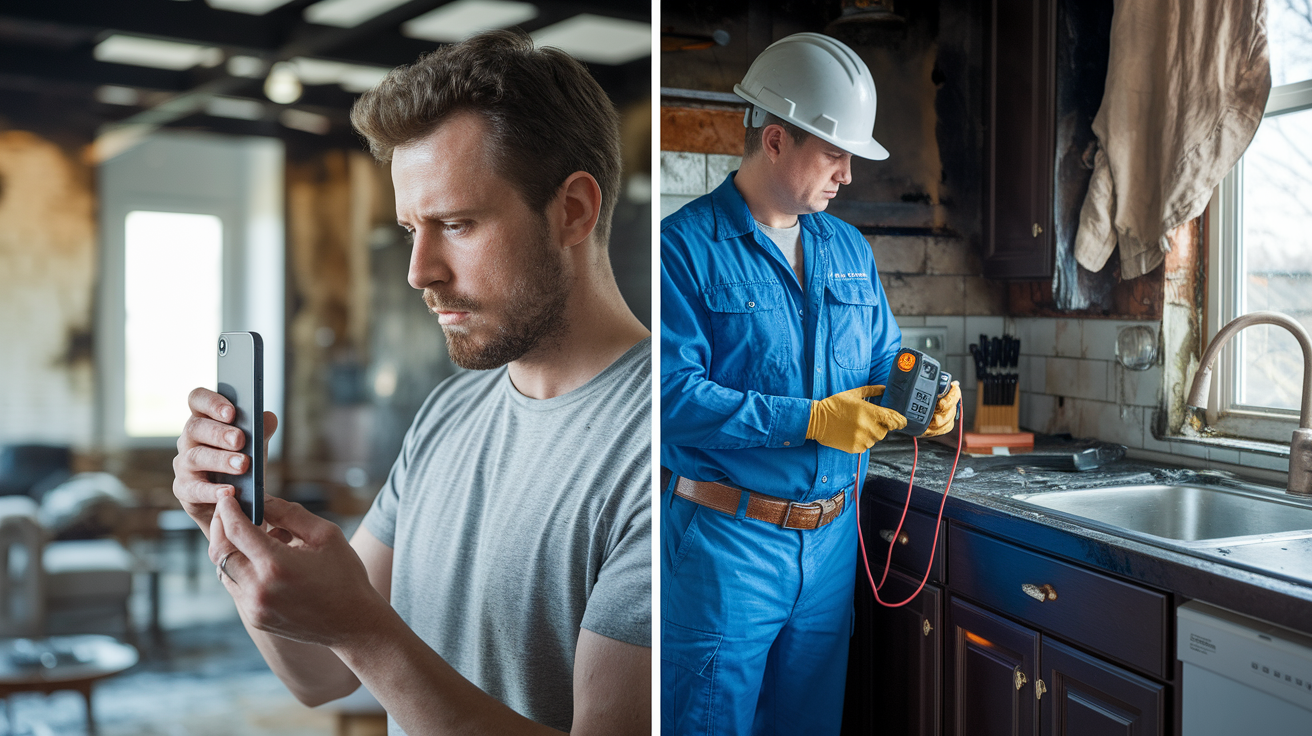
Homeowners can do valuable initial visual assessment and documentation, but certain damage types and restoration needs require professional expertise, specialized equipment, and technical certifications that DIY evaluation can’t replicate. Understanding where the line falls helps you make informed decisions about when to call professionals.
What Homeowners Can Assess Independently
Visual damage documentation using photography and written descriptions captures what you can see without specialized tools. Take photos from every angle. Write down what you observe. This documentation is valuable for insurance claims and helps professionals understand the situation before they arrive.
Initial safety observation without entry makes sense when conditions look unsafe. You can evaluate from doorways whether the space appears structurally unstable or too contaminated to enter without professional clearance. This keeps you safe while still gathering information.
Inventory of damaged and destroyed items is something you can do better than anyone else since you know what was in your kitchen and what it was worth. List everything affected with as much detail as you can recall.
Identification of obviously damaged appliances and materials doesn’t require expertise. If your refrigerator is charred, your cabinets are burned, or your floor is water-soaked, you can document that and note it needs professional evaluation or replacement.
Preliminary insurance notification starts your claim process and establishes a timeline. You can call your insurance company, report the fire, and start the claims process before any professional assessment happens.
Basic cost research through online resources and contractor estimates gives you a rough sense of restoration costs. Search for appliance prices, look up restoration service ranges, and request preliminary estimates from contractors, though these will be refined once professionals assess hidden damage.
Suspected structural compromise including cracks, sagging, or weakened load-bearing elements requires structural engineering expertise to evaluate safety and determine repair requirements.
Any electrical system or gas line exposure to fire or heat needs licensed electrician and gas technician inspection to verify safety before utilities are restored.
Extensive smoke penetration beyond the kitchen into living spaces, HVAC systems, or wall cavities requires professional testing and specialized cleaning equipment.
Significant water saturation in walls, ceilings, or floors from firefighting needs moisture meters and thermal imaging to assess hidden damage and industrial extraction equipment to prevent mold.
Suspected mold growth or conditions that encourage mold (meaning 48+ hours post-fire with water damage) requires professional mold testing, containment, and fix work.
HVAC and ductwork contamination requires testing for particle levels and specialized cleaning to remove smoke and soot without spreading contamination.
Fires larger than contained stovetop incidents affecting multiple kitchen areas have hidden damage in walls, ceilings, and adjacent spaces that only professionals can fully assess.
When your insurance policy requires third-party professional assessment for claim validation, you can’t proceed with DIY evaluation alone.
Professional Capabilities Beyond DIY Assessment
Specialized professional services start with thermal imaging that detects hidden heat damage and water intrusion by showing temperature differences invisible to the naked eye. Moisture meters measure exact saturation levels inside materials without cutting them open, revealing whether drywall, insulation, or structural elements hold dangerous moisture levels.
Air quality testing identifies combustion byproducts and particles that linger after fires, measuring whether your home is safe to occupy and where contamination exceeds safe levels. Structural engineering evaluation of load-bearing elements determines whether walls, beams, joists, and supports maintain their strength or need reinforcement and replacement.
Electrical system safety testing goes beyond visual inspection to verify circuits, panels, and wiring function safely without shock or fire risks. HVAC contamination assessment determines whether your heating and cooling system spread smoke throughout your home and requires cleaning.
Industrial water extraction and dehumidification equipment removes water far more effectively than household fans and dehumidifiers, preventing mold growth by getting thorough drying done within the critical 24-48 hour window. Specialized smoke odor elimination techniques use thermal fogging, ozone treatment, and hydroxyl generators to neutralize odors at the molecular level rather than just covering them up.
Professionals provide value beyond assessment through detailed written reports with findings and recommendations that document everything they discovered and what needs to happen next. Direct communication and negotiation with insurance companies takes the burden off homeowners, with restoration professionals explaining technical details and advocating for complete repairs. Comprehensive fix plans address both visible and hidden damage in a coordinated sequence that prevents problems from getting worse. IICRC certification demonstrates industry-standard expertise in fire and water damage restoration, giving insurance companies confidence in the restoration plan. Coordination of multiple specialty contractors (structural engineers, electricians, plumbers, HVAC technicians) happens through a single project manager rather than you juggling schedules. Project management through completion means one team handles everything from assessment through final walkthrough.
For professional Water Damage and Flooding Cleanup after firefighting efforts, specialized equipment and expertise make the difference between thorough fix work and ongoing problems from hidden moisture. While professional services involve costs, they often result in more thorough damage identification, higher insurance settlements that offset service costs, and more complete restoration that prevents future problems from missed damage like mold growth, structural failure, or lingering contamination.
Final Words
Kitchen fire damage assessment covers safety protocols, structural evaluation, smoke and soot mapping, water damage from firefighting, appliance inspection, and thorough documentation for your insurance claim.
You can handle initial visual assessment and photography. But structural damage, electrical systems, hidden water saturation, and smoke penetration beyond the kitchen need professional equipment and expertise.
The goal isn’t just figuring out what burned. It’s identifying everything affected, including damage you can’t see, so restoration gets your kitchen back to normal without surprises down the road.
FAQ
What does a fire damage assessment include?
A fire damage assessment includes evaluating structural integrity (walls, ceilings, floors), documenting smoke and soot contamination throughout affected areas, identifying water damage from firefighting efforts, inspecting appliances and electrical systems, photographing all damage, creating written inventories of damaged items, and determining repair scope and costs.
What is the 30/30/30 rule for fire?
The 30/30/30 rule for fire safety means staying 30 feet from wildfire flames, seeking shelter when visibility drops below 30 feet due to smoke, and evacuating if winds exceed 30 mph. This rule applies to outdoor fires, not kitchen fire damage assessment.
Does homeowners insurance cover a kitchen fire?
Homeowners insurance typically covers kitchen fire damage including structural repairs, smoke cleanup, appliance replacement, and water damage from firefighting efforts. Coverage depends on your policy terms, fire cause, and whether negligence was involved, so contact your insurance company immediately after the fire.
How to estimate fire damage costs?
To estimate fire damage costs, assess damage severity across three categories: structural repairs (walls, ceilings, floors), smoke and soot cleanup (surfaces, ductwork, odor removal), and water damage remediation. Obtain written estimates from licensed contractors for electrical work, reconstruction, and professional restoration services to determine total costs.
When do I need professional fire damage assessment?
You need professional fire damage assessment when structural elements show cracks or sagging, electrical systems or gas lines were exposed to fire, smoke spread beyond the kitchen, significant water damage occurred from firefighting, or your insurance policy requires third-party evaluation for claim validation.
How long does kitchen fire restoration take?
Kitchen fire restoration takes one to three weeks for minor fires with localized damage, four to eight weeks for moderate fires affecting multiple systems, and two to six months for severe fires requiring complete kitchen rebuilds. Timeline depends on damage extent, hidden damage discovered during work, and material availability.
What safety steps come before fire damage assessment?
Before fire damage assessment, verify professional clearance to enter, shut off electricity and gas, wear protective equipment (N95 mask, gloves, boots, long sleeves), check for structural instability, test for carbon monoxide and toxic fumes, and secure the area from unauthorized entry to prevent injuries.
Where does smoke damage hide after kitchen fires?
Smoke damage hides inside cabinets and drawers, within HVAC ductwork and ventilation systems, behind appliances, in wall cavities, on surfaces in adjacent rooms, and within porous materials like insulation. Smoke travels through vents and doorways, contaminating areas far from the fire origin.
How do I document fire damage for insurance?
Document fire damage for insurance by photographing all damage from multiple angles before any cleanup, creating detailed written inventories with item descriptions and values, obtaining the official fire department report, collecting receipts for emergency expenses, and requesting written estimates from licensed contractors for all repair work.
What causes most kitchen fires?
Most kitchen fires are caused by unattended cooking, overheated grease and oil, electrical malfunctions in appliances or wiring, appliance defects, and oven failures. Identifying the cause during assessment matters for insurance claims, liability determination, and preventing future incidents.
Can I assess kitchen fire damage myself?
You can assess kitchen fire damage yourself for visual documentation, photographing damage, creating item inventories, identifying obviously damaged appliances, and preliminary insurance notification. However, structural compromise, electrical systems, gas lines, extensive smoke penetration, and significant water damage require professional inspection with specialized equipment.
Why does water damage matter after kitchen fires?
Water damage matters after kitchen fires because firefighting water saturates floors, walls, ceilings, and insulation, creating conditions for mold growth within 24 to 48 hours. Water causes secondary structural damage to materials that survived the fire and requires immediate professional drying with industrial equipment.
