
You can’t just wipe down surfaces and call it done after a kitchen fire. That smoke smell burrowed into your cabinets, your HVAC system, even the spaces behind your appliances while you were dealing with the flames. Most people clean what they can see, declare victory, then wonder why that burnt odor keeps creeping back two weeks later. Real kitchen fire odor removal means finding every hidden spot where soot settled, understanding what kind of contamination you’re dealing with, and tackling it in the right order before those acidic particles etch permanently into your surfaces.
Immediate Action Plan for Kitchen Fire Odor Removal

The clock starts the second those flames go out. Acidic soot doesn’t wait around. It starts eating into metal, staining wood, discoloring wallpaper, and etching drywall within hours. Smoke gets into everything fast, and the longer those particles sit there, the deeper they go. What you do in those first critical hours determines whether you’re looking at manageable cleanup or a full-blown restoration project.
Here’s what needs to happen, in order:
- Make absolutely sure the fire’s out and any official investigations are wrapped up before you open windows or touch anything.
- Safety first. Get your protective gear on, confirm the structure’s stable, check that utilities aren’t compromised.
- Figure out what kind of soot you’re dealing with. Dry soot? You can wipe it with sponges and mild detergent. Oily soot? That’s a different game entirely and usually means calling in pros.
- Get air moving. Open windows and doors on opposite sides to create cross ventilation.
- Document everything. Photos, notes, the works. Your insurance company will want this.
- Map out a cleaning schedule that tackles the worst areas and time-sensitive surfaces first.
| Timeframe | Critical Actions | Why It Matters |
|---|---|---|
| First 24 Hours | Ventilation, safety assessment, soot type identification, damage documentation | Prevents acidic soot from permanently etching surfaces; establishes insurance timeline |
| Days 2-7 | Surface cleaning, fabric treatment, odor neutralizer placement, initial air purification | Removes the bulk of contamination before particles bond permanently with materials |
| Week 2+ | HVAC system attention, hidden area cleaning, sealing or replacement of compromised materials | Addresses embedded odors and prevents recirculation through ventilation systems |
Fire severity changes everything. A quick stovetop grease fire might be handled with good cleaning in a week. An extended kitchen fire with oily soot spreading into multiple rooms? That’s weeks of work, possibly with professional help. Know what you’re dealing with so you don’t waste time on methods that won’t cut it.
Safety Precautions Before Starting Fire Odor Removal

Don’t touch those windows yet. Wait until fire officials give you the all clear that everything’s completely out and investigations are done. Moving air before that clearance can mess with evidence or reignite embers you didn’t know were there. Once you get official clearance, then safety becomes job one.
Before you touch anything covered in soot:
- Get an N95 mask or respirator that’s rated for fine particles. Smoke residue has chemicals in it that’ll wreck your lungs.
- Disposable nitrile gloves and long sleeves. Acidic soot on skin is bad news.
- Toss any food that was exposed to smoke. Doesn’t matter if the packaging looks fine, harmful chemicals and invisible particles make it unsafe.
- Pet food and treats anywhere near the smoke? Gone.
- Document every damaged item and surface with photos and written notes before you start cleaning.
- Check for structural problems. Weakened ceiling materials, sketchy wiring, unstable cabinets. Look before you work overhead or move heavy stuff.
Call your insurance company right away. Don’t wait. Delays make documentation harder and slow down any reimbursement you might get for cleaning or replacement costs. Most insurers want to hear from you within 24 to 48 hours, and early contact establishes a clear timeline.
Step-by-Step Deep Cleaning Techniques for Kitchen Fire Residue
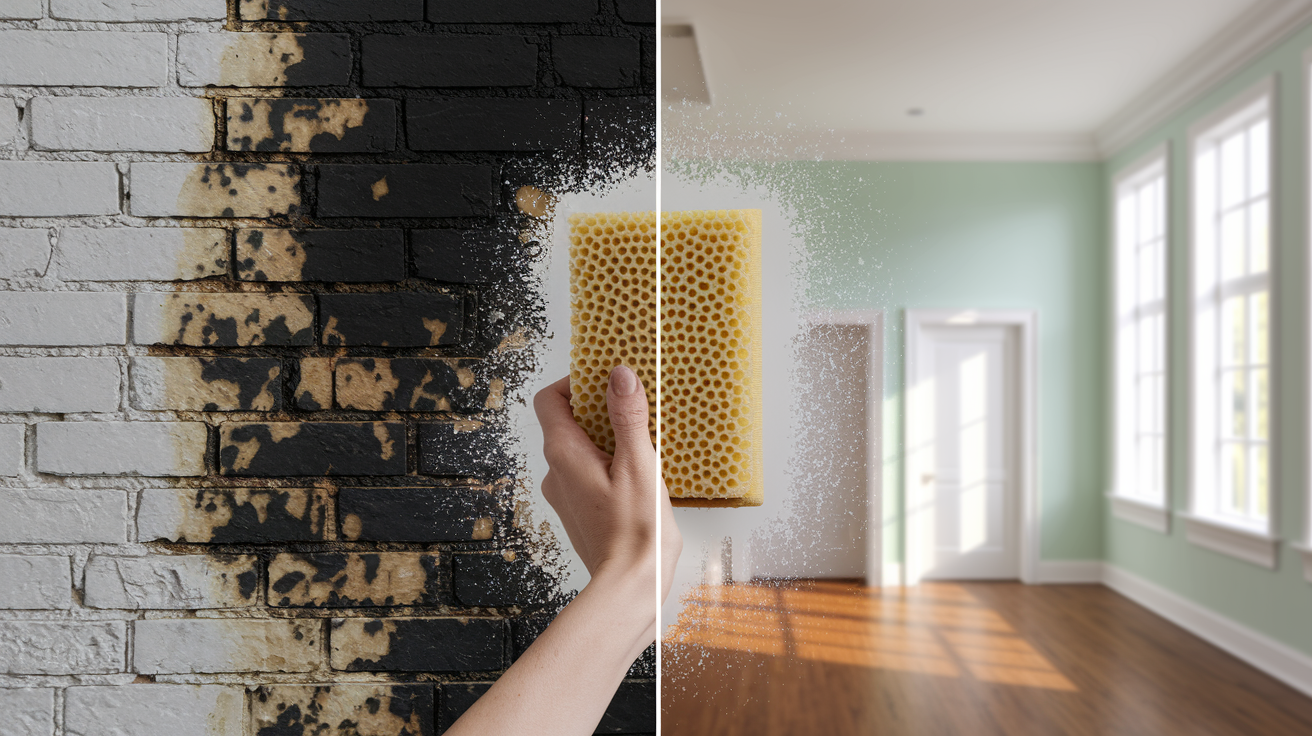
Start at the top, work down. Clean walls before ceilings and you’ll just be rewashing walls when ceiling particles fall. Clean floors first and you’re guaranteed to reclean them after everything else drips down. Gravity’s working against you if you rush the sequence.
Cleaning Walls and Ceilings After Kitchen Fire
Got dry soot? Use a dry chemical sponge first. Not your regular kitchen sponge, the specialized kind. Wipe in long, overlapping strokes without pressing hard. When the sponge surface gets saturated with soot, slice off that dirty layer with a utility knife to expose fresh material underneath.
After dry sponging, wash with TSP cleaner mixed per package directions, or use mild detergent with low alkaline content. Work small sections, maybe four square feet at a time. Wipe with a damp sponge, rinse with clean water, dry immediately with clean towels. Water sitting on drywall or painted surfaces causes more staining or texture damage.
Oily soot smears when you try to wipe it dry. If you see greasy residue spreading when touched, stop right there. You need professional equipment and chemical treatments for petroleum-based contamination. Trying to clean it yourself just makes things worse.
Cabinet and Woodwork Decontamination
Empty every cabinet completely. Pull the shelves out if they lift. Soot settles on surfaces you can’t see. Shelf undersides, cabinet backs, drawer bottoms. Wipe down the interior walls, ceiling, and floor of each cabinet box. Don’t skip the exterior surfaces, including the top of upper cabinets where heavy soot piles up.
Drawer interiors need attention too. Pull drawers all the way out, flip them over, clean the undersides and back panels. Smoke particles settle in joints and corners where drawer boxes meet. A small brush helps get residue out of trim details and routed edges on cabinet doors.
For wood surfaces, test your cleaning solution somewhere inconspicuous first. Some finishes react badly to alkaline cleaners by hazing or losing sheen. If the test spot shows damage, switch to a pH-neutral wood cleaner. Dry wood thoroughly after washing to prevent moisture damage and swelling.
Countertop and Backsplash Treatment
Granite and natural stone need pH-neutral cleaners or you’ll etch the surface. Don’t use acidic solutions like vinegar on stone. It dulls the finish. Laminate countertops handle mild detergent and water fine. Scrub gently so you don’t scratch the surface layer.
Tile backsplashes collect soot in grout lines. Use a grout brush or old toothbrush with cleaning solution to scrub those recessed lines. Rinse thoroughly so cleaner residue doesn’t leave a haze. Stainless steel backsplashes and appliance panels polish up with stainless steel cleaner applied with a microfiber cloth, rubbing in the direction of the grain.
Hidden areas that keep recontaminating cleaned spaces:
Light fixture housings trap smoke particles that release gradually. Remove covers, wash globes and trim, wipe out the interior fixture box. Turn off power at the breaker before you remove electrical components.
Electrical outlet and switch plate covers absorb odors. Unscrew them (power off first), wash in warm soapy water, dry completely before reinstalling.
Spaces behind and under appliances collect heavy soot. Pull out ranges, refrigerators, dishwashers if you can. Clean the walls, floors, and appliance backs.
Baseboards and trim joints have small gaps where soot settles. A damp cloth wrapped around a butter knife edge gets into the crevices without scratching.
Flooring edges and transitions between rooms or materials trap particles that keep releasing odors. Scrub along the seams where floor meets wall or where different flooring types connect.
Smell keeps coming back? You missed contamination somewhere. Most kitchen fires need two or three cleaning passes. First removes bulk soot, second catches what the first missed, third addresses stubborn spots. If you clean every visible surface and smell still returns, check these hidden areas. They’re where recontamination comes from after what seemed like thorough cleaning.
Kitchen Appliance Odor Removal After Fire Damage

Appliances trap smoke smell in places detergent can’t easily reach. Heating elements, motor housings, insulation layers, ventilation pathways. They all absorb odors that release gradually during normal use. Crevices around knobs, control panels, door seals hold particles that keep emitting smell long after surfaces look clean.
Here’s how to tackle specific appliances:
-
Refrigerator: Remove all food, shelves, drawers. Wash interior walls, ceiling, floor with baking soda solution (four tablespoons per quart of warm water). Clean door gaskets with mild detergent, dry thoroughly to prevent mold. Wipe exterior surfaces, including the top and back panel. Clean the drip pan if you can get to it.
-
Oven: If your oven has a self-cleaning cycle and wasn’t directly damaged, running it can help burn off residue. Otherwise, manually scrub interior surfaces with oven cleaner per product directions. Remove racks and wash separately. Clean the window, door edges, seal.
-
Stovetop: Disassemble burner components (grates, caps, burner heads). Soak removable parts in hot soapy water, scrub with a brush to remove soot from ports and crevices. Clean drip pans or the surface under burners. Wipe down control knobs after removing them from their posts.
-
Microwave: Put a microwave-safe bowl with one cup water and two tablespoons white vinegar inside. Heat on high for three minutes. Let it sit for five minutes, then wipe down interior surfaces with the steam-loosened residue. Remove and wash the turntable and support ring.
-
Dishwasher: Remove and clean the filter at the bottom. Wipe down door edges, gasket, interior walls. Run an empty cycle with two cups of white vinegar in a dishwasher-safe container on the top rack.
-
Range hood: Replace or thoroughly degrease metal mesh filters. Disposable filters should be replaced. Clean the fan housing and ductwork opening. If you can access the fan motor housing, wipe it down carefully without getting electrical components wet.
-
Small appliances: Disassemble what you safely can. Toaster crumb trays, coffee maker reservoirs and filter baskets, blender bases. Wipe down exterior surfaces and any interior components that don’t involve electrical connections.
When appliances show visible fire damage, melted components, or compromised safety features (damaged cords, cracked housings, non-functioning controls), replacement’s safer than trying to clean and reuse. If an appliance smells like smoke every time it heats up even after thorough cleaning, internal insulation or wiring likely absorbed contamination you can’t reach. At that point, continued use means continued odor release, and replacement becomes the practical solution.
Treating Fabrics and Upholstery for Burnt Food Smell

Fabrics don’t just smell like smoke. They hold onto smoke particles in their fibers, releasing odor gradually over days and weeks. Cotton, polyester, upholstery foam, carpet backing all act like sponges for airborne contamination. Surface wiping doesn’t work because the particles are embedded, not sitting on top.
Fabric treatment steps in order:
- Figure out whether soot is dry or oily by touching an inconspicuous area with a white cloth. Dry soot brushes off, oily soot smears and leaves greasy residue.
- Vacuum all fabric surfaces using a HEPA-filtered vacuum with a brush attachment. Don’t use upright vacuums with beater bars on upholstery or area rugs. The rotating brushes push soot deeper into fibers instead of lifting it out.
- Launder washable items with high-quality detergent plus an odor-removal laundry booster (products with enzymes or activated charcoal work well). Wash in the hottest water the fabric tolerates. Run an extra rinse cycle.
- Take delicate fabrics, lined drapes, items labeled “dry clean only” to a professional cleaner. Explain they were exposed to kitchen fire smoke.
- For heavily contaminated fabrics or anything with oily soot, professional cleaning is necessary. Don’t put oily soot fabrics in your washing machine. The petroleum residue can clog the pump and leave contamination in the machine that transfers to future loads.
| Fabric Type | Cleaning Method | Drying Approach |
|---|---|---|
| Washable Clothing | Hot water wash with detergent and odor booster; extra rinse cycle | Air dry or tumble dry on high heat if fabric allows |
| Curtains/Drapes | Vacuum first, then launder if washable or dry clean if lined/delicate | Hang to dry to avoid wrinkles; press if needed |
| Upholstered Furniture | HEPA vacuum with brush attachment; spot clean with upholstery cleaner; consider professional steam cleaning | Air dry with fans; avoid sitting until completely dry |
| Carpets/Rugs | HEPA vacuum; sprinkle baking soda, wait 24 hours, vacuum again; steam clean or hire professional carpet cleaner | Use fans and dehumidifiers; keep traffic off until dry |
| Bedding | Hot water wash with odor booster; wash pillows if labels allow or replace if smell persists | Tumble dry on high heat; air dry pillows thoroughly to prevent mildew |
Never put fabrics with oily soot residue in your washing machine. The grease and petroleum contamination won’t fully rinse out, and it’ll coat the interior of your washer. Every load after that gets a light film of the same residue. Professional fabric restoration equipment uses specialized detergents and extraction methods designed for petroleum-based contamination. Trying to save money on professional cleaning can mean replacing your washing machine instead.
Comprehensive Odor Neutralization Methods and Products
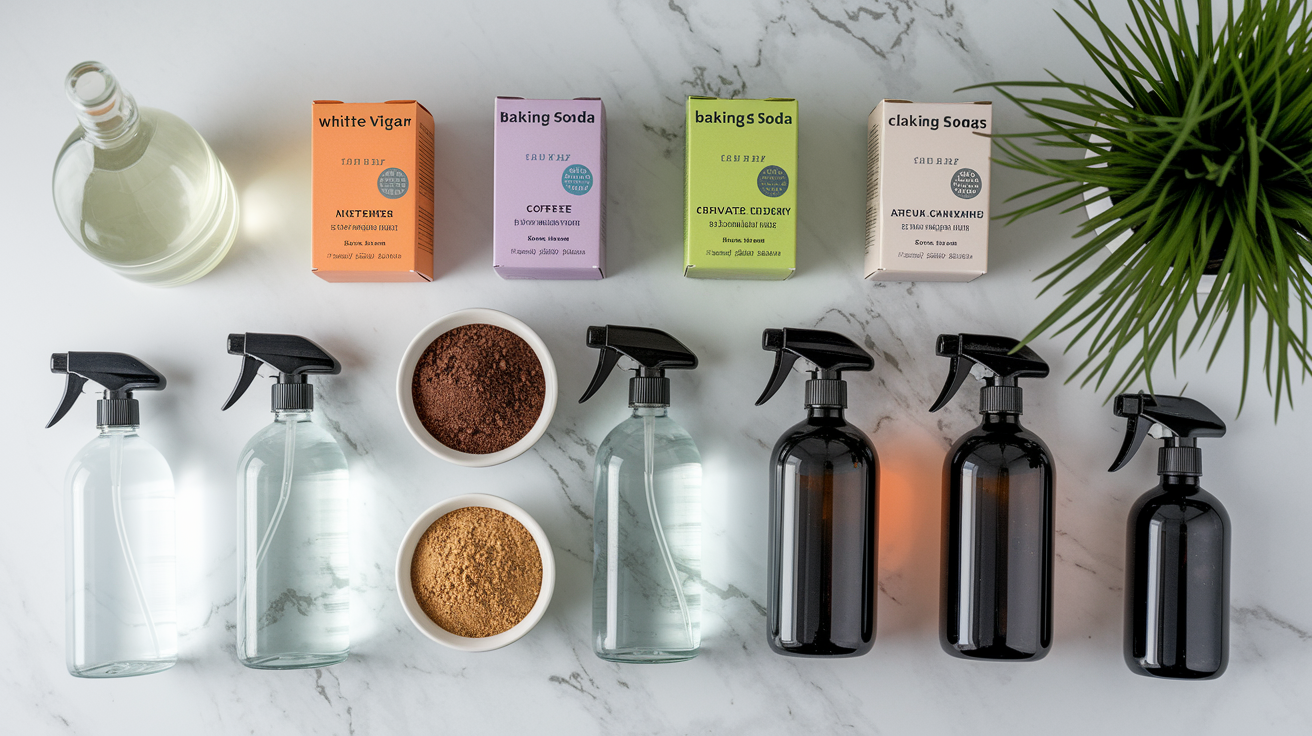
Spray deodorizers and scented candles mask smoke odor temporarily. They don’t remove it. Smoke particles embed into fabrics, fibers, porous surfaces, and covering the smell with fragrance just creates a mix of smoke and artificial scent. Once the spray or candle scent fades, the smoke smell remains because the actual particles are still there.
Odor neutralizers work differently. They chemically bind to odor molecules or absorb them, rather than layering fragrance over the top. Understanding which products actually eliminate versus which ones mask helps you avoid wasting time and money on temporary fixes.
DIY methods work for light to moderate smoke exposure and when you’re working within a tight budget. For extensive fires, oily soot, or smoke that penetrated structural materials, professional-grade neutralizers become necessary because household products can’t reach or bind with deeply embedded particles.
| Product | Application Method | Surface Types | Wait Time |
|---|---|---|---|
| White Vinegar | Spray diluted solution (1:1 with water) on hard surfaces; place bowls around room; simmer on stovetop | Hard surfaces, air treatment | Spray: wipe after 5 minutes; Bowls: replace daily; Simmer: 15-30 minutes |
| Baking Soda | Sprinkle on carpets, upholstery, inside cabinets; place open bowls in rooms | Fabrics, carpets, enclosed spaces | 24 hours before vacuuming; bowls: replace weekly |
| Activated Charcoal Bags | Hang or place in affected areas; no direct surface contact needed | Air treatment, enclosed spaces | Continuous use; recharge in sunlight monthly |
| Lemon Juice Mixture | Mix with water (1:4 ratio), spray on washable hard surfaces | Countertops, painted walls, tile | Wipe after 5 minutes |
| Coffee Grounds | Place dry grounds in shallow bowls in affected rooms | Air treatment | Replace every 2-3 days |
| Enzyme Cleaners | Spray or wipe on according to product directions | Organic residue on any washable surface | Varies by product; typically 10-15 minutes |
| Commercial Smoke Odor Neutralizers | Follow manufacturer instructions; often spray application | All surfaces; product-specific | Product-specific; some require no rinse |
| Hydrogen Peroxide (3%) | Use undiluted on white or colorfast fabrics only; test first | White fabrics, some hard surfaces | 15 minutes; rinse thoroughly |
Specific mixing ratios and application techniques:
-
Vinegar solution: Mix equal parts white vinegar and water in a spray bottle. For stovetop simmering, pour one cup vinegar into a pot with three cups water. Heat until steaming but not boiling. Never let it boil dry or burn. That creates a worse smell than the smoke you’re trying to eliminate.
-
Baking soda paste: For spot treatment of stubborn stains or odors on hard surfaces, mix three parts baking soda with one part water to form a thick paste. Apply, let sit 15 minutes, scrub gently, rinse.
-
Placement strategies: Put absorbent materials (bowls of vinegar, baking soda, or coffee grounds) at multiple heights. Some on floors, some on counters or tables, some on high shelves. Smoke particles settle at different levels, and coverage at varying heights captures more contamination.
Combination approaches often work better than single methods. Spray surfaces with vinegar solution, place baking soda bowls around the room, run an air purifier with activated carbon filtration simultaneously. Each method targets odor differently (chemical neutralization, absorption, air filtration), so layering them covers more ground.
DIY neutralizers handle surface and airborne odor. They struggle with particles embedded in porous materials like drywall, wood subflooring, or insulation. If you’ve cleaned thoroughly, used multiple neutralization methods, and odor still returns after a week, it’s a sign that contamination has penetrated beyond what household products can reach.
Professional treatments use stronger concentrations, penetrating sealants, or specialized application methods (thermal fogging, ozone generation) that neutralize odors in places you can’t access with spray bottles and bowls of baking soda. Knowing when DIY has done all it can and professional help becomes necessary saves you from repeating the same ineffective steps.
Ventilation Methods and Air Purifier Selection for Smoke Smell

Ventilation moves contaminated air out and brings fresh air in, but it doesn’t remove particles embedded in surfaces. Opening windows helps during and after cleaning by preventing odor concentration from building up while you work. It’s a complement to cleaning, not a replacement for it.
Proper ventilation steps in order:
- Open windows and exterior doors on opposite sides of the affected area to create cross-ventilation. Air needs entry and exit points to flow effectively.
- Position box fans in windows facing outward to exhaust contaminated air. Don’t face fans inward. That just recirculates smoke particles already inside.
- Create directional airflow from clean areas toward contaminated areas, then outside. If the kitchen is the source, you want air moving from living areas into the kitchen, then out through kitchen windows or doors. This prevents spread of particles to unaffected rooms.
- Maintain ventilation during active cleaning and for several days afterward. As you disturb settled soot and spray cleaning solutions, you stir particles back into the air. Continuous air exchange helps clear them out.
| Air Purifier Feature | Why It Matters | Recommended Specification |
|---|---|---|
| HEPA Filter | Captures fine smoke particles (0.3 microns or larger) that float in air | True HEPA rated; not “HEPA-type” or “HEPA-like” |
| Activated Carbon Filter | Absorbs odor molecules and gaseous contaminants that HEPA filters can’t capture | Thick carbon layer (minimum 5 lbs for effective odor absorption) |
| CADR Rating | Indicates how much air the purifier cleans per minute; higher CADR means faster room coverage | Match CADR to room size; minimum 200 for average kitchen |
| Continuous Operation Capability | Purifier needs to run 24/7 during restoration without overheating or motor failure | Unit rated for continuous use; commercial models preferred over light-duty residential units |
Run air purifiers continuously during the restoration period. Smoke particles don’t settle and disappear. They remain suspended in air and resettle on surfaces you’ve already cleaned. Continuous filtration pulls particles out of circulation before they redeposit.
Proper placement matters. Put purifiers in the center of the room, away from walls and furniture that block airflow. If you’re treating multiple rooms, use multiple units rather than expecting one purifier to handle your entire home. Air doesn’t flow freely through doorways and around corners, so coverage is room-specific.
After a fire, plan to run purifiers for at least two weeks, even if you don’t smell smoke after the first few days. Residual particles take time to circulate through air enough times for the filter to capture them. Shut the purifier off too soon, and particles you didn’t capture settle back onto cleaned surfaces.
HVAC System Cleaning and Filter Replacement After Kitchen Fires

Smoke doesn’t stay in the room where the fire happened. It gets pulled into return air vents, circulates through ductwork, gets blown back out through supply registers into every room the HVAC system serves. The entire network becomes contaminated, and every time the system runs, it reintroduces smoke particles and odor into spaces you’ve already cleaned.
That’s why cleaning visible surfaces but ignoring your HVAC means odor keeps coming back. The system is quietly redistributing contamination on a cycle, undoing your cleaning work.
Immediate actions for your HVAC system:
- Replace all air filters immediately. Standard filters are saturated with smoke particles and need to go. Use high-quality pleated filters (MERV 11 or higher) for better particle capture during the restoration period.
- Remove and wash all register and vent covers. Soak them in warm soapy water, scrub with a brush, rinse, dry thoroughly before reinstalling.
- Schedule a professional HVAC inspection. Smoke permeates ductwork, accumulates on blower components, coats evaporator coils. Technicians have cameras to inspect ducts internally and equipment to clean components you can’t access.
- Consider professional duct cleaning services for moderate to severe fires. If the fire burned long enough to send visible smoke through the house, ductwork likely has contamination that vacuuming registers won’t address.
- Replace or thoroughly clean exhaust fan filters in the range hood. These take the heaviest smoke exposure and won’t function properly if clogged with residue.
Signs that professional HVAC restoration is needed: You smell smoke every time the system runs, even after changing filters and cleaning vents. Visible soot appears around supply registers or return grilles. Airflow seems reduced, indicating blockage from accumulated residue. The system makes new noises or struggles to maintain temperature.
Change filters more frequently in the three to six months following fire damage. Even after thorough cleaning, residual particles continue working loose from surfaces and fabrics. More frequent filter changes capture this gradual release before particles recirculate. Plan to replace filters monthly for the first three months, then return to your normal schedule.
If your home has ductwork running through unconditioned spaces (attics, crawl spaces) and the fire involved heavy smoke, ask the HVAC professional to check for contamination that reached those areas. Insulation around ducts can absorb odors that slowly release back into the system. For more information about when professional restoration becomes necessary, fire and smoke damage restoration services can assess system-wide contamination.
Professional Restoration Services for Persistent Kitchen Fire Odors

DIY cleaning handles surface contamination. When smoke penetrates porous materials, gets into wall cavities, or involves oily soot that smears when touched, professional restoration equipment and techniques become necessary. Fire size, materials burned, how long before you started cleaning all affect whether household methods will work or you need specialized help.
Situations requiring professional restoration:
- Extensive damage covering multiple rooms or entire floors of the home
- Oily soot that spreads when you try to wipe it (petroleum-based residue from grease fires or synthetic materials burning)
- Odors that persist after thorough DIY cleaning and multiple neutralization attempts
- Smoke that penetrated into drywall, subflooring, wall cavities, or insulation layers
- Structural materials showing discoloration or damage that cleaning doesn’t improve
Professional techniques that go beyond household methods:
-
Ozone treatment: Generates ozone gas that oxidizes odor molecules at a chemical level. Occupants and pets must evacuate during treatment (ozone is harmful to breathe). Technicians seal the space, run ozone generators for several hours, then ventilate thoroughly before re-entry. Effective for deep odor penetration that other methods can’t reach.
-
Thermal fogging: Heats a petroleum-based deodorizing solution into a fine mist that penetrates the same spaces smoke reached. The fog particles are similar in size to smoke particles, so they travel into cracks, crevices, porous materials where spray cleaners can’t go. Neutralizes odors at the source rather than masking them.
-
Hydroxyl generators: Produce hydroxyl radicals that break down odor molecules through oxidation. Unlike ozone, hydroxyl treatment is safe for continuous operation while occupants remain in the home. Less aggressive than ozone but requires longer treatment time.
-
Specialized sealants and primers: Shellac-based or synthetic primers designed to encapsulate odor molecules in porous surfaces. Applied to walls, ceilings, subflooring before repainting or installing new flooring. Prevents odors from bleeding through new finishes.
-
Ductwork cleaning equipment: High-powered vacuums, rotary brushes, compressed air systems that remove contamination from inside air ducts. Access ports allow technicians to clean the entire duct run, not just the visible register openings.
Professional assessment provides documentation for insurance claims. Restoration companies photograph damage, itemize affected materials, provide detailed estimates that support your claim. They know what insurance adjusters look for and can document things you might overlook.
Cost varies based on square footage affected, severity of damage, techniques required, whether materials need replacement or can be cleaned and sealed. A small kitchen fire might involve a few hundred dollars for ozone treatment and duct cleaning. A fire that spread smoke through an entire home with oily soot penetration can run several thousand dollars for complete deodorization, duct cleaning, sealing.
Some variables that affect restoration cost: the number of rooms involved, ceiling height (higher ceilings mean more surface area and harder access), type of materials contaminated (carpet and drywall absorb more than tile and concrete), whether HVAC ductwork needs cleaning, if you need structural repairs beyond odor removal.
Note: If firefighting efforts involved significant water, you may also need moisture management and potential water damage and flooding cleanup to prevent secondary issues like mold growth in drywall or subflooring.
Paint Sealing and Material Replacement for Severe Smoke Damage

Cleaning removes surface contamination. When smoke particles penetrate deep into porous materials, cleaning can’t pull them back out. Drywall, ceiling tiles, insulation, grout, unfinished wood all absorb smoke at a level where odor molecules bond with the material itself. At that point, sealing or replacement becomes more practical than repeated cleaning attempts.
Porous materials absorb smoke particles through tiny openings in their structure. The particles travel into the material and lodge in spaces cleaning solutions can’t reach. You can scrub the surface until it looks clean, but odor molecules remain embedded inside, gradually releasing smell over weeks and months.
Scenarios requiring sealing or replacement:
- Drywall that won’t release odors after two or three thorough cleanings with appropriate solutions
- Discolored ceiling tiles where smoke staining won’t lift, even with specialty cleaners
- Compromised insulation in attic spaces or wall cavities exposed to heavy smoke (insulation is nearly impossible to clean effectively)
- Permanently stained grout that holds odor after scrubbing and attempted sealing
- Warped or severely discolored wood surfaces where the grain has absorbed smoke deeply
Odor-blocking primer creates a barrier between contaminated material and new paint. Shellac-based primers (BIN is a common brand) or specialty smoke sealants bond tightly to surfaces and prevent odor molecules from migrating through to the new finish. Water-based primers don’t seal smoke odors. You need solvent-based or shellac formulas.
Application process: Clean the surface as thoroughly as possible first. Let it dry completely. Apply primer in thin, even coats. Most odor-blocking primers require two coats for maximum effectiveness. Allow proper drying time between coats (check product instructions). Once the primer is fully cured, you can paint with your finish color.
Full material replacement makes sense when damage is extensive enough that sealing would require multiple coats of expensive primer across large areas. At some point, the cost of premium primer, labor for multiple applications, uncertainty about long-term effectiveness exceeds the cost of tearing out contaminated drywall and installing new.
Replacement is also more cost-effective when materials have structural damage beyond odor. Water-damaged drywall from firefighting efforts, warped wood from heat exposure, or insulation that’s compressed or contaminated. Trying to salvage materials that are compromised in multiple ways rarely works out.
Matching existing finishes and textures during replacement takes some attention. Drywall texture (smooth, orange peel, knockdown) needs to match surrounding areas. Paint sheen and color should blend seamlessly. Wood trim profiles should match existing baseboards or crown molding. When replacing portions of a room rather than entire surfaces, blending new with old matters for a finished appearance.
If you’re replacing carpet or flooring in one room, consider how well new material will match adjacent rooms. Sometimes smoke damage becomes the reason to update flooring throughout a connected area, avoiding visible transition lines between old and new material.
Timeline and Success Indicators for Kitchen Fire Odor Elimination
How long odor removal takes depends on variables you can’t control and a few you can. Fire size matters most. A small stovetop fire with minimal smoke clears faster than an oven fire that smoldered for twenty minutes before discovery. Damage extent, soot type, immediate response time, materials affected all shift the timeline.
| Damage Level | Typical Timeline | Key Activities |
|---|---|---|
| Minor (burnt food, no structural damage) | 3-7 days | Surface cleaning, ventilation, odor neutralizers, fabric laundering |
| Moderate (small fire, surface damage) | 1-3 weeks | Thorough surface cleaning, appliance treatment, HVAC filter replacement, air purification, possible primer/paint on walls |
| Significant (extended burning, multiple rooms affected) | 3-6 weeks | Professional cleaning, duct cleaning, ozone or hydroxyl treatment, sealing of porous surfaces, possible material replacement |
| Severe (structural involvement, professional restoration) | 6-12 weeks | Complete restoration including demolition, material replacement, professional deodorization, HVAC system cleaning, sealing all affected surfaces |
Success indicators that show you’re done:
- No smell detected when entering from outside. Your nose adapts to smells when you’re continuously exposed, so leave the house for a few hours and notice what you smell when you return.
- HVAC operation doesn’t trigger odors. If running heat or AC brings back smoke smell, contamination remains in the system.
Final Words
Kitchen fire odor removal takes patience, the right approach, and a clear understanding of what you’re dealing with.
Smoke particles don’t just sit on surfaces. They embed into fabrics, soak into walls, and circulate through your HVAC system. That’s why masking sprays don’t work and why thorough cleaning matters more than speed.
Start with safety. Move methodically from top to bottom. Address hidden areas like ductwork and cabinet interiors. Use neutralizers that absorb odors instead of covering them up.
If you’ve cleaned multiple times and the smell returns when the heat kicks on, that’s your signal to call in restoration pros with the equipment to reach what you can’t.
Your kitchen can smell normal again. It just takes the right steps in the right order.
FAQ
How do you get rid of kitchen fire smoke smell?
To get rid of kitchen fire smoke smell, you need to combine deep cleaning of all surfaces with proper ventilation and odor neutralizers like activated charcoal or white vinegar. Simply masking the smell won’t work because smoke particles embed deep into fabrics and porous materials.
What is the best odor eliminator after a fire?
The best odor eliminator after a fire combines activated charcoal bags for absorption and white vinegar for neutralization, while air purifiers with HEPA and activated carbon filters continuously remove particles. For severe cases, professional techniques like ozone treatment or thermal fogging may be necessary.
How long does it take for fire smoke smell to go away?
Fire smoke smell takes anywhere from several days to several weeks to go away, depending on damage severity, soot type, and how quickly you start cleaning. Minor burnt food odors may clear in days, while significant fire damage with structural involvement often requires weeks of thorough cleaning and professional restoration.
Does vinegar neutralize fire smoke odors?
Yes, vinegar neutralizes fire smoke odors by breaking down acidic soot particles when used as a spray solution on surfaces or placed in bowls around the room. However, vinegar works best alongside thorough cleaning since it neutralizes odors but doesn’t physically remove embedded smoke particles from porous materials.
Can you remove smoke smell from kitchen appliances yourself?
You can remove smoke smell from kitchen appliances yourself by disassembling removable parts, cleaning all surfaces with mild detergent, and running self-cleaning cycles where appropriate. For heavily damaged appliances with smoke penetration into heating elements or insulation, replacement may be safer and more cost-effective than cleaning.
When should you call professionals for kitchen fire odor removal?
You should call professionals for kitchen fire odor removal when dealing with oily soot, odors persisting after multiple DIY cleaning attempts, or smoke that’s penetrated ductwork and structural materials. Professional equipment like thermal foggers and ozone generators handles contamination that household methods can’t reach.
What safety equipment do you need before cleaning fire damage?
Before cleaning fire damage, you need N95 masks or respirators to protect from soot particles, heavy-duty gloves, and protective clothing that covers skin. You should also confirm the fire is completely extinguished and official investigations are complete before starting any cleaning or ventilation.
Should you replace HVAC filters after a kitchen fire?
You should replace HVAC filters immediately after a kitchen fire because smoke particles circulate through ductwork and embed in filters, causing recurring odors every time the system runs. Consider having a professional inspect the entire HVAC system since smoke may have contaminated ductwork and ventilation components beyond just the filters.
Do air fresheners remove smoke smell after a fire?
No, air fresheners do not remove smoke smell after a fire because they only mask odors temporarily without eliminating the embedded smoke particles in fabrics and porous surfaces. You need actual cleaning and neutralization methods to remove the source of the smell, not just cover it up.
Can you wash smoke-damaged fabrics in a regular washing machine?
You can wash smoke-damaged fabrics in a regular washing machine only if they have dry soot, using high-quality detergent plus odor-removal boosters. Never wash fabrics with oily soot in your machine because the residue can clog internal components and spread contamination.
