
You open the bathroom door and there it is again. That black stuff spreading along the grout line behind the toilet, or creeping up the corner by the shower. Small patches of bathroom mold look fixable, and often they are. But scrubbing the surface without understanding what’s happening underneath can waste your time and let the problem get worse. This guide walks you through safe DIY mold removal for small bathroom wall patches, explains which cleaning solutions actually work on different surfaces, and shows you the warning signs that mean it’s time to call a professional before the contamination spreads into wall cavities you can’t reach.
Complete Process for Removing Bathroom Wall Mold

Bathroom wall mold removal shifts based on what you’re dealing with. Tile, painted drywall, and wallpaper each need different approaches, and the process changes depending on how far the contamination has spread. But the workflow stays consistent.
You’ve got four main stages: assess the area and set up containment, apply the right cleaning solution and let it do its thing, scrub or replace materials to physically remove the mold, then fix the moisture source so it doesn’t come right back. Prep the space by protecting areas you don’t want contaminated. Pick a cleaner that matches your wall surface. Give it time to penetrate. Then remove the mold and any damaged materials.
DIY works for small patches under 10 square feet in spots you can actually reach, clean, and dry completely. Larger areas need pros. Same goes for mold that’s gotten into wall cavities, situations with structural damage, or homes where someone has respiratory issues or a weakened immune system. The sections that follow cover which cleaning solutions work, what safety gear you need, how to apply everything, and how to stop mold from coming back.
Identifying Bathroom Wall Mold Before Removal

Visible mold shows up in a few ways. Black, green, brown, sometimes orange spots and patches. Often starts small in grout lines or corners, then spreads. The texture might be fuzzy, slimy, or powdery depending on the type. Common spots include the wall behind the toilet, around the tub or shower, near the sink backsplash, and upper corners where warm humid air collects. Grout and caulking lines show dark streaking or discoloration even when the tile around them looks fine.
Hidden mold creates different warning signs. That musty smell that won’t go away after cleaning? Mold’s growing inside wall cavities or behind surfaces. Paint peeling, bubbling, or separating from the wall, especially in areas that don’t get sprayed directly, often means moisture and mold are trapped underneath. Warped baseboards, soft spots when you press on drywall, sections that feel spongy… water’s soaked into the material and mold is growing in the damp interior. Moisture stains or yellowish-brown patches that keep coming back after you paint over them signal ongoing water intrusion and probable mold growth deeper in the wall.
Surface mold sits on top of materials and you can scrub it away. Structural infiltration happens when mold penetrates porous materials like drywall, growing into the paper facing and gypsum core, or spreads into wall cavities and grows on insulation, wooden studs, and the back side of drywall. If surface staining won’t clean off completely, or if drywall feels soft or mushy when you press it, the mold has moved beyond the surface. Cleaning the visible part doesn’t solve the problem. You’re looking at material replacement because the contamination goes deeper than any cleaning solution can reach.
Cleaning Solutions for Bathroom Wall Mold

The right solution depends on what your walls are made of and whether you’re dealing with colored or white grout.
Chlorine bleach cleaners work on tiled walls with non-colored grout. Products like Ecolab Mold and Mildew Stain Remover cost under $5. Spray it directly on the moldy spots, let it sit for at least 30 minutes so the bleach kills the mold roots, scrub with a stiff brush, then rinse with warm water. Don’t use bleach-based cleaners on colored grout. They’ll fade or bleach out the grout color permanently.
White distilled vinegar provides a safer alternative for colored grout and for anyone who wants to avoid bleach fumes. Fill a spray bottle with undiluted white vinegar, saturate the moldy areas completely, let it sit for 30 minutes, then spray again and wait another 30 minutes. The double application gives the acidic vinegar time to break down mold structure. Scrub with a brush and rinse with warm water. Vinegar won’t fade colored grout.
Borax-vinegar mixture works best on painted or wallpapered walls where bleach might damage the finish. Mix 2 tablespoons of borax powder with 1/4 cup white vinegar and 2 cups hot water in a spray bottle. Shake until the borax dissolves. Spray liberally on moldy areas, scrub and wipe clean, then spray again and let it sit for 10 minutes before wiping dry. This combination kills mold without harsh fumes and the borax residue continues inhibiting regrowth.
Hydrogen peroxide (3% concentration from drugstores) kills mold on various surfaces without bleach toxicity. Spray it on moldy areas, let it sit for 10 to 15 minutes, scrub, and wipe clean. Works on tile, painted walls, and grout, though it may lighten dark-colored surfaces with repeated use.
Baking soda paste creates a gentle abrasive for scrubbing textured surfaces. Mix baking soda with just enough water to make a thick paste. Apply to moldy areas, scrub with a brush or sponge, then rinse. Baking soda’s mild abrasiveness helps lift mold from porous or textured surfaces without scratching.
Commercial antimicrobial products designed specifically for mold remediation often combine multiple active ingredients and include surfactants that help solutions penetrate porous surfaces. These products cost $10 to $30 per bottle and work well for severe contamination or when you want maximum killing power. Follow label instructions for dwell time and dilution.
Non-porous surfaces like ceramic tile and glazed surfaces respond to surface cleaning because mold can’t penetrate the material. It only grows on top. Porous surfaces like drywall, unsealed grout, and painted walls absorb moisture and allow mold roots to penetrate below the surface. Even aggressive cleaning solutions only penetrate a fraction of an inch into porous materials, which means deeply established mold in drywall or wood often survives surface treatment and regrows within weeks.
Safety Equipment and Containment for Wall Mold Removal

When you’re removing mold that covers more than a few square feet, you need proper protective equipment. Wear an N-95 or P-100 respirator, not just a dust mask, to filter out mold spores that become airborne when you disturb the growth. Add safety goggles to keep spores out of your eyes, rubber or nitrile gloves to protect your hands from cleaning solutions and mold contact, and old clothes you can throw away afterward since mold spores embed in fabric and are nearly impossible to wash out completely. Long sleeves and long pants protect your skin from both the mold and the cleaning chemicals.
Set up containment before you start scrubbing. Turn off your furnace and air conditioner so the system doesn’t pull mold spores through the house and deposit them in every room. Cover air vents and ducts in the bathroom with plastic sheeting and tape. Close the bathroom door and seal gaps around it with plastic and tape, or hang a plastic sheet over the doorway. Put a box fan in the bathroom window pointing outward to exhaust spore-filled air directly outside. Don’t just crack a window. Seal around the fan with plywood or cardboard to create a tight fit so contaminated air goes out and clean air doesn’t blow back in. You’ll need to throw the fan away when you’re done because mold spores stick to the motor and blades and you can’t clean them off completely.
Controlling spores during the work prevents contamination spread. Use a garden sprayer or spray bottle to mist moldy areas with water or cleaning solution before you scrub or tear anything out. The moisture weighs down spores so fewer become airborne when you disturb the surface. When you remove contaminated materials like sections of drywall, moldy carpeting, or insulation, wrap everything in 6-mil plastic sheeting while it’s still in the bathroom. Double-bag smaller debris in heavy garbage bags, seal them, and take them straight outside. Don’t carry unwrapped moldy materials through your house.
After the work, throw away protective clothing, the box fan, and any porous items that contacted mold. Keep your wet/dry vacuum outside during the entire project. If you use it inside without a HEPA filter, it’ll blow mold spores throughout the house. Take a shower and wash your hair right after finishing remediation work, before you sit on furniture or move around other parts of your home. Bag your work clothes separately and wash them in hot water with extra detergent, or just throw them out.
Scrubbing Techniques for Different Bathroom Wall Surfaces

For tiled surfaces, spray your cleaning solution directly on moldy areas and let it sit for at least 30 minutes. Some people set a timer so they don’t start scrubbing too soon. Use a stiff-bristled brush, not a sponge, because you need the bristle firmness to dislodge mold from grout lines and textured surfaces. Scrub in a circular pattern on the tile face, then switch to back-and-forth strokes along grout lines where mold often embeds deeper. Pay extra attention to corners and the junction between the wall and tub or shower pan where water collects. After scrubbing, rinse the entire area with warm water using a sponge or clean cloth, changing the rinse water frequently so you’re not spreading spores around.
Painted and wallpapered walls need a gentler approach. Apply your cleaning solution liberally but don’t oversaturate the surface. Spray enough to wet the mold completely but not so much that solution runs down the wall and soaks into drywall below. Scrub with a softer brush or a stiff sponge, using moderate pressure to avoid damaging the paint finish or loosening wallpaper. Wipe the area clean with a damp cloth. Then spray a second application of cleaning solution, let it sit for 10 minutes, and wipe dry with a clean cloth. This double-application method ensures you’ve killed mold that might be partially embedded in the porous paint layer. For wallpaper, test your cleaning solution in an inconspicuous spot first since some wallpapers are moisture-sensitive and will separate or stain.
Porous surfaces like unsealed drywall or bare wood present a bigger challenge. Scrubbing only reaches surface-level contamination. If mold has penetrated into the material, which happens when moisture has been present for more than 48 to 72 hours, scrubbing won’t reach the roots growing inside. Signs that scrubbing isn’t enough include mold regrowth within days of cleaning, a musty smell that persists after cleaning and drying, discoloration that won’t scrub off, or soft, deteriorated material. When mold has penetrated porous materials, you need to cut out and replace the contaminated section rather than trying to clean it. Surface cleaning might make it look better temporarily, but the mold will come back.
Behind-Wall Mold: Inspection and Drywall Removal
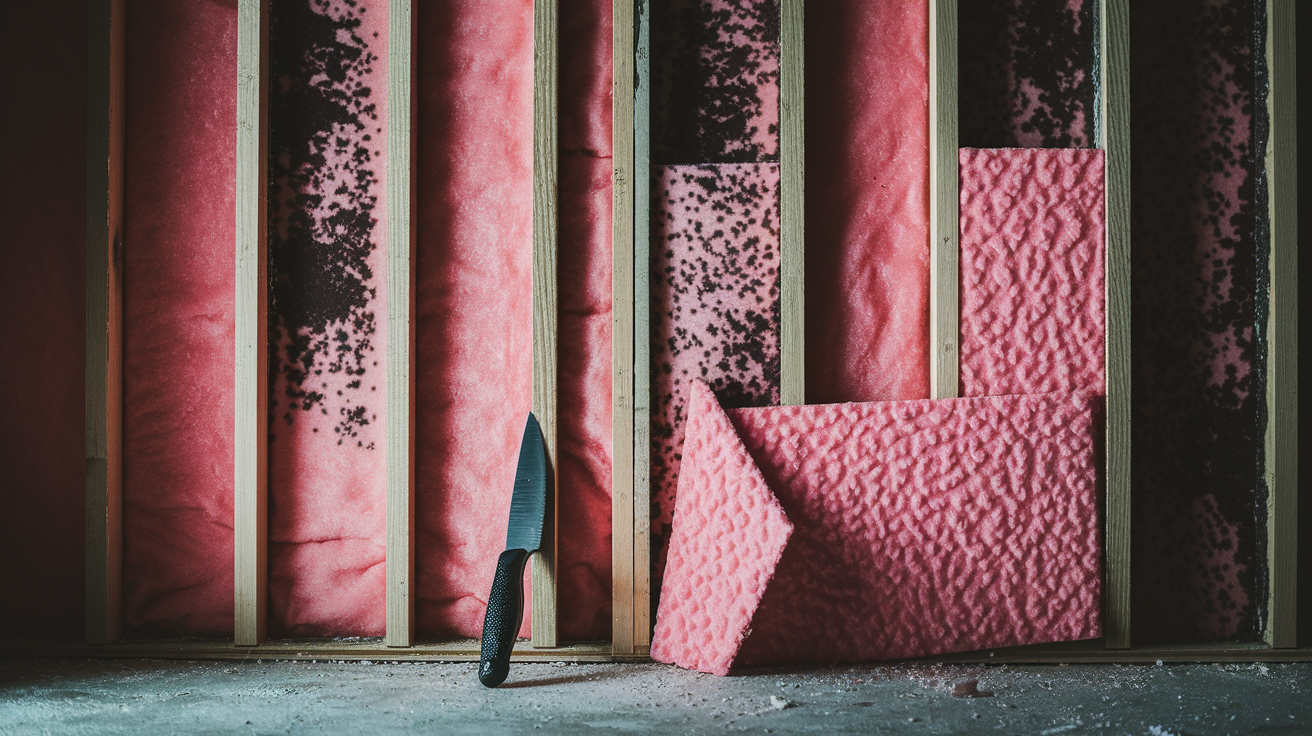
You need to check inside wall cavities when drywall feels mushy or soft instead of firm, when cleaning the surface doesn’t eliminate the musty smell, or when you see brown water stains that suggest moisture has soaked through from a leak or condensation problem.
Cut small inspection openings in areas where you suspect hidden mold. Near stains, soft spots, or where the musty smell is strongest. Use a utility knife or drywall saw to cut a square opening about 6 inches on each side. Start small so you’re not removing more material than necessary if the cavity is clean.
Check the insulation inside the wall cavity. Look for discoloration, dampness, or visible mold growth on the insulation material. Wet or contaminated insulation won’t dry out properly and needs to be removed and replaced.
Inspect the wooden studs and framing for mold growth, dark staining, soft spots, or moisture. Wood that’s actively wet or shows extensive mold coverage may have structural damage that needs evaluation before you close up the wall.
Mark the extent of contaminated drywall that needs removal. Mold doesn’t respect neat boundaries, so cut back to clean, dry material. Usually to the center of the nearest stud on each side of the contaminated area. Better to remove an extra foot of clean drywall than to leave a moldy edge that’ll spread after you rebuild.
Cut out and dispose of affected materials using a reciprocating saw or utility knife. Mist the area as you cut to control dust and spores. Immediately bag cut sections in plastic and remove them from the house.
Once framing is exposed, treat bare wood studs and the back of remaining drywall with antimicrobial solution or borax mixture. Let everything dry completely for at least 48 to 72 hours with fans running before you install new insulation and drywall. Moisture meters help confirm wood and remaining materials have dried to acceptable levels, below 16% moisture content for wood.
| Damage Indicator | Required Action | Material Disposal |
|---|---|---|
| Surface discoloration only | Clean with appropriate solution, scrub, and dry thoroughly | No disposal needed if mold is eliminated and material remains intact |
| Soft or mushy drywall | Remove affected drywall section back to clean material at stud centers | Double-bag drywall sections in plastic, seal, and dispose immediately |
| Visible cavity mold on insulation or studs | Remove contaminated insulation, treat studs with antimicrobial, allow full drying before rebuild | Wrap insulation in plastic before removal, bag separately, dispose of with contaminated drywall |
| Structural wood damage or extensive penetration | Professional assessment required for structural integrity and scope of remediation | Professional disposal of contaminated building materials following containment protocols |
Moisture Sources Causing Bathroom Wall Mold
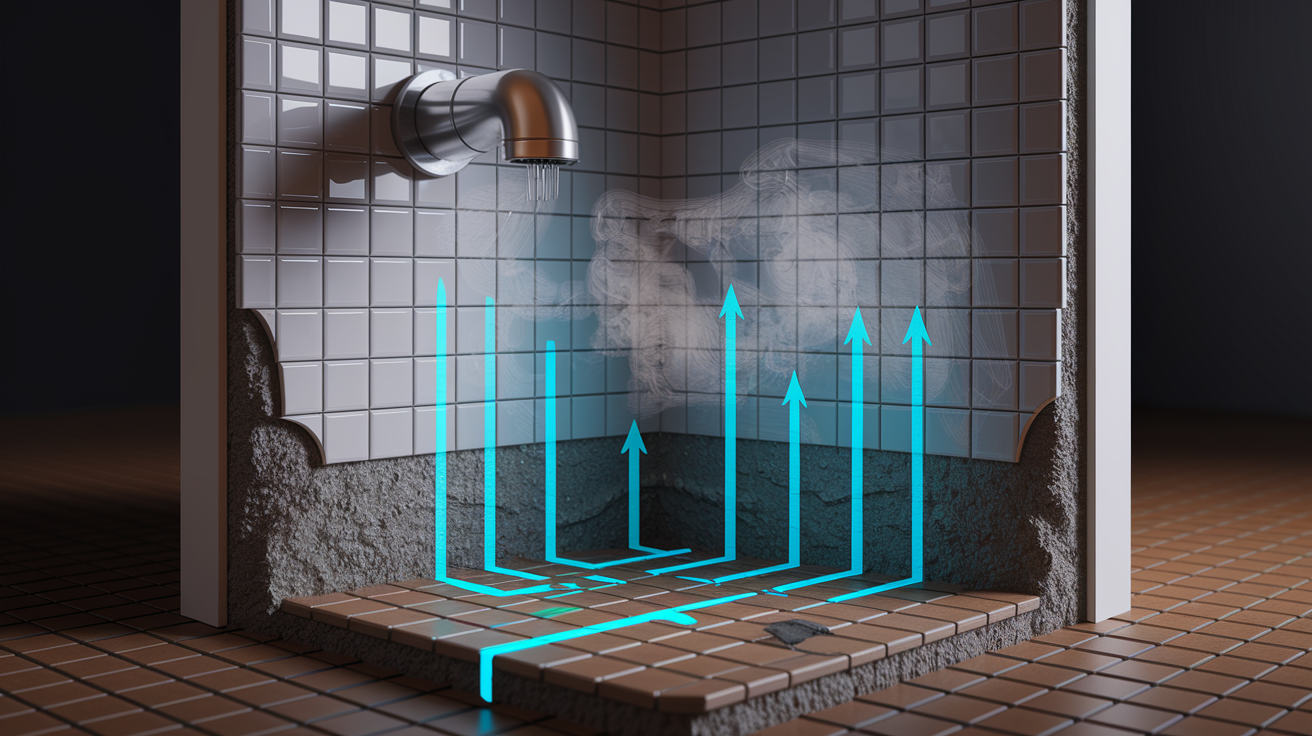
Plumbing leaks create the most common moisture problems in bathroom walls. Supply line connections under sinks develop slow drips that soak into flooring and lower wall sections. Drain pipes, especially older galvanized or connections with failing gaskets, leak inside walls when water flows down the drain. Toilet wax rings deteriorate over time, letting water seep from the base during every flush, saturating the floor and lower walls nearby. Pipe condensation happens when cold water lines run through humid spaces without insulation, creating constant dripping that homeowners often don’t notice until water damage appears on walls or ceilings below. Even small plumbing leaks create enough persistent moisture for heavy mold growth over weeks or months.
Structural water intrusion brings outside moisture through the building envelope. Poor exterior waterproofing around tub and shower surrounds lets water penetrate the wall assembly every time someone showers. Foundation cracks or inadequate drainage allow groundwater to wick up through concrete into framing and drywall in lower-level bathrooms. Roof leaks in areas above bathrooms, from damaged shingles, failed flashing, or ice dams, send water down through wall cavities where it spreads along horizontal framing before showing up as stains or mold far from the actual leak point. Inadequate attic ventilation creates condensation that forms on cold surfaces and drips down onto insulation and top plates of bathroom walls. When you address water damage promptly, you limit both the immediate structural impact and the mold growth that follows.
Daily bathroom use generates its own moisture load even without leaks. Shower steam saturates the air and condenses on cooler wall surfaces, especially in corners and along exterior walls in cold weather. Bathrooms without exhaust fans or with underpowered fans can’t remove moisture fast enough, leaving walls damp for hours after each shower. Missing caulk around tubs, showers, and sinks allows water to run behind fixtures and into wall cavities during normal use. Deteriorated grout in tile walls and floors creates pathways for water to reach the substrate and framing behind the decorative surface. What looks like surface water dries quickly, but water that gets into wall assemblies stays trapped and creates perfect mold-growing conditions.
Mold removal without fixing the moisture source is wasted work. Scrub all you want. If water keeps coming in, mold grows back within days or weeks. Before you rebuild walls or paint over cleaned surfaces, you need to stop the water at its source. That might mean repairing plumbing, improving waterproofing, upgrading ventilation, or fixing structural defects. Otherwise you’re just cleaning the same mold repeatedly.
Ventilation and Humidity Control for Bathroom Walls

Controlling moisture is the single most effective way to prevent mold from establishing or returning after removal. Ventilation and humidity control eliminate the damp conditions mold needs to grow.
Exhaust fan capacity must match your bathroom size. Calculate CFM (cubic feet per minute) rating by bathroom square footage. Multiply length times width and use that number as your minimum CFM. For bathrooms over 100 square feet, add 50 CFM for each toilet, tub, and shower. Run the fan for 20 to 30 minutes after every shower, not just during. Timers or humidity-sensing switches help ensure adequate runtime.
Proper exhaust fan venting routes moisture outside, never into the attic or crawlspace. Check that your exhaust duct runs continuously to an exterior vent without dips or sags where condensation can collect. Ducts venting into attics dump moisture that condenses on insulation and framing, creating mold problems above the bathroom.
Window ventilation provides natural airflow when weather permits. Open the bathroom window during and after showers when outdoor temperature allows. Even partial window opening helps, though it’s less effective than mechanical exhaust in very humid climates.
Door positioning affects air circulation. Leaving the bathroom door open after showers when the fan is running allows humid air to mix with drier household air rather than staying concentrated in the bathroom. Close doors during showers to contain steam, open them afterward during fan operation.
Portable dehumidifier placement makes sense in humid climates or during damp seasons. A small dehumidifier (30 to 50 pint capacity) in or near the bathroom removes moisture the exhaust fan misses. Set it to maintain 40 to 50% relative humidity. Empty the collection bucket daily or connect a drain hose if your model allows.
HVAC system humidity management helps control whole-home moisture levels that affect bathroom humidity. If your home consistently runs above 50% humidity, consider a whole-house dehumidifier integrated with your HVAC system or adjusting your air conditioning settings for better moisture removal.
Air circulation fans prevent stagnant moist pockets in corners and behind fixtures. A small desktop fan placed temporarily after showers helps surface water evaporate faster. Don’t aim fans directly at wet walls for hours on end. That just circulates humid air. Use fans to move air through the room and out the exhaust vent or window.
Measuring humidity helps you know whether your ventilation efforts are working. Ideal bathroom humidity sits between 30 to 50% relative humidity. Buy an inexpensive hygrometer (humidity meter) for $10 to $20 and check bathroom humidity levels several times weekly, especially after showers and in different seasons. If humidity consistently runs above 60%, mold growth becomes probable. Above 70%, it’s almost certain. Adjust your ventilation strategies based on what your measurements show.
Waterproofing and Sealing Bathroom Walls After Mold Removal

Caulk creates the first line of defense against water entering wall cavities. Remove old deteriorated caulk completely before applying new caulk. Use a utility knife or specialized caulk removal tool to scrape out the old bead, then clean the joint with rubbing alcohol to remove soap residue and oils. Apply new caulk in a continuous bead around tubs, showers, sinks, and toilet bases. For tub and shower areas that get direct water exposure, use 100% silicone caulk for maximum water resistance and flexibility. For sink areas and toilets, latex caulk works fine and it’s easier to smooth and paint. Tool the fresh caulk with a damp finger or caulk tool within a few minutes of application, before it skins over. Let it cure fully, usually 24 hours, before exposing it to water.
Grout sealing prevents water from wicking through grout lines and reaching the substrate or wall cavity behind tiles. Wait until grout and surfaces are completely clean and dry before sealing, preferably at least a week after grouting or cleaning. Use a penetrating grout sealer designed for your grout type (sanded or unsanded). Apply sealer with a small foam brush or specialized grout sealer applicator, working it into grout lines and wiping excess off tile faces immediately with a clean dry cloth. Grout sealer typically needs reapplication annually in shower areas, every 2 to 3 years in areas with less water exposure. You can test whether grout needs resealing by putting a few drops of water on a grout line. If water beads up, the sealer is still working. If water soaks in and darkens the grout, it’s time to reseal.
Mildewcide-infused paint helps control surface mold in damp rooms like bathrooms. When buying paint for bathroom walls, check with your paint dealer to confirm the paint contains mildewcide additives that inhibit mold growth on the paint surface. Some bathroom and kitchen paints include mildewcide as standard, while others don’t. You can add mildewcide to regular paint separately, though adding it yourself may void the paint manufacturer’s warranty and you need to measure carefully to avoid adding too much, which can affect paint performance. Mildewcide paint works for controlling surface mold but it doesn’t stop mold from growing behind the paint if moisture reaches the substrate, so it’s only effective when combined with proper moisture control and waterproofing.
Primer selection matters when repainting bathroom walls after mold removal and repairs. Use a stain-blocking primer like an oil-based primer or shellac-based primer (BIN or similar) to seal any remaining staining and prevent tannins or moisture marks from bleeding through your finish paint. In high-moisture areas, choose moisture-resistant drywall called “green board” with moisture-resistant core and facing, though regular drywall is fine in lower-moisture bathroom areas away from direct water exposure. For shower surrounds and areas that get direct repeated water contact, install cement board like Hardie board as the substrate behind tile instead of any drywall. Cement board doesn’t support mold growth the way paper-faced drywall does, even if water gets behind the tile.
Shower and Fixture Maintenance to Prevent Wall Mold

Consistent maintenance habits reduce mold risk with minimal daily effort.
| Maintenance Task | Frequency | Purpose |
|---|---|---|
| Squeegee shower walls after use | Daily, after every shower | Removes standing water that would otherwise evaporate slowly, keeping walls damp for hours and creating ideal mold conditions |
| Wipe down wet surfaces around sink and tub | After each use | Prevents water accumulation on horizontal surfaces and splash zones where moisture sits long enough to support mold growth |
| Inspect caulk and grout for gaps or deterioration | Monthly | Identifies early signs of failing waterproofing so you can recaulk small areas before water penetrates into wall cavities and causes extensive damage |
| Clean exhaust fan cover and check airflow | Quarterly | Maintains fan effectiveness by removing dust and lint buildup that reduces airflow, ensures fan continues removing moisture adequately |
| Check under sink and around toilet base for leaks | Monthly | Catches slow plumbing leaks early before they saturate walls, flooring, or subfloor and create extensive hidden moisture damage |
| Deep clean tile, grout, and caulk with antimicrobial cleaner | Monthly | Removes organic matter, soap residue, and body oils that provide food sources for mold, kills surface mold spores before visible growth establishes |
Early intervention when you notice minor moisture issues prevents major mold problems. When you spot a small leak, fix it within days, not weeks. When you see early mold spots forming in grout lines or corners, clean them immediately before the growth spreads across larger areas. When caulk starts pulling away from a joint or cracking, recaulk that section right away before water starts getting behind it. Establishing simple routines like squeegee after each shower, run the fan every time, wipe the sink area after brushing teeth creates long-term protection without feeling like a burden. These habits take less time than removing established mold and fixing the water damage that follows neglect.
Health Risks from Bathroom Wall Mold Exposure
Common reactions to bathroom mold exposure include allergic symptoms that feel like seasonal allergies even when it’s not allergy season. You might notice sneezing, runny or stuffy nose, itchy or watery eyes, and skin rashes or irritation, especially after spending time in the moldy bathroom. Respiratory symptoms show up as persistent coughing, throat irritation that doesn’t resolve, and wheezing or difficulty breathing, particularly for people with asthma. The mold itself and the volatile organic compounds (VOCs) mold releases as it grows both contribute to these symptoms. Sensitivity varies dramatically. Some people barely react to moderate mold exposure while others develop symptoms from minor contamination. Young children and pets often react more strongly than healthy adults because of their smaller size and developing immune systems.
More serious health concerns arise from prolonged exposure and certain mold species. Black mold, specifically Stachybotrys chartarum, produces mycotoxins that create stronger reactions than common bathroom molds like Cladosporium or Penicillium species. Extended exposure to mycotoxin-producing molds can cause persistent headaches, difficulty concentrating, fatigue, and in severe cases more serious neurological effects, though severe reactions are relatively uncommon in typical residential settings. Vulnerable populations face elevated risks: infants and children because their respiratory and immune systems are still developing, elderly individuals whose immune response may be weakened, and immunocompromised people including those with HIV/AIDS, cancer patients undergoing chemotherapy, transplant recipients, or people taking immunosuppressant medications. For these groups, even moderate mold exposure can trigger severe reactions or infections that wouldn’t affect healthy adults.
Prompt removal matters because ongoing exposure compounds effects over time. What starts as occasional sniffling can develop into chronic sinusitis or persistent respiratory problems as exposure continues week after week. Even after you remove visible mold, spores embedded in porous materials like drywall, insulation, or unsealed wood continue releasing into the air and affecting indoor air quality. Someone might clean surface mold and feel temporary improvement, then symptoms return within days as remaining spores reactivate and regrow. That’s why thorough removal, including replacing contaminated porous materials, not just scrubbing visible growth, matters for truly improving health conditions. The longer you wait to address bathroom mold, the more opportunity it has to spread through wall cavities and HVAC systems, expanding from a localized bathroom problem to a whole-house air quality issue.
When to Hire Professional Mold Removal Services
Certain mold situations exceed DIY capability and require professional expertise, specialized equipment, and proper insurance coverage.
Mold covering more than 10 square feet exceeds the EPA’s guideline for DIY remediation. Larger areas require industrial containment, negative air pressure equipment, and proper disposal procedures that most homeowners don’t have. Ten square feet roughly equals a patch three feet by three feet. Anything larger needs professional help.
Mold inside HVAC systems or ductwork requires specialized cleaning to prevent spreading spores throughout the house every time the system runs. Professionals use HEPA-filtered vacuums and antimicrobial fogging equipment to clean ductwork interior surfaces that you can’t reach without proper tools.
Structural damage to framing or extensive drywall areas means you’re looking at significant reconstruction, potential load-bearing concerns, and building code compliance issues. Professionals assess structural integrity, coordinate repairs with licensed contractors, and ensure rebuilding meets code requirements.
Sewage-related water damage causing mold involves biohazards beyond typical mold contamination. Category 3 water (sewage backup, flooding from rivers or streams) requires professional cleanup because of bacterial contamination in addition to mold growth.
Residents with serious health concerns or compromised immunity shouldn’t handle mold remediation themselves. The disturbance during cleaning releases massive amounts of spores that even healthy people with proper protective equipment can find overwhelming. Immunocompromised individuals should leave the property during professional remediation.
Mold returning after multiple DIY removal attempts indicates you haven’t identified the moisture source, the contamination is more extensive than visible signs suggest, or the mold has penetrated deeper into materials than surface cleaning reaches. Professionals use moisture meters, infrared cameras, and other diagnostic tools to find hidden problems.
When hiring mold remediation contractors, verify IICRC (Institute of Inspection, Cleaning and Restoration Certification) credentials, which indicate training in proper remediation protocols. Ask for proof of liability insurance and workers’ compensation coverage. Uninsured contractors leave you vulnerable if someone gets hurt or property gets damaged during the work. Get detailed written estimates covering scope of work, specific procedures, materials to be removed, containment methods, timeline, and total cost. Ask for references from recent similar projects and actually call them. Professional bathroom mold remediation typically costs $500 to $1,500 for small to moderate bathroom projects, scaling up to $3,000 to $6,000 when significant material removal and reconstruction is needed, though like fire damage restoration costs can climb much higher for extensive contamination affecting multiple rooms or building systems.
Insurance coverage depends on your policy and the original cause of the mold. If mold resulted from a sudden, accidental water event like a burst pipe or appliance failure, your homeowner’s insurance may cover both the water damage repairs and subsequent mold remediation. If mold developed from long-term neglect, maintenance issues, or slow leaks you didn’t address, insurance typically denies coverage because it’s considered a maintenance problem rather than a sudden accident. Review your policy or call your agent to understand your coverage before filing a claim. Expect professional remediation timelines of several days to a week for bathroom projects: initial assessment and testing takes a day, containment setup and removal work takes 1 to 3 days depending on extent, drying time adds 2 to 3 days, and final reconstruction takes another few days once everything has dried completely.
Bathroom Renovation Options to Eliminate Recurring Wall Mold
When you’re removing mold from the same bathroom walls every few months despite your best cleaning and prevention efforts, the problem goes beyond surface cleaning. Persistent mold despite repeated removal points to fundamental moisture or ventilation design flaws that surface treatments can’t fix. Maybe the room doesn’t have a window and the single small exhaust fan can’t keep up with steam from daily showers. Maybe the shower was built with improper waterproofing behind the tile, letting water migrate into walls with every use. Maybe the bathroom sits above a damp crawlspace or basement that keeps humidity constantly elevated. Whatever the cause, temporary fixes become more expensive and frustrating than addressing the root problem permanently.
Upgrading to moisture-resistant building materials makes sense when you’re already tearing out contaminated drywall. Instead of replacing water-damaged standard drywall with the same material that failed, install cement board (like Hardie board or Durock) for shower surrounds and areas that receive direct or frequent water exposure. Cement board costs more than drywall, roughly $10 to $15 per 3×5 sheet compared to $8 to $12 for standard drywall, but it’s composed of cement and fibers with no paper facing, meaning water penetration doesn’t provide food for mold growth. For bathroom walls outside the shower that don’t get directly wet but experience high humidity, moisture-resistant drywall (green board or purple board) provides moderate upgrade protection for $12 to $15 per sheet. When tiling shower walls, install a proper waterproofing membrane over the substrate before tile work. Options include sheet membranes like Schluter Kerdi or liquid-applied membranes that seal the wall assembly against water migration.
Ventilation system improvements often matter more than building material upgrades because even the best materials struggle in chronically humid environments. Calculate your bathroom’s ventilation requirements and compare against your current exhaust fan capacity (CFM rating is printed on the fan housing or in the manual). Upgrading from a weak 50 CFM builder-grade fan to a properly sized 80 to 110 CFM fan costs $100 to $300 for the fan plus installation, but the improvement in moisture removal is dramatic. Adding makeup air provisions, a passive air inlet or transfer grille in the bathroom door, prevents the bathroom from becoming negatively pressurized when the exhaust fan runs, which improves fan effectiveness. Installing a humidity-sensing fan control ($30 to $80) automatically runs the fan when moisture levels spike and shuts it off when humidity drops, ensuring adequate runtime without remembering to leave the fan on. If the bathroom has no window, adding one during renovation provides natural ventilation and emergency egress, though window installation costs $800 to $1,500 depending on size and wall construction.
Full bathroom renovation becomes cost-effective when you’re facing repeated mold removal cycles every 6 to 12 months. Each remediation cycle costs hundreds in materials and days of work, plus the disruption to daily life and the health effects of ongoing exposure. After the third or fourth remediation, you’ve spent enough on temporary fixes to fund significant portions of a renovation that solves the problem permanently. A renovation lets you correct design flaws like inadequate waterproofing, undersized ventilation, moisture-vulnerable materials that guarantee mold returns. Beyond solving the mold problem, bathroom renovation increases property value and appeal, especially if your recurring mold has left visible damage signs. Addressing design problems during renovation rather than after the next mold event prevents future damage.
Final Words
Mold removal in bathroom walls requires the right approach for your specific situation. Surface cleaning works for small spots on tile or paint, but hidden growth behind walls means cutting out damaged materials and treating the framing.
The real key is fixing moisture sources. If you stop the leak, improve ventilation, and seal gaps, mold won’t come back.
For small areas, you can handle this with basic supplies and a weekend. Larger infestations or structural damage mean it’s time to call in a team that handles this work daily. Either way, you’ll get your bathroom back to clean and safe.
FAQ
How do I permanently remove mold from my bathroom walls?
You permanently remove mold from bathroom walls by cleaning affected surfaces with appropriate solutions (bleach for tile, vinegar-borax mix for painted walls), fixing the moisture source causing growth, improving ventilation, and sealing walls with mildewcide-infused paint or proper waterproofing to prevent return.
What does toxic mold look like in a bathroom?
Toxic mold in a bathroom typically appears as black, dark green, or brown patches on walls, grout, or caulk, often with a slimy or fuzzy texture, and produces a persistent musty odor even after cleaning, though laboratory testing is required to confirm toxicity.
Do Clorox wipes kill mold?
Clorox wipes can kill surface mold on non-porous bathroom surfaces like tile or fiberglass, but they won’t penetrate porous materials like drywall or grout, and they don’t address the moisture source, so mold will return without fixing the underlying dampness problem.
What kills mold permanently?
Mold is killed permanently by combining effective cleaning agents (chlorine bleach for non-porous surfaces, vinegar-borax solutions for porous walls) with eliminating the moisture source, improving ventilation, and applying protective sealants or mildewcide-infused paint to prevent regrowth.
How much mold requires professional removal?
Mold covering more than 10 square feet requires professional removal, along with situations involving HVAC contamination, structural damage, sewage-related growth, residents with health vulnerabilities, or mold that returns after multiple DIY attempts, as these exceed safe DIY capability.
What safety equipment do I need for bathroom mold removal?
You need N-95 or P-100 respirators, protective goggles, waterproof gloves, and disposable clothing when removing bathroom mold covering more than a few square feet, along with containment supplies like plastic sheeting, a box fan for ventilation, and heavy-duty garbage bags for disposal.
How long should cleaning solution sit on bathroom mold?
Cleaning solution should sit on bathroom mold for at least 30 minutes on tile and grout surfaces to allow penetration and kill effectiveness, while painted walls require a two-step approach with an initial scrub followed by a 10-minute application before final wiping.
Can I just paint over mold on bathroom walls?
You cannot just paint over mold on bathroom walls because the mold will continue growing underneath the paint, eventually causing paint failure, persistent odors, and health risks, so you must remove existing mold and fix moisture problems before applying mildewcide-infused paint.
What causes mold to grow behind bathroom walls?
Mold grows behind bathroom walls when moisture penetrates through failed caulking or grout, plumbing leaks within walls, exterior water intrusion, inadequate ventilation causing condensation, or pipe sweating, creating damp conditions in wall cavities where mold thrives undetected.
How do I know if mold is inside my bathroom walls?
You know mold is inside bathroom walls when you notice musty odors after surface cleaning, paint peeling or bubbling without visible water, soft or mushy spots in drywall, persistent moisture stains, or visible mold returning quickly after removal, indicating deeper contamination.
What humidity level prevents bathroom mold?
A humidity level between 30-50 percent prevents bathroom mold growth, which you can maintain through exhaust fans running 20+ minutes after showers, opening windows for natural ventilation, using dehumidifiers in humid climates, and ensuring proper whole-home HVAC humidity control.
Should I use bleach or vinegar for bathroom mold?
You should use bleach for bathroom mold on tiled walls with non-colored grout because it kills mold quickly and removes stains, while vinegar works better for colored grout, painted walls, and wallpapered surfaces where bleach would cause fading or damage.
How often should I seal bathroom grout and caulk?
You should seal bathroom grout annually after cleaning and drying to prevent water penetration behind tiles, and replace deteriorated caulk around tubs, showers, and fixtures whenever you notice cracking, separation, or discoloration to maintain moisture barriers that prevent mold growth.
When does bathroom drywall need replacement instead of cleaning?
Bathroom drywall needs replacement instead of cleaning when it feels soft or mushy, shows visible mold growth on the back side after inspection cuts, has absorbed significant water creating structural weakness, or when mold returns persistently after proper surface cleaning.
What type of paint prevents mold in bathrooms?
Mildewcide-infused paint prevents mold in bathrooms by controlling surface growth in damp conditions, though you should verify mildewcide content with paint dealers and note that adding mildewcide separately to regular paint may void the manufacturer’s warranty while providing similar protection.
