
You probably check your phone more often than you check behind your shower curtain for mold. That’s normal. But bathroom mold grows fast in hidden spots, and by the time you notice the dark patches or smell that musty odor, it’s already spread. The good news? Most bathroom mold cleans up with supplies you already own and a clear process that takes about an hour. This guide walks you through identifying what’s growing, protecting yourself during cleanup, removing it completely, and keeping it from coming back.
Identifying Different Types of Bathroom Mold and Mildew

Bathroom mold shows up in a bunch of different forms, and knowing what you’re looking at helps you figure out what you’re dealing with. Black mold appears as dark greenish-black patches that feel slimy when they’re wet and turn powdery once they dry out. Pink mold isn’t actually mold at all. It’s a bacteria called Serratia marcescens, and it looks like pink or orange slime around drains and on shower walls. White mold has a fuzzy or powdery texture and usually grows on grout or painted surfaces. Green mold spreads in circular patches with a soft, almost velvety feel to it. Brown mold shows up as darker spots on wood or drywall, and when you see it, you’re probably looking at water damage.
People mix up mildew and mold all the time, but they’re not the same. Mildew sits flat on surfaces, looks gray or white, and wipes away easily with basic cleaners. It’s just a surface thing. Mold actually puts down roots into porous surfaces like grout, drywall, and wood. When you spot mold on non-porous surfaces like glass or tile, you can usually clean it off completely. But when it’s growing on porous surfaces, it digs in deep, which makes getting rid of it way trickier. If you’re smelling a musty, earthy odor in your bathroom even after you’ve cleaned, that’s telling you there’s mold growth somewhere you haven’t found yet. Could be behind walls or under the flooring.
Black mold gets talked about the most because certain types, like Stachybotrys chartarum, produce toxins that mess with your health. That said, you can’t tell if black mold is toxic just by looking at it. Any dark mold growth that’s bigger than about a square foot, or any mold that keeps showing up in the same spot, deserves a professional assessment. Black mold typically appears where there are ongoing moisture problems. Around leaking pipes, under sinks, on ceilings with condensation issues. If you’re seeing black mold spreading across a large area, or if anyone in your home starts developing respiratory symptoms when the bathroom stays closed up, call in professionals who can test and identify the specific mold spores you’re dealing with.
Essential Safety Gear and Protective Measures for Mold Cleanup
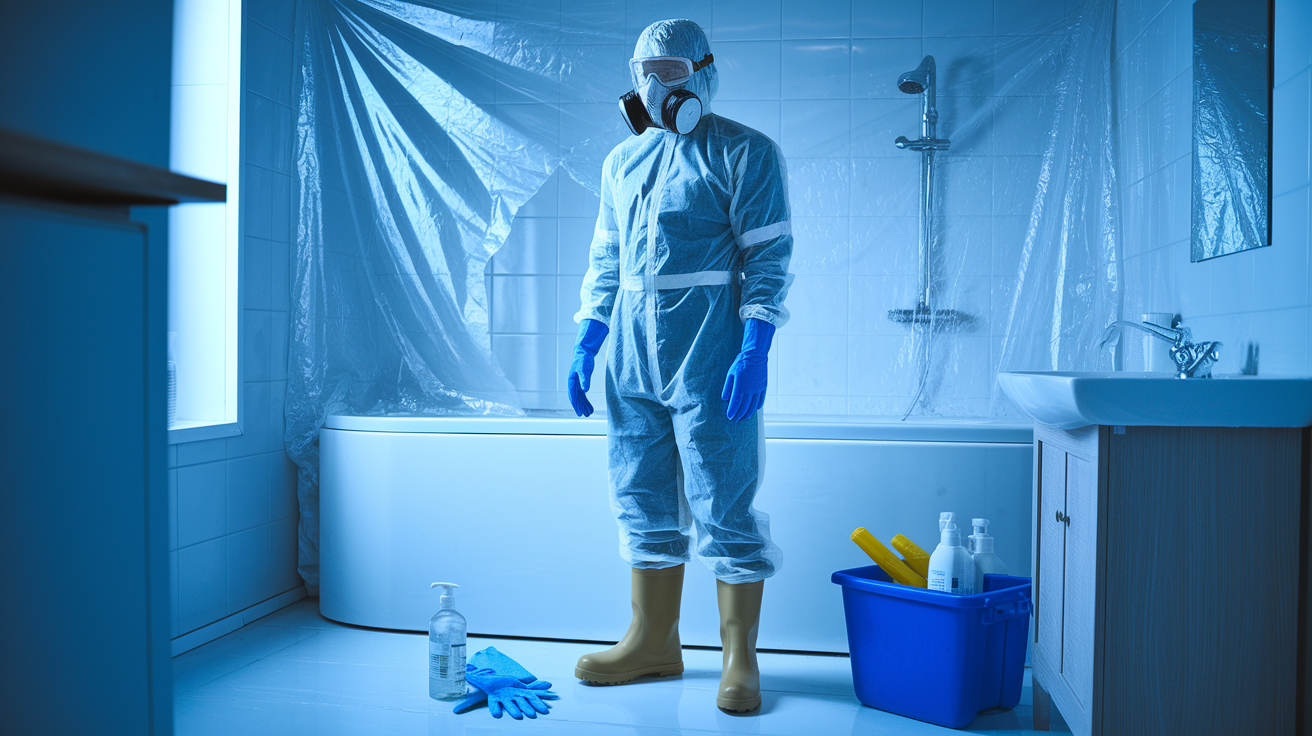
Mold spores go airborne the second you start scrubbing, and breathing them in can trigger allergic reactions, respiratory issues, and other health problems. Even if you’re cleaning what looks like a tiny patch, those spores spread through the air and land on other surfaces. That’s why the EPA recommends treating even minor mold cleanup as a job that needs real protective gear.
Some people should stay completely out of the area during mold removal. If you’ve got asthma, chronic respiratory problems, immune system issues, or severe allergies, don’t clean bathroom mold yourself. Same goes for children and elderly family members who are more vulnerable to mold exposure. Pregnant women should also avoid mold cleanup areas because spore exposure can cause complications.
Before you start, set up proper ventilation by opening windows and turning on the bathroom exhaust fan. If you’ve got a portable fan, point it toward an open window to push air out of the bathroom instead of into the rest of your home. Keep the bathroom door closed to contain spores in that one room.
Here’s the protective equipment you need:
N-95 respirator mask or higher. Not a dust mask or surgical mask, which don’t filter mold spores. The N-95 seals around your nose and mouth to prevent breathing in airborne spores during scrubbing and cleanup.
Rubber gloves that extend to mid-forearm. Mold cleaning solutions can irritate skin, and direct contact with mold can cause rashes or allergic reactions in sensitive people.
Safety goggles with side shields. Regular glasses don’t protect your eyes from splashing cleaning solution or airborne mold spores. Goggles create a seal around your eyes.
Long sleeves and long pants. Wear old clothes you can wash in hot water immediately after cleanup to prevent carrying spores to other rooms.
Closed-toe shoes. Protect your feet from splashing solutions and prevent tracking mold spores through your home.
Run the exhaust fan during the entire cleaning process and for at least 30 minutes after you finish. If you don’t have an exhaust fan or window, wait to tackle the mold until you can arrange proper ventilation. Working in a closed bathroom without airflow means you’re breathing concentrated mold spores, and the moisture from cleaning solutions has nowhere to go.
Complete Removal Process: From Preparation to Final Cleaning
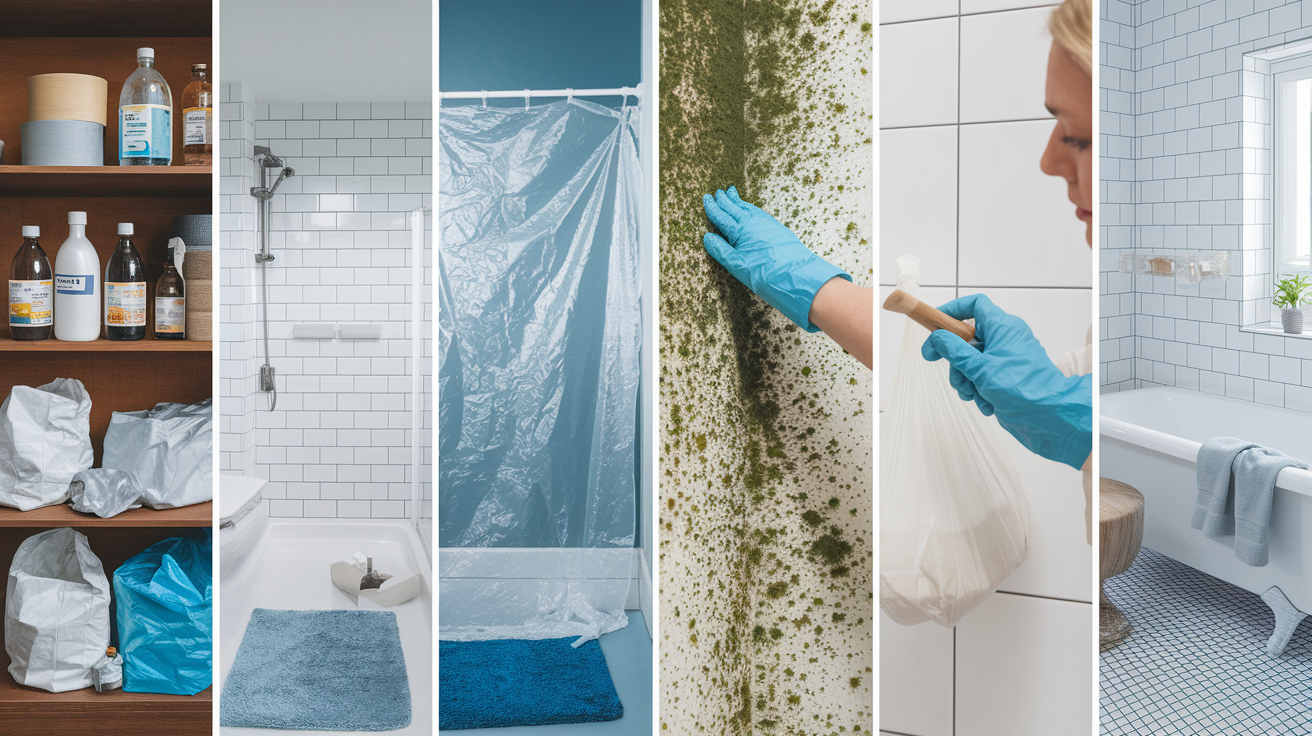
Most bathroom mold responds to cleaning solutions you already have at home or can pick up at any grocery store for a few dollars.
| Cleaning Solution | Application Method | Effectiveness | Best For |
|---|---|---|---|
| White vinegar (undiluted) | Spray directly, wait 15 minutes, scrub | Kills 82% of mold species | Tile, grout, painted surfaces, glass |
| Hydrogen peroxide (3%) | Spray, wait 10 minutes, scrub, rinse | Antifungal and antibacterial | Porous surfaces, stubborn mold, disinfecting |
| Baking soda paste | Mix with water, apply, scrub gently | Mild abrasive, absorbs moisture | Light mold, deodorizing, gentle surfaces |
| Borax solution | 1 cup per gallon of water, scrub, don’t rinse | Prevents regrowth, non-toxic | Hard surfaces, long-term prevention |
| Tea tree oil | 1 teaspoon per cup of water, spray, leave on | Natural antifungal, long-lasting | Small areas, natural remedies preference |
| Commercial mold removers | Follow product instructions exactly | Fast-acting, varies by brand | Heavy buildup, quick results needed |
Follow these steps for complete mold removal:
Gather all supplies before you start. You’ll need your chosen cleaning solution, spray bottles, soft-bristle scrub brush, microfiber cloths or sponges, bucket of clean water, plastic sheeting, painter’s tape, garbage bags, and protective gear. Having everything ready means you won’t be walking through your house in contaminated gloves looking for supplies.
Seal off the work area. Use painter’s tape and plastic sheeting to cover the bathroom doorway if you’re concerned about spores traveling to other rooms. Tape plastic over air vents if you have forced air heating or cooling. Remove towels, bath mats, and anything else that isn’t being cleaned.
Put on all protective equipment. Mask, goggles, gloves, long sleeves, closed shoes. Don’t skip any of these, even if the moldy area looks small.
Apply your chosen cleaning solution. Spray or apply the solution directly onto moldy areas, working from bottom to top to prevent drips from rewetting areas you’ve already cleaned. Apply generously enough that the surface stays wet. For vinegar and hydrogen peroxide, let the solution sit for the full recommended time without scrubbing. This gives it time to penetrate and kill mold roots in porous surfaces.
Scrub gently but thoroughly. Use a soft-bristle brush and work in small circular motions. Don’t scrub aggressively, which sends spores flying into the air. For grout lines, use an old toothbrush to work the solution into the crevices. Wipe away loosened mold with a damp microfiber cloth, rinsing the cloth frequently in your bucket of clean water.
Rinse the entire area with clean water. Use a fresh damp cloth to remove all cleaning solution residue. Change your rinse water when it gets cloudy or dirty. This step matters more than people think because leftover cleaning solution can leave surfaces sticky or attract new dirt.
Dry everything completely. This is where most people stop too soon. Use dry towels to wipe down all surfaces, then run your exhaust fan or set up a portable fan to dry the bathroom thoroughly. If you have a dehumidifier, run it in the bathroom for several hours. Wet surfaces after mold cleaning just invite mold to grow back within days.
Dispose of all cleaning materials properly. Put used cloths, sponges, and any moldy items you’re throwing away into a sealed garbage bag. Take it directly outside to your trash bin. Don’t reuse sponges or brushes that touched mold.
Continue ventilation for at least 30 minutes. Keep windows open and fans running even after you’ve cleaned up. This helps remove airborne spores stirred up during scrubbing.
Remove protective gear carefully. Take off gloves by pulling them inside-out, seal them in a plastic bag. Remove goggles and mask without touching the parts that contacted your face. Wash your hands immediately with soap and warm water.
Thorough drying after cleaning makes the difference between mold removal that lasts and mold that reappears in two weeks. Run your bathroom fan for 30 minutes after every shower, and keep the door open between uses so air circulates. Mold needs moisture to grow. Take that away and it can’t come back.
Skip the bleach, even though plenty of people still recommend it. Bleach only kills surface mold on non-porous materials like tile or glass. It can’t penetrate porous surfaces like grout or drywall, which means it leaves the roots alive to regrow. Worse, bleach is mostly water, and that water soaks into porous materials and actually feeds the mold underneath. The fumes irritate your respiratory system, especially in a small bathroom with limited ventilation. Bleach can also discolor or damage bathroom surfaces, and it breaks down quickly, offering zero protection against future mold growth. Vinegar and hydrogen peroxide work better, cost less, and won’t damage your lungs or bathroom finishes.
Understanding Bathroom Mold Causes and High-Risk Locations

Mold grows fast when it finds moisture and something organic to feed on, which bathrooms provide in abundance. According to the EPA, mold can establish colonies within 24 to 48 hours when conditions are right. Hot showers create steam that condenses on cool surfaces like ceilings, walls, and windows. That condensation sits there, soaking into drywall, wood, and grout. Poor ventilation means the moisture has nowhere to go, so it just stays trapped in your bathroom. The humidity levels spike during and after showers, creating the damp environment mold needs. Add in organic materials like the paper backing on drywall, dust, soap scum, and dead skin cells, and you’ve got everything mold needs to thrive.
Building materials in bathrooms make the problem worse. Standard drywall absorbs moisture like a sponge. Paint creates a vapor barrier that traps condensation between the paint layer and the drywall underneath. Grout is porous and holds water in the tiny spaces between tiles. Wood window frames, baseboards, and cabinets swell and stay damp. Hidden leaks behind walls or under floors provide constant moisture that keeps mold growing where you can’t see it. If you’ve ever dealt with significant water intrusion, professional water damage and flooding cleanup services can identify and address hidden moisture problems that lead to ongoing mold growth.
Here are the bathroom spots where mold appears most often:
Tile grout and caulking. These porous materials trap moisture and organic residue from soap and shampoo, creating perfect conditions for mold colonies in the tiny gaps between tiles.
Shower walls and enclosures. Constant water exposure combined with soap residue gives mold everything it needs, especially in corners where water pools and doesn’t dry quickly.
Bathroom ceilings. Steam rises and condenses on cool ceiling surfaces, soaking into textured or painted drywall that stays damp for hours after showers.
Around and behind toilets. Condensation forms on cold toilet tanks, drips down, and creates persistent moisture on floors and walls. Leaks around the base often go unnoticed for months.
Under sinks and inside cabinets. Leaking pipes, drain connections, and supply lines create hidden moisture in dark, unventilated spaces where mold grows undisturbed.
Window sills and frames. Condensation from hot showers hits cold windows and drips onto sills and frames, where it soaks into wood or collects in metal tracks.
Bathroom corners where walls meet. Air circulation is worst in corners, so moisture lingers and condensation builds up, especially in corners with outside walls that stay cooler.
Shower curtains and liners. These stay damp between uses and develop mold along the bottom edges and in the folds, especially when bunched together instead of spread out to dry.
Walk through your bathroom and look for water stains, discoloration, peeling paint, or soft spots in walls and ceilings. These signs point to moisture problems that need fixing before you can stop mold for good. Check under sinks and behind toilets with a flashlight at least once a month, because small leaks turn into big mold problems when they go unnoticed.
Treating Mold on Tile Grout and Shower Surfaces

Grout lines and shower surfaces give mold plenty of places to hide because grout is porous and rough, with tiny pits and valleys that trap moisture, soap scum, body oils, and dead skin cells. When mold gets into grout, it puts down roots below the surface. That’s why you can scrub grout that looks clean and still see mold spots reappear within days. Same thing happens with caulking around tubs and shower pans. Silicone sealant develops cracks and gaps over time, and mold grows in those spaces where cleaning solutions can’t reach.
Cleaning grout requires patience and the right technique to kill mold without damaging the grout itself. Mix a paste of baking soda and water, or use undiluted white vinegar in a spray bottle. Apply your chosen solution directly to the grout lines and let it sit for at least 15 minutes. The wait time matters because it gives the solution time to penetrate into the grout and reach the mold roots. After waiting, use a stiff-bristled grout brush or old toothbrush to scrub along the grout lines with firm pressure, working in small sections. For stubborn mold, hydrogen peroxide works better than vinegar. Spray it on, wait 10 minutes, scrub, then rinse thoroughly. Avoid using metal brushes or abrasive pads that can scratch and pit the grout surface, creating more places for mold to hide.
Caulking and silicone sealant pose a different problem. If the caulk shows black mold stains that won’t scrub away, or if you see cracks, gaps, or areas where the caulk has pulled away from the surface, cleaning won’t solve the problem. Mold has penetrated deep into the caulk itself. You need to remove the old caulk completely, clean and dry the area thoroughly, then apply fresh caulk or sealant. Use a utility knife or caulk removal tool to cut and scrape away all the old material. Clean the now-exposed joint with rubbing alcohol and let it dry completely before applying new caulk. When you recaulk, choose a mold-resistant silicone product designed for bathrooms.
After cleaning grout, apply a grout sealer once the surface is completely dry. Sealer fills the porous surface and creates a water-resistant barrier that keeps moisture, soap, and mold from penetrating. Reapply grout sealer every six months to a year, depending on how much water exposure your shower gets. Sealed grout stays cleaner longer and makes future mold removal much easier.
Addressing Ceiling Mold and Wall Moisture Issues

Ceiling mold appears as dark spots, patches, or spreading stains on painted or textured drywall surfaces. The challenge with ceiling mold is working overhead without spreading mold spores throughout your bathroom and home. Before you start cleaning, spread plastic sheeting or old towels on the floor directly below the work area to catch drips and falling debris. Wear your N-95 mask and goggles because scrubbing above your head sends particles directly toward your face. Apply your cleaning solution with a spray bottle or by gently dabbing it on with a sponge rather than scrubbing aggressively at first. Let the solution sit for the recommended time, then wipe gently with a microfiber cloth or soft sponge, working from the outer edges of the mold patch toward the center. For textured ceilings, use a soft brush to work the solution into the texture without abrading the surface.
Surface cleaning only works if the mold hasn’t penetrated the drywall. Look for signs that point to deeper moisture problems. If the ceiling feels soft or spongy when you press it, or if paint is bubbling and peeling, moisture has soaked into the drywall itself. Check for water stains that spread beyond the moldy area. Look up into the attic above the bathroom if you have access, and inspect for roof leaks, condensation on pipes, or inadequate insulation. In multi-story homes, check the floor above for plumbing leaks, overflowing tubs, or toilet leaks. Feel along the walls for cool spots or dampness that might indicate condensation from temperature differences between inside and outside. If you find an active leak, fix it before attempting mold removal, or the mold will just come back.
Sometimes mold on ceilings and walls signals that the problem goes deeper than what you can see and clean. If the ceiling stays discolored even after thorough cleaning, or if you smell mold but can’t find the source, the mold has likely grown behind the paint and into the drywall. Drywall is made of gypsum board sandwiched between paper layers, and that paper provides the organic material mold feeds on. When mold gets into drywall, cleaning the surface doesn’t kill the colony living inside the wall material. You’ll know the drywall needs replacement if it’s soft, crumbling, or shows dark staining that won’t clean off. At that point, the damaged section needs to be cut out, the underlying moisture problem fixed, and new drywall installed. This goes beyond DIY for most people. Cutting into walls releases mold spores, requires proper containment, and involves repairs that need to look right when finished.
Cleaning Mold from Bathroom Fixtures and Fabrics

Bathroom fabrics and removable items need different cleaning approaches than hard surfaces because they’re porous and hold moisture differently.
| Item | Cleaning Method | When to Replace |
|---|---|---|
| Shower curtain and liner | Wash in hot water with 1 cup vinegar, no detergent, then air dry completely. For plastic liners, wipe with vinegar solution and rinse. | Replace if mold stains won’t come out, plastic is stiff or cracking, or mold returns within a week of cleaning. |
| Bath mats and rugs | Wash in hot water with detergent and 1 cup baking soda, dry on high heat or in direct sunlight. | Replace if mold has penetrated rubber backing, mat smells musty even after washing, or fibers are deteriorating. |
| Towels and washcloths | Wash in hot water with detergent and 1 cup white vinegar, then dry completely on high heat. | Replace if musty smell persists after washing, towels feel stiff or slimy, or visible mold spots remain. |
| Window treatments and curtains | Remove and wash according to care label, add vinegar to rinse cycle. For non-washable items, wipe with diluted vinegar solution. | Replace if mold has spread throughout fabric, material is fragile, or mold returns despite thorough cleaning and increased ventilation. |
| Decorative items and accessories | Wipe hard surfaces with hydrogen peroxide solution. For porous decorations, scrub gently with baking soda paste. | Replace porous items like wicker, wood, or fabric decorations if mold has penetrated deep into the material. |
The decision to clean versus replace often comes down to cost and extent of mold growth. A $5 shower curtain liner with mold spots isn’t worth the time and effort to clean when replacement is cheap and guaranteed mold-free. Bath mats under $20 fall into the same category. On the other hand, quality towels or custom window treatments justify the cleaning effort. If you do clean moldy fabric items, wash them separately from your regular laundry to avoid spreading spores to clean clothes. Run an empty hot water cycle with 2 cups of vinegar through your washing machine after washing moldy items to clean the machine itself. For items you’re throwing away, seal them in plastic garbage bags before carrying them through your home to prevent spreading spores to other rooms.
Comprehensive Strategies to Prevent Bathroom Mold Recurrence

Preventing mold takes less time and effort than repeatedly cleaning it, and the strategies are straightforward once you build them into your routine.
Here’s how to keep mold from coming back:
Run your exhaust fan during every shower and for 30 minutes after. This removes humid air before it condenses on surfaces. If you forget to turn it off, install a timer switch that runs for a set period then shuts off automatically.
Open windows during and after showers when weather permits. Fresh air circulation speeds drying and brings humidity down faster than an exhaust fan alone.
Keep the bathroom door open between uses. Closed doors trap moisture and humidity. Leave the door open so air circulates through the room.
Wipe down shower walls, doors, and tub after every use. Use a squeegee or towel to remove standing water from tile, glass, and tub surfaces. This simple step eliminates most of the moisture mold needs to grow.
Hang wet towels and bath mats to dry between uses. Don’t leave damp towels crumpled on the floor or bunched on hooks. Spread them out on towel bars where air can circulate around them.
Spread your shower curtain or liner out after showering. Bunched curtains stay wet for hours. Spread the curtain across the rod so all sections can air dry.
Keep indoor humidity between 30% and 50%. Use a humidity monitor to track levels. When humidity creeps above 50%, run a dehumidifier until levels drop back down.
Fix leaks immediately when you notice them. That small drip under the sink or around the toilet base feeds mold growth 24 hours a day. Repair it now, not next month.
Improve bathroom insulation to prevent condensation. Cold exterior walls and ceilings collect condensation from warm, humid bathroom air. Adding insulation reduces temperature differences that cause moisture buildup.
Clean bathroom surfaces weekly with mold-preventing solutions. A quick wipe-down with diluted vinegar or hydrogen peroxide once a week prevents mold from establishing colonies.
Wash shower curtains, bath mats, and towels regularly. Don’t wait until they look or smell moldy. Wash these items every week or two before mold has a chance to grow.
Check under sinks, around toilets, and behind cabinets monthly. Use a flashlight to inspect hidden areas where small leaks and condensation lead to mold problems you won’t notice until they’re serious.
Use mold-resistant products when remodeling. Mold-resistant drywall, grout, caulk, and paint cost slightly more but resist mold growth far better than standard materials.
Position space heaters strategically during cold months. If your bathroom stays cold and develops condensation, running a small space heater for 15 minutes after showers warms surfaces so moisture evaporates instead of condensing.
Building these practices into your regular routine stops mold before it starts. The key is consistency. Wiping down the shower daily takes two minutes and prevents hours of scrubbing mold later. Running the exhaust fan costs pennies in electricity and saves you from replacing moldy drywall or calling professional remediation services. Think of mold prevention as regular maintenance like brushing your teeth or taking out the trash. Do it routinely and you won’t face mold problems.
Monitor your bathroom for early warning signs even when you’re following prevention strategies. A musty smell means mold is growing somewhere, even if you can’t see it yet. Peeling paint or bubbling wallpaper signals moisture trapped in the walls. Increased condensation on windows or mirrors indicates rising humidity that needs attention. Catch these signs early and you can fix the problem before mold takes over.
Waterproofing and Sealing to Stop Recurring Bathroom Mold

Unsealed grout and damaged caulking create pathways for water to penetrate surfaces and building materials, where it feeds hidden mold growth that keeps coming back no matter how often you clean the visible surface. When water soaks into grout or slips behind failed caulk, it reaches the drywall, wood framing, and other organic materials mold loves. The surface might look dry and clean, but moisture trapped underneath keeps mold growing.
Grout sealer creates a protective barrier that repels water instead of absorbing it. Apply sealer to clean, completely dry grout after you’ve removed all mold and given the grout at least 24 hours to dry thoroughly. Use a small brush or foam applicator to apply sealer directly to the grout lines, avoiding the tile faces. Work in small sections and wipe away any sealer that gets on the tile before it dries. Let the first coat dry according to the product directions, usually 2 to 4 hours, then apply a second coat for maximum protection. Reapply grout sealer every 6 to 12 months in high-use showers, and test whether your grout needs resealing by putting a few drops of water on the grout. If the water beads up, the sealer is still working. If it soaks in, it’s time to reapply.
Caulking requires regular inspection and maintenance because it breaks down over time from water exposure, temperature changes, and normal house settling. Check the caulk around your tub, shower pan, sink, and toilet every few months. Press the caulk with your finger to see if it’s still firm and flexible. Look for cracks, gaps, or areas where the caulk has pulled away from the surface. Any of these problems mean water is getting through and you need to remove and replace the caulking. Cut away old caulk completely with a utility knife or caulk removal tool, clean the joint with rubbing alcohol, let it dry overnight, then apply fresh caulk in a smooth, continuous bead. Use mold-resistant silicone caulk formulated for bathrooms. Smooth the bead with a wet finger or caulk tool before it starts to skin over, and let it cure for 24 hours before exposing it to water.
Water-resistant and mold-resistant paints provide another layer of protection for bathroom walls and ceilings. These paints contain antimicrobial additives that inhibit mold growth and create a slightly glossy finish that sheds moisture instead of absorbing it. Standard flat paint is the worst choice for bathrooms because it’s porous and holds moisture. If you’re repainting after mold removal or dealing with recurring ceiling mold, prime the surface with a mold-killing primer first, then apply two coats of bathroom-specific paint. Semi-gloss or satin finishes work better than flat paint because they’re easier to clean and less absorbent. The investment in proper paint pays off when mold doesn’t reappear on your freshly painted ceiling three months later.
When Professional Mold Remediation Services Are Necessary
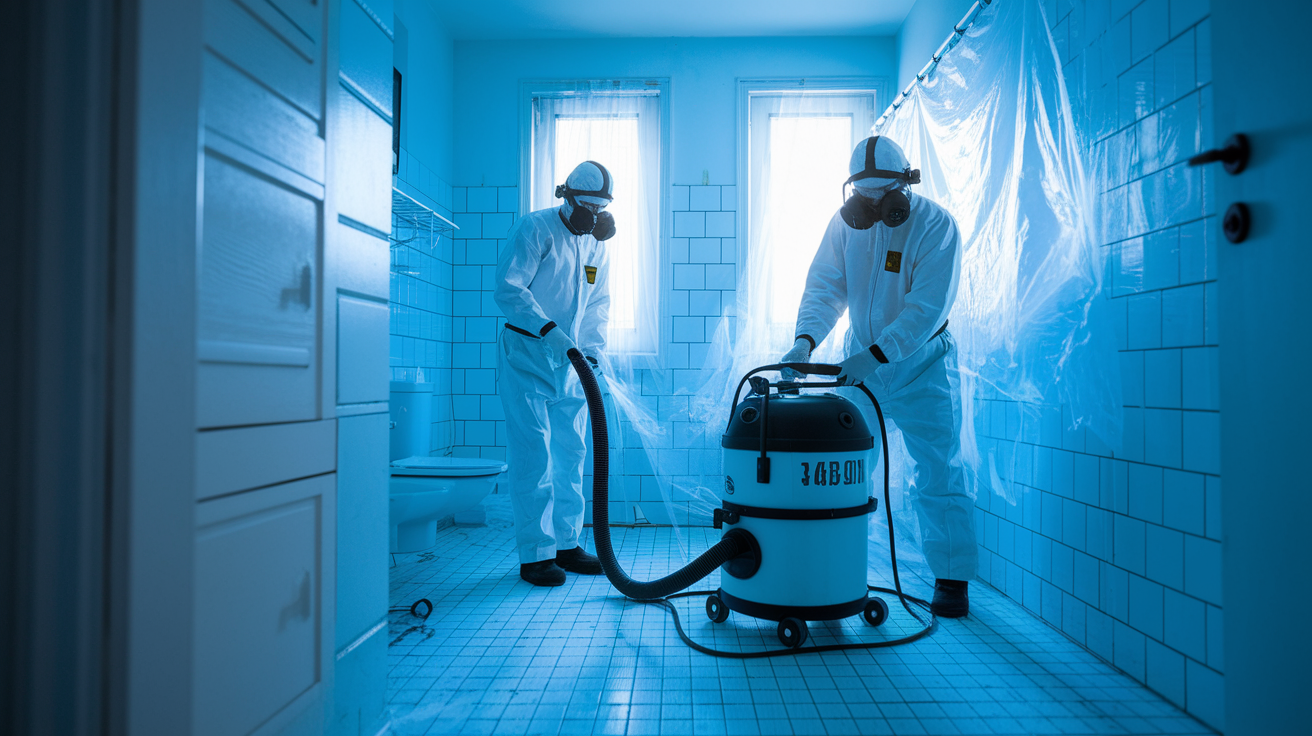
Some mold situations are beyond what you can safely or effectively handle with spray bottles and scrub brushes.
Call professional mold remediation services when you encounter these scenarios:
Mold covers an area larger than 10 square feet. That’s roughly a 3-foot by 3-foot section. Large mold colonies indicate serious moisture problems and release massive amounts of spores during cleaning that overwhelm DIY containment efforts.
Family members develop respiratory problems, persistent coughs, or allergy symptoms that improve when away from home. This suggests widespread mold growth releasing enough spores to impact health, even if you can’t locate all the mold.
You smell persistent musty or earthy odors but can’t find the mold source. The smell indicates hidden mold growing behind walls, under flooring, in HVAC systems, or in other concealed spaces you can’t reach.
Mold keeps returning to the same spots within days or weeks of thorough cleaning. Recurring growth signals an underlying moisture problem you haven’t identified or fixed. Professionals use moisture meters and thermal imaging to locate hidden water sources.
You discover mold growing on or behind drywall, insulation, or structural wood. These porous building materials require removal and replacement when mold penetrates them, which means cutting into walls and creating major spore release.
Black mold appears in large quantities or spreads rapidly. While you can’t identify toxic mold visually, extensive black mold growth warrants professional testing and removal because the health risks increase with exposure levels.
Your bathroom suffered flooding, a major leak, or other significant water damage. Water intrusion that soaks walls, floors, and structural materials creates ideal conditions for widespread mold growth that starts within 24 to 48 hours.
Professional mold remediation goes far beyond scrubbing visible mold. Certified remediation specialists start with thorough inspection using moisture meters, infrared cameras, and sometimes air quality testing to identify all affected areas and the moisture sources feeding mold growth. They set up proper containment with negative air pressure systems that prevent spores from spreading throughout your home during removal. The remediation process includes removing contaminated materials like drywall and insulation, HEPA vacuuming and air scrubbing to capture airborne spores, treating affected areas with antimicrobial solutions, and addressing the underlying moisture problems through repairs and waterproofing. For recurring mold tied to serious moisture events, professional mold mitigation tied to moisture events ensures the root cause gets fixed so mold doesn’t just come back.
Professional remediation costs more than DIY methods, but it delivers several benefits DIY can’t match. Professionals identify and fix hidden moisture problems you might never find. They remove mold from inside walls and other concealed spaces without contaminating your entire home. The equipment they use, including commercial dehumidifiers, air scrubbers, and negative air machines, removes moisture and spores far more effectively than household fans. Most importantly, they verify the mold is completely gone through post-remediation testing, and they handle the structural repairs needed to restore your bathroom to pre-mold condition. When mold affects your health or your home’s structure, professional remediation is an investment in safety and long-term solutions.
DIY Bathroom Mold Removal Cost Comparison and Time Investment
DIY mold removal costs significantly less than professional services when you’re dealing with small to moderate mold problems, though the time commitment and final results vary depending on which approach you choose and how severe the mold situation is.
| Method | Estimated Cost | Time Required | Best Use Case |
|---|---|---|---|
| White vinegar solution | $3 to $5 for gallon jug | 1 to 2 hours including prep and cleanup | Light to moderate mold on hard surfaces, regular maintenance cleaning |
| Hydrogen peroxide (3%) | $5 to $8 for large bottle | 1.5 to 2.5 hours with waiting time | Stubborn mold, porous surfaces like grout, disinfecting after removal |
| Commercial mold removal spray | $8 to $15 per bottle | 30 minutes to 1.5 hours | Quick cleanup, moderate mold, when you want fast-acting solutions |
| Professional remediation service | $500 to $3,000+ depending on extent | 1 to 3 days for complete service | Large areas, hidden mold, health concerns, recurring problems, structural involvement |
| Preventive maintenance routine | $20 to $40 per year for supplies | 15 minutes weekly, 1 hour monthly | Stopping mold before it starts, maintaining clean bathroom long-term |
The cost difference is obvious, but so is the difference in what you get. DIY methods work great for surface mold on tile, grout, and painted walls when you catch it early and address the moisture source. You’re looking at under $50 in supplies and a few hours of your time. Professional services make sense when mold has spread extensively, you can’t locate the moisture source, or the problem keeps coming back despite your best efforts.
Final Words
Bathroom mold doesn’t have to take over your space. You’ve got the tools now to identify what you’re dealing with, protect yourself during cleanup, and tackle the problem step by step. Whether it’s grout lines, ceiling spots, or a moldy shower curtain, the right approach makes a real difference.
The key to long-term mold removal in bathroom spaces comes down to this: stop the moisture, seal the vulnerable spots, and stay consistent with ventilation. When the problem goes deeper than surface cleaning can handle, that’s when you call someone in.
Your bathroom can be clean, dry, and mold-free. Just takes the right steps.
FAQ
What’s the best way to kill mold in your bathroom?
The best way to kill mold in your bathroom is to use undiluted white vinegar or 3% hydrogen peroxide applied directly to the moldy surface, let it sit for 15 minutes, then scrub with a brush and rinse thoroughly. Make sure you’re wearing gloves and a mask, and dry the area completely afterward with fans or a dehumidifier.
How do you remove black mold in a bathroom?
Black mold in a bathroom is removed using the same process as other mold types: spray with vinegar or hydrogen peroxide, wait 15 minutes, scrub gently with a brush, rinse with a damp cloth, and dry completely. If the black mold covers more than 10 square feet or keeps coming back, call a professional to check for hidden moisture problems.
Will a Clorox wipe kill mold?
Clorox wipes and bleach-based products kill surface mold on non-porous materials like tile or glass, but they don’t penetrate porous surfaces like grout or drywall where mold roots grow. Bleach also contains mostly water that can actually feed mold deeper in materials, plus it produces harsh fumes and can damage bathroom surfaces.
Is the black mold in my bathroom toxic?
Black mold in bathrooms can cause respiratory issues and allergic reactions, especially in children, elderly individuals, and people with compromised immune systems or existing respiratory problems. If family members develop unexplained health symptoms, or if the moldy area is larger than 3 feet by 3 feet, contact a professional for proper assessment and removal.
When should I replace bathroom caulking instead of cleaning it?
Bathroom caulking should be replaced instead of cleaned when it’s cracked, peeling, or has deep mold stains that won’t come out with scrubbing. Old caulking that’s breaking down lets moisture seep behind shower walls and tub surrounds, creating hidden mold problems that keep coming back no matter how often you clean the surface.
How long should I run the bathroom fan to prevent mold?
Run your bathroom exhaust fan during your shower and for at least 20 to 30 minutes afterward to remove moisture and steam that cause mold growth. If your bathroom still feels damp or you see condensation on mirrors and walls after the fan runs, consider leaving it on longer or adding a dehumidifier.
What humidity level prevents bathroom mold growth?
Bathroom humidity levels should stay between 30% and 50% to prevent mold growth. Use a dehumidifier if your bathroom stays humid even with the exhaust fan running, and consider opening windows for extra air circulation after showers to help moisture escape faster.
Can I clean bathroom ceiling mold myself or do I need professional help?
You can clean bathroom ceiling mold yourself if it’s a small surface patch and you can reach it safely without stirring up too many spores. If mold has darkened or warped the ceiling drywall, if it keeps coming back, or if you smell mold but can’t see it, the problem has likely penetrated the material and needs professional assessment.
How often should I seal bathroom grout to prevent mold?
Seal bathroom grout every six months to one year to prevent moisture from soaking into the porous surface where mold roots grow. Apply grout sealer after cleaning and drying grout thoroughly, especially in shower areas and around tubs that get constant water exposure.
What’s the difference between mildew and mold in a bathroom?
Mildew appears as a flat, powdery gray or white film on bathroom surfaces and wipes off easily with basic cleaning, while mold grows in raised patches with fuzzy or slimy texture in colors like black, green, or orange and requires more aggressive scrubbing. Mildew is surface-level growth, but mold can penetrate porous materials like grout and drywall.
