
Most people think an oven fire is over once the flames are out. It’s not. The real work starts when you open that door and face baked-on soot, chemical residue, and smoke damage that can spread if you handle it wrong. This guide walks you through every step of safe oven fire cleanup, from the first safety checks to final odor removal, so you can decide whether to handle it yourself or call in pros.
Immediate Post-Fire Safety and Initial Assessment

Turn off your oven right away. If it’s electric, switch it off and kill power at the circuit breaker. Gas oven? Turn off the supply at the shutoff valve, especially if you smell gas or you’re worried about leaks.
Keep that oven door closed for at least 2 to 4 hours after the fire looks out. Open it too soon and you’re feeding oxygen to hot materials that can reignite instantly.
Here’s what you need to do:
-
Make sure the fire is actually out. Look through the window. No flames, no glowing spots. If you see anything still burning, leave the door closed and call 911.
-
Get everyone out if fire spreads. Flames escape the oven or heavy smoke fills the room? Grab all people and pets, get outside, and call from there.
-
Cut all power sources. Flip the circuit breaker for electric ovens. Turn off the gas shutoff valve for gas models. It’s usually behind or under the appliance.
-
Wait for it to cool completely. Even after flames disappear, everything inside stays dangerously hot. Give it at least 2 to 4 hours before you touch that door.
-
Get air moving through the kitchen. Open every window and door. Run exhaust fans. Set up box fans to push smoke outside.
-
Put on protective gear. Before opening anything, you need heat resistant gloves, safety goggles, and an N95 mask or respirator. Smoke residue burns skin and lungs.
-
Take photos of everything. Document the oven interior, cabinets around it, walls, smoke patterns. Your insurance claim needs this.
-
Open the door slowly when you’re ready. Stand to the side in case heat or gases escape. Check for hot spots or anything still smoldering.
-
Look at damage inside the oven. Check for melted parts, warped racks, bubbled enamel, cracked glass, damaged heating elements, broken door seals.
-
Check the surrounding kitchen. Look at cabinets above and next to the oven for heat damage, smoke marks on walls and ceiling, any water damage if you used water to fight the fire.
-
Figure out how big the cleanup is. Small fires totally contained in the oven? Maybe you can handle it. Smoke throughout the house or damaged structures? You need professional help.
-
Decide what to do next. Damage limited to oven interior with minimal smoke? You can probably clean it yourself. Structural damage, heavy soot beyond the immediate area, or weird chemical smells? Contact a certified restoration company within 24 to 48 hours.
Smoke and soot start eating away at surfaces within hours. The faster you clean up properly or bring in pros, the more you can save. Charred cabinets, cracked walls, smoke in multiple rooms? That’s beyond DIY and needs systematic professional work.
Essential Safety Gear and Cleanup Tools for Fire Aftermath

You need proper protective equipment to avoid respiratory problems and skin contact with corrosive soot. Smoke residue contains acidic compounds that irritate your lungs and burn your skin, especially when you stir up settled particles during cleanup.
What you need:
- N95 respirator or half face respirator mask with replaceable filters rated for smoke particles
- Heat resistant work gloves or heavy duty rubber gloves to protect your hands from sharp debris and chemical residues
- Safety goggles with side shields to keep soot out of your eyes while you scrub
- Long sleeved shirt and long pants in washable fabric to minimize skin exposure
- Closed toe shoes with non slip soles to protect feet from dropped debris and wet floors
- Non abrasive plastic scrapers to remove charred materials without scratching oven surfaces
- Microfiber cloths in multiple colors to separate cleaning stages and avoid cross contamination
- Buckets (at least two) for clean solution and rinse water
- Heavy duty trash bags rated for sharp objects to contain contaminated debris
- HEPA filter vacuum if you have one, to capture fine soot without releasing it back into the air
Take before photos from multiple angles before you start moving debris or wiping anything. Insurance adjusters need clear evidence of fire extent and affected areas. Get close ups of charred spots, smoke patterns, damaged components.
Dispose of fire contaminated materials the right way. Soot covered rags, melted plastics, charred debris often count as hazardous waste. Contact your local waste management facility to confirm disposal requirements. A lot of places require special handling for fire debris instead of regular trash pickup. Bag everything separately, label it clearly, follow local regulations to avoid fines and environmental problems.
Deep Cleaning Process: Solutions and Application Techniques

Pick your cleaning solution based on how bad the damage is and what surfaces you’re working with. Mild solutions work for light smoke film. Heavier residue needs stronger degreasers. Always start gentle and increase strength only if you need to.
| Solution Type | Mixing Ratio | Best Use Case | Application Method |
|---|---|---|---|
| Baking soda paste | 3 parts baking soda to 1 part water | Burnt on residue and localized char spots | Apply thick paste, let sit 15 to 20 minutes, scrub gently with cloth |
| White vinegar solution | 1 part vinegar to 1 part warm water | Smoke film, odor neutralization, general cleaning | Spray or wipe on, let sit 5 minutes, wipe with clean cloth |
| Dish soap mixture | Few drops per quart of warm water | Light soot and everyday cleaning after initial debris removal | Dip cloth in solution, wring well, wipe surfaces in sections |
| Commercial degreaser | Follow manufacturer dilution instructions | Heavy grease deposits and stubborn baked on residue | Spray on, allow dwell time per label, scrub and rinse thoroughly |
| Oven specific cleaner | Use undiluted as directed | Severe damage with multiple layers of char and grease | Apply in ventilated area, follow exact contact time, rinse completely |
Don’t use abrasive scrubbers, steel wool, or scouring pads on enamel or ceramic oven coatings. They scratch the surface, which traps residue and makes future cleaning harder. Avoid caustic oven cleaners unless you absolutely have to, and if you use them, increase ventilation a lot and wear chemical resistant gloves. Never mix cleaning products, especially vinegar with bleach or ammonia based cleaners.
Charred Debris and Dry Soot Removal
Pull out large charred debris first by hand while wearing protective gloves. Pick out burnt food, melted foil, loose chunks of char. Put everything straight into heavy duty trash bags.
Use the dry sponge method for loose soot before you add any moisture. Wipe oven walls, racks, door surfaces with a dry microfiber cloth or chemical dry sponge designed for soot removal. Work top to bottom so you don’t recontaminate cleaned areas. This lifts surface soot without smearing it deeper into porous materials.
Run a HEPA filter vacuum over the oven interior and surrounding areas if you have one. Regular vacuums just blow fine soot particles back into the air. HEPA filtration actually traps microscopic particles. Vacuum crevices around heating elements, door hinges, vent openings where soot settles.
Smoke Residue and Grease Deposit Treatment
Pick your solution from the table based on how thick the residue is. Light smoke film responds to vinegar solution. Heavy grease needs commercial degreaser or oven cleaner.
Try warm water with mild detergent first for moderate residue. Dip a microfiber cloth into dish soap mixture, wring it so it’s damp but not dripping, wipe interior surfaces in small sections. Work top to bottom, back to front. Rinse the cloth frequently in clean water so you don’t just spread soot around.
Stubborn residue needs multiple passes. After your first round removes surface grime, look at what’s left. Apply baking soda paste to problem spots, let it sit 15 to 20 minutes, then scrub gently with a non abrasive cloth. For truly baked on deposits, spray commercial degreaser, wait the specified time, then wipe clean.
Check your cloth constantly. When it turns black with soot, grab a fresh one. Using a dirty cloth just moves contamination around.
Fire Extinguisher Chemical Cleanup
If you used a fire extinguisher, you’re dealing with chemical powder residue on top of fire damage. Remove this first before you address smoke and char.
Vacuum excess powder using a HEPA filter vacuum before you add any moisture. Wet powder turns into sticky paste that’s way harder to remove. Work slowly so you don’t create dust clouds.
After vacuuming, apply your cleaning solution and wipe surfaces thoroughly. Fire extinguisher chemicals can be alkaline or acidic depending on type, so you need multiple rinse passes. Wipe with solution, then wipe again with clean water, then dry completely.
Rinse all surfaces thoroughly with clean warm water after using any cleaning solution. Leftover cleaner can damage oven components during heating or create fumes. Go over every cleaned surface at least twice with a cloth dampened in plain water. Wipe dry with clean microfiber cloths, then let everything air dry for several hours before you move on to inspecting components. Leave the oven door open during drying to get airflow moving.
Addressing Smoke Odor and Air Quality After Cleanup
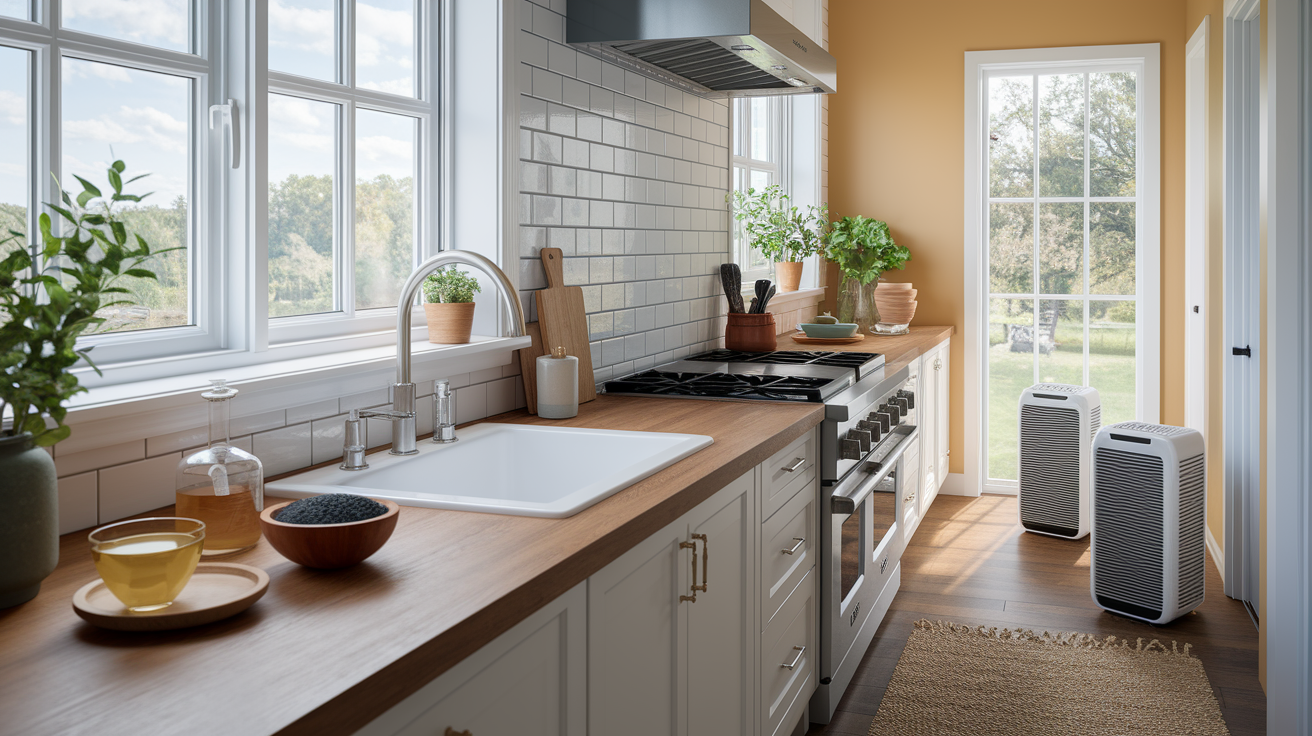
Smoke particles embed deep into porous surfaces like drywall, ceiling tiles, cabinet interiors. Even after you clean surfaces thoroughly, these trapped particles release odor for days or weeks. That’s why getting rid of odor requires both surface treatment and air quality improvement.
Ways to eliminate odor:
- Cross ventilation for 24 to 48 hours straight. Open windows on opposite sides of the kitchen. Put box fans to pull fresh air in one side and push contaminated air out the other. Keep this airflow running continuously, not just for a few hours.
- Bowls of white vinegar or activated charcoal. Place several bowls inside the closed oven and around the kitchen overnight. Both absorb odor molecules from the air. Replace daily until the smell gets better.
- Wipe all kitchen surfaces with vinegar solution. Smoke doesn’t just affect the oven. Cabinet exteriors, countertops, backsplashes, even the refrigerator exterior collect smoke film. Clean everything in a 10 foot radius.
- Wash all textiles and window treatments. Curtains, dish towels, even upholstered chair seats absorb smoke. Run everything through the washing machine with a cup of white vinegar added to the rinse cycle.
- Replace HVAC air filters immediately. Smoke particles circulate through your ventilation system and clog filters fast. Install fresh filters rated for smoke and odor control.
- Run air purifiers with HEPA and carbon filters. HEPA filtration removes particulates. Carbon filtration removes odors. You need both. Run purifiers continuously in the kitchen and next to it for at least a week.
- Leave open boxes of baking soda in the closed oven overnight. After cleaning, place two to three open boxes on oven racks, close the door, leave for 8 to 12 hours. Baking soda absorbs leftover odor from the oven cavity.
When DIY methods can’t eliminate odor after 48 hours of serious effort, you need professional help. This is especially true when smoke spread beyond the immediate oven area into living spaces, ductwork, or wall cavities. Professional restoration teams use industrial grade air scrubbers that filter thousands of cubic feet per minute, thermal fogging systems that neutralize odor molecules at the molecular level, ozone treatments that break down odor compounds chemically. If you still smell smoke after thorough cleaning and ventilation, or if the odor gets worse when you turn on heating or cooling systems, contact a fire and smoke damage restoration company for assessment.
Inspecting Oven Components for Fire Damage

You need to visually inspect everything before you even think about using your oven again. Fire creates internal damage that isn’t always immediately visible but creates serious safety hazards. Compromised electrical components can cause fires. Damaged heating elements can fail during operation. Warped structures can prevent proper door sealing.
Inspect these parts systematically:
- Heating elements for warping, breaks, visible char marks on coils or element housing
- Electrical connections where wires attach to elements, looking for melted insulation, exposed wire, blackened terminals
- Oven racks for warping that prevents smooth sliding or indicates extreme heat exposure
- Glass door window for cracks, cloudiness from thermal shock, separation between glass layers in double pane designs
- Rubber door gasket for melting, brittleness, sections that pull away from the door frame
- Control panel and knobs for melted plastic, unresponsive buttons, heat damage to digital displays
- Interior enamel coating for bubbling, flaking, large areas where coating has burned away to bare metal
- Insulation accessibility through gaps in the oven cavity that might mean deteriorated internal insulation
- Thermostat sensor positioning to make sure the temperature probe hasn’t shifted or gotten damaged
- Convection fan operation by checking for blade damage or motor housing distortion if your oven has this feature
Even small fires need professional appliance technician inspection before you plug the oven back in or restore gas supply. What looks like minor cosmetic damage on the surface can hide compromised electrical components, damaged insulation, weakened structural elements. Fire temperatures inside an oven can go over 500°F, hot enough to damage components not designed for sustained extreme heat. Electrical shorts, gas leaks, fire reignition are real risks from undetected damage.
Testing how it works after cleaning requires caution. Only try this after a certified technician has inspected and cleared the appliance, or if damage was truly minimal and confined to easily visible surfaces. Even then, start with the lowest heat setting, stay in the kitchen, watch for unusual smells, sounds, or performance issues during the first several uses.
Restoring Oven Interior Surfaces and Finishes
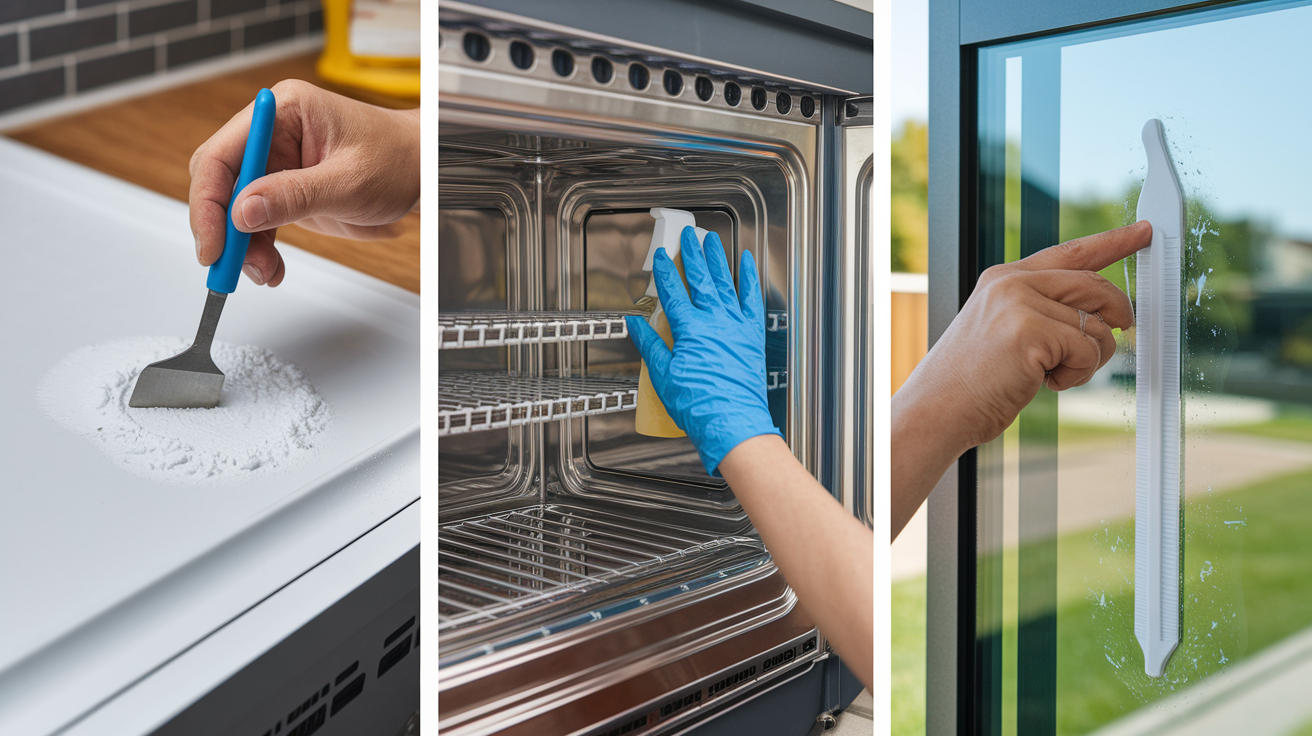
Telling the difference between cleanable discoloration and permanent heat damage determines whether you can restore your oven or need replacement parts. Heat discoloration often comes off with proper cleaning. Bubbled enamel, cracked ceramic, warped metal require replacement because they compromise oven function and safety.
Ceramic and Enamel Coating Restoration
Use gentle cleaning methods that won’t chip or scratch the protective coating. Enamel and ceramic coatings protect the underlying metal from corrosion and make cleaning easier, but they’re brittle under physical stress.
Clean with soft microfiber cloths or non abrasive sponges only. Skip steel wool, abrasive scrubbers, harsh scouring pads entirely. These create tiny scratches that trap grease and make staining worse over time.
Address heat discoloration with baking soda paste. Mix 3 parts baking soda to 1 part water, spread the paste over discolored areas, let sit 20 to 30 minutes, then wipe clean with a damp cloth. The mild abrasion from baking soda crystals lifts stains without damaging enamel.
You can spot irreparable coating damage by checking for bubbling, flaking, or areas where coating has completely burned away. Bubbled enamel means the coating separated from the metal base because of extreme heat. This won’t flatten out and will keep getting worse. Flaking enamel creates sharp edges and exposes bare metal to moisture and food acids, causing rust. These conditions require panel replacement, not more cleaning.
Stainless Steel Interior Maintenance
Clean stainless steel following the grain pattern, not against it. Look closely at the surface to see which direction the tiny lines run, then wipe parallel to those lines. Scrubbing across the grain creates visible scratches.
Remove stubborn stains with specialized stainless steel cleaners made to dissolve heat residue without damaging the finish. Apply according to product directions, usually spraying on, letting it sit briefly, then buffing with a clean cloth.
Polish to restore appearance after cleaning. Stainless steel polish fills minor surface imperfections and creates a protective layer against future staining. Apply sparingly with a soft cloth, buff to a shine, then wipe away any excess.
Glass Door and Window Cleaning
Remove baked on residue from glass using the same baking soda paste method described for enamel. Apply, wait, then scrub gently with a non abrasive cloth. For extremely stubborn deposits, use a plastic razor blade scraper held at a low angle to lift residue without scratching glass.
Check for thermal cracks that compromise safety. Inspect the entire glass surface under good lighting, looking for fine hairline cracks, chips at edges, spider web patterns. Any cracks mean the glass can shatter during heating and must be replaced immediately. Don’t try to use an oven with cracked door glass.
Understand restoration limits when glass is permanently clouded. Some heat damage creates permanent haze between double pane glass layers or etches the surface at a microscopic level. This clouding reduces visibility but doesn’t necessarily affect function. You can keep using the oven safely, but the cloudiness won’t come out with any amount of cleaning.
Surface damage falls into two categories: cosmetic and functional. Discoloration, minor scratches, light cloudiness are cosmetic. The oven works fine, it just doesn’t look perfect. Bubbled enamel, cracked glass, warped racks, flaking coatings are functional damage that affects performance and safety. Replace functional damage. Live with cosmetic damage if budget is tight.
When to Call Professional Fire Damage Restoration Services

Being honest about damage scope tells you whether household cleaning methods can fully address the problem. Small contained fires with minimal smoke spread are manageable with proper DIY cleanup. Larger fires or heavy smoke penetration require professional equipment and expertise you don’t have access to.
You need professional help when:
- Fire spread beyond the oven cavity to cabinets or walls. Once flames reach surrounding structures, damage extends into areas you can’t easily access or clean. Hidden fire damage behind walls creates ongoing safety risks.
- Heavy smoke got into other rooms. If smoke filled your living room, bedrooms, or other spaces, it deposited corrosive residue on every surface in those areas. Professional grade air scrubbers and cleaning methods are necessary for complete work.
- Structural concerns like warped cabinetry or damaged drywall. Heat intense enough to warp wood or crack drywall means serious damage that affects home safety. This needs structural assessment and repair beyond cosmetic cleaning.
- Smell persists after 48 hours of DIY work. If intensive cleaning and ventilation don’t eliminate smoke smell, odor molecules have penetrated porous materials deeper than household methods can reach.
- Water damage from firefighting efforts. If firefighters used hoses or extinguishers deposited significant moisture, you’re dealing with potential mold growth and water damage on top of fire damage. Professional water damage restoration prevents secondary problems.
- Electrical system concerns. Smoke and heat affect electrical wiring inside walls. If you smell burning when you turn on lights or outlets near the fire area, or if circuit breakers trip repeatedly, electrical damage requires immediate professional inspection.
- Suspected hidden fire damage behind walls. Fire can spread through wall cavities, especially near gas lines or electrical conduits. If you see smoke staining on walls away from the oven location, fire may have spread inside structures.
- Insurance claim complexity. Large claims benefit from professional documentation. Restoration companies provide detailed damage reports, before and after photos, work directly with insurance adjusters to make the claims process smoother.
IICRC certified restoration companies offer industrial equipment that dramatically outperforms household cleaning methods. Air scrubbers filter thousands of cubic feet per minute and remove microscopic particles that household fans can’t touch. Thermal fogging systems put out a fine mist that gets into fabrics, ductwork, porous materials to neutralize odor at the molecular level. Ozone treatments use O3 molecules to chemically break down odor compounds, though this requires leaving the home during treatment.
Contact professionals within 24 to 48 hours of fire damage for best results. Smoke residue starts corroding metal surfaces, etching glass, permanently staining porous materials within days. The faster you bring in fire and smoke damage restoration services, the more you can salvage and the less permanent damage occurs.
Insurance claim documentation requires thorough records from the start. Take photos and videos of all damage before cleanup begins. Save receipts for every cleaning supply, replacement part, service you purchase. Keep a written log of all cleanup activities with dates and descriptions. Professional restoration companies handle much of this documentation automatically and provide detailed reports formatted for insurance submission.
Preventing Future Oven Fires Through Maintenance

Regular maintenance dramatically reduces fire risk compared to cleaning up after disaster strikes. Most oven fires start from accumulated grease and food particles that ignite during cooking. Consistent cleaning removes these fuel sources before they become hazards.
| Prevention Task | Frequency | Why It Matters |
|---|---|---|
| Remove spills immediately after oven cools | After each use | Prevents buildup from baking onto surfaces where it becomes harder to remove and more likely to ignite during next use |
| Wipe down oven interior with damp cloth | Monthly | Eliminates grease accumulation before it reaches ignition levels and reduces smoke during cooking |
| Place rimmed baking sheet under messy dishes | Every time you cook pies, casseroles, or dishes with dripping potential | Catches overflow before it burns onto oven floor or drips onto heating elements where it ignites |
| Inspect door gasket for gaps or deterioration | Quarterly | Makes sure you have a proper seal and heat containment, preventing heat exposure to surrounding cabinetry and maintaining cooking efficiency |
| Clean oven thoroughly before using self clean cycle | As needed, typically 2 to 4 times per year | Prevents 900°F self clean temperatures from igniting heavy grease or food debris that produces excessive smoke and potential flames |
| Keep flammable items 3+ feet away from oven | Always maintain this clearance | Gets rid of ignition sources like kitchen towels, paper products, curtains that can catch fire from oven heat or escaping flames |
Proper cookware sizing prevents drips and spills that lead to fires. Oversized pans block heat circulation and can tip when you open the door. Undersized pans allow grease and liquids to drip onto heating elements or the oven floor where they burn and potentially ignite. Match pan size to the food you’re cooking, and always use rimmed sheets under anything with sugar or fat content that might bubble over.
Never leave cooking unattended. This single behavior causes more kitchen fires than any other factor. If you need to step away, set a timer that goes with you. Better yet, turn off the oven if you’re leaving the kitchen for more than a minute or two. Most oven fires start when cooks forget about food and let it overcook until it chars and ignites.
Keep working smoke detectors as your final safety layer. Install one inside the kitchen and one in the adjacent hallway. Test monthly by pressing the test button. Replace batteries annually whether they seem weak or not. Replace the entire detector every 10 years regardless of how well it seems to work. Smoke detectors give you the early warning that lets you catch small fires before they become major damage requiring extensive cleanup and restoration.
Final Words
An oven fire leaves more than just visible damage. Soot, smoke residue, and lingering odors need systematic attention to make your kitchen safe and usable again.
Following these oven fire cleanup steps, from initial safety checks through component inspection and odor removal, helps you address damage thoroughly without missing hidden problems.
If the fire spread beyond the oven or you’re dealing with persistent smoke smell after two days of work, professional restoration teams have the industrial equipment to finish what household methods can’t handle.
Regular cleaning and simple prevention habits keep your oven running safely for years ahead.
FAQ
How to clean up after an oven fire?
To clean up after an oven fire, first ensure the oven has cooled for 2-4 hours, then disconnect power at the breaker. Remove large charred debris wearing protective gloves, vacuum loose soot with a HEPA filter, apply baking soda paste or vinegar solution to residue, scrub gently with non-abrasive cloths, rinse thoroughly with warm water, and ventilate the kitchen for 24-48 hours to eliminate smoke odor.
What are the 3 P’s of fire?
The 3 P’s of fire refer to Pull the pin on the fire extinguisher, Point or Aim the nozzle at the base of the flames, and Press or Squeeze the handle to discharge. This is part of the PASS method, which adds Sweep side to side across the fire base for complete extinguishment of small manageable fires.
What are the 5 steps to putting out a fire on the stove in order?
The 5 steps to putting out a stove fire in order are: turn off the heat source immediately, keep the oven door closed to cut oxygen supply, evacuate occupants if fire spreads, call 911 for uncontrollable fires, and use a fire extinguisher on small fires using the PASS method only after ensuring safety.
What is a step by step plan for cleaning my oven?
A step-by-step plan for cleaning your oven after a fire includes waiting 2-4 hours for cooling, disconnecting power at the breaker, documenting damage with photos, removing large debris with gloves, vacuuming loose soot, applying appropriate cleaning solution like baking soda paste or vinegar mixture, scrubbing surfaces gently, rinsing thoroughly, drying completely, and inspecting all components before reuse.
When should I call professional fire damage restoration after an oven fire?
You should call professional fire damage restoration after an oven fire when flames spread beyond the oven to cabinets or walls, heavy smoke penetrated adjacent rooms, persistent odor remains after 48 hours of DIY cleanup, you notice structural damage like warped cabinetry, or water from firefighting efforts caused additional damage requiring specialized drying equipment.
How long should I wait before opening the oven door after a fire?
You should wait a minimum of 2 to 4 hours before opening the oven door after a fire to allow complete cooling. Opening the door prematurely can reignite the fire by exposing hot materials to fresh oxygen, potentially spreading flames beyond the oven compartment and creating a more dangerous situation.
What cleaning solutions work best for removing smoke residue from my oven?
The cleaning solutions that work best for removing smoke residue from your oven include a 1:1 white vinegar and water mixture for smoke film and odor, a 3:1 baking soda paste for burnt-on residue, warm water with dish soap for general cleaning, and commercial degreasers for heavy grease deposits following manufacturer dilution instructions.
Can I use the self-clean cycle to clean up after an oven fire?
You should not use the self-clean cycle to clean up after an oven fire because it heats the oven to 900°F, which can ignite remaining grease or food debris and potentially damage already compromised electrical components. Manual cleaning with appropriate solutions is safer after fire damage.
How do I remove fire extinguisher powder from my oven?
To remove fire extinguisher powder from your oven, first vacuum the excess dry powder using a HEPA filter vacuum to prevent it from forming a paste. Then apply a mild detergent and warm water solution to remaining residue, scrub gently with non-abrasive cloths, and rinse thoroughly multiple times to remove all chemical traces.
What protective equipment do I need for oven fire cleanup?
The protective equipment you need for oven fire cleanup includes an N95 respirator or mask to prevent breathing corrosive soot particles, heat-resistant gloves to protect hands from residue, safety goggles for eye protection, long sleeves and closed-toe shoes, plus non-abrasive scrapers, microfiber cloths, buckets, and heavy-duty trash bags for contaminated materials.
How do I eliminate smoke odor after cleaning my oven?
To eliminate smoke odor after cleaning your oven, open windows and run fans for 24-48 hours for cross-ventilation, place bowls of white vinegar or activated charcoal inside the oven and kitchen overnight, wipe all surrounding surfaces with vinegar solution, replace air filters, and run HEPA air purifiers with carbon filters continuously.
When should a technician inspect my oven after a fire?
A certified appliance technician should inspect your oven after any fire, even small ones, before you attempt to use it again. Internal damage to electrical components, heating elements, thermostat sensors, or insulation may not be visible but can pose serious fire and electrical shock hazards during operation.
How do I know if my oven is safe to use after a fire?
Your oven is safe to use after a fire only when a certified technician has inspected all electrical connections, heating elements, door gasket, control panel, and internal wiring for damage, you’ve completed thorough cleaning removing all residue, conducted functionality tests with the technician present, and confirmed no lingering smoke odor or visible damage remains.
